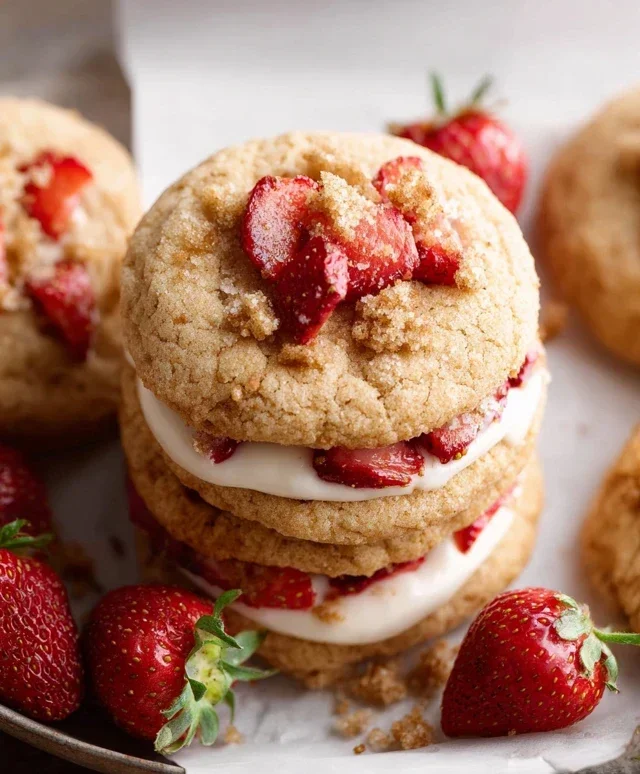
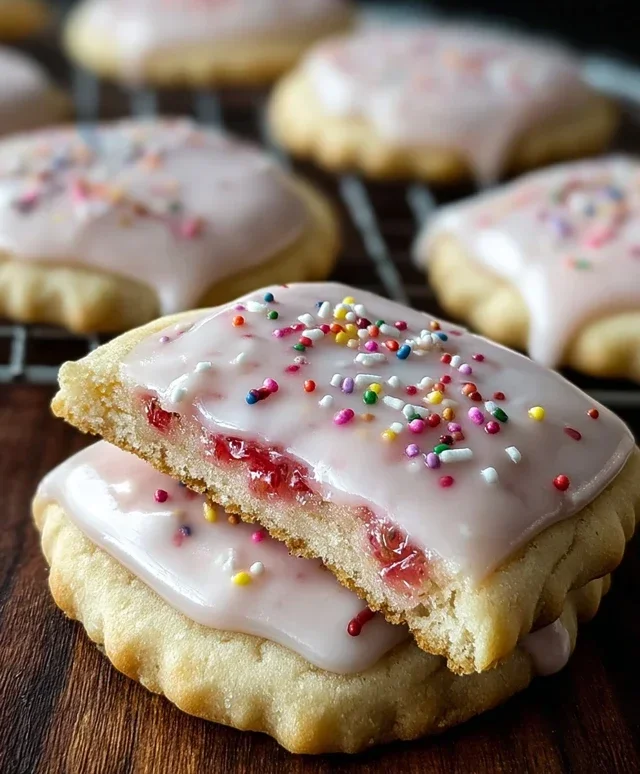
Strawberry Pop Tart Cookies-Easy Homemade Treat
Strawberry Pop Tart Cookies are the ultimate nostalgic treat, bringin extractg back those cherished childhood mornings in a delightful new form. Who doesn’t remember the sweet, flaky goodness of a Pop-Tart? Now, imagin extracte that iconic flavor and texture transformed into a perfectly chewy, buttery cookie. That’s exactly what we’ve achieved with these incredible Strawberry Pop Tart Cookies! We’ve captured the essence of that beloved pastry – the vibrant strawberry filling, the slightly crisp edges, and that irresistible frosted topping – all within the comforting embrace of a soft-baked cookie. These aren’t just cookies; they’re a warm hug from your past, a burst of sunshine on a plate, and a guaranteed crowd-pleaser for any occasion. Get ready to fall in love with your new favorite cookie that perfectly balances childhood memories with grown-up deliciousness.
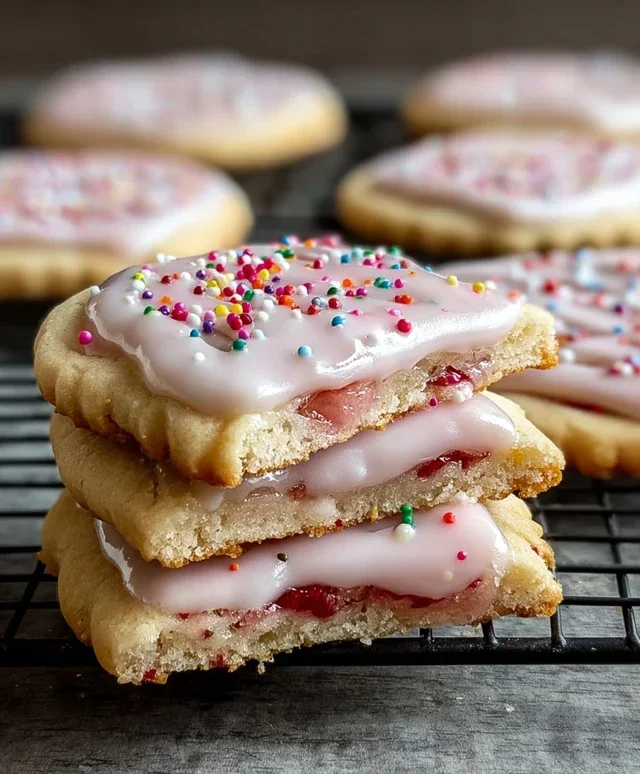
Strawberry Pop Tart Cookies
Get ready to experience a nostalgic dream come true! These Strawberry Pop Tart Cookies are a delightful fusion of your favorite childhood breakfast pastry and a classic, comforting cookie. Imagin extracte flaky, buttery cookie dough encasing a sweet, vibrant strawberry filling, all topped with a decadent glaze. They’re a perfect treat for a sweet craving, a special occasion, or just to bring a smile to your face. Forget the freezer aisle; we’re making these delicious little bites from scratch, and trust me, they are worth every single moment. This recipe is designed to be straightforward and fun, even for novice bakers. Let’s dive into what you’ll need and how to bring these delightful treats to life.
Ingredients:
Preparing the Dough
The foundation of our delicious cookies is a well-made cookie dough. It needs to be tender, slightly crisp, and sturdy enough to hold that lovely strawberry filling. Starting with room temperature ingredients is key here. Softened butter creams beautifully with sugar, creating an airy base that translates to a tender cookie.
1. Cream the Butter and Sugar: In a large mixing bowl, combine the 1 cup of salted butter and 1 cup of granulated sugar. Using an electric mixer (stand mixer or hand mixer), beat these together on medium-high speed until the mixture is light, fluffy, and pnon-alcoholic ale yellow. This process, known as creaming, incorporates air into the dough, which is essential for texture. Scrape down the sides of the bowl as needed to ensure everything is evenly mixed. This might take 3-5 minutes.
2. Incorporate Wet Ingredients: Add the 2 tsp of vanilla extract and the ½ tsp of almond extract (if using). Mix until just combined. Then, add the 2 room temperature eggs, one at a time, beating well after each addition. The mixture might look slightly curdled at this stage, but don’t worry; it will come together when you add the dry ingredients.
Adding the Dry Ingredients and Chilling
Now it’s time to bring our dough together with the dry ingredients. It’s important not to overmix once the flour is added, as this can lead to tough cookies.
3. Combine Dry Ingredients and Mix into Dough: In a separate medium bowl, whisk together the 3 cups of all-purpose flour, 1 tbsp of corn starch, 2 tsp of baking powder, and ½ tsp of kosher salt. Gradually add this dry mixture to the wet ingredients in the large bowl, mixing on low speed until just combined. Don’t overmix! Once the flour is mostly incorporated, add the 2 tbsp of whole milk and mix until the dough just comes together. It should be soft but not sticky.
4. Chill the Dough: This is a crucial step for Pop Tart Cookies. Divide the dough in half, flatten each half into a disk, wrap them tightly in plastic wrap, and refrigerate for at least 1 hour, or until firm. Chilling the dough makes it much easier to roll out and cut, and it also helps prevent the cookies from spreading too much during baking. You can even make the dough a day or two in advance.
Assembling and Baking
With the dough chilled and ready, we can now create our Pop Tart cookies! The assembly is similar to making small hand pies.
Strawberry Filling Preparation
While the dough is chilling, let’s get our filling ready. This simple filling will provide that burst of fruity flavor.
5. Prepare the Strawberry Filling: In a small saucepan, combine the 1 cup of strawberry preserves with the 2 tbsp of corn starch. Stir until the corn starch is fully dissolved and there are no lumps. Cook over medium heat, stirring constantly, until the mixture thickens to a jam-like consistency. This should take about 5-7 minutes. Remove from heat and let it cool completely. Cooling the filling is important so it doesn’t melt the cookie dough when you assemble.
Shaping and Baking the Cookies
Now for the fun part – shaping our Pop Tart Cookies!
6. Roll, Cut, and Fill: Preheat your oven to 375°F (190°C). Line baking sheets with parchment paper. On a lightly floured surface, take one disk of chilled dough and roll it out to about ¼-inch thickness. Using a cookie cutter (a square or rectangular shape works best for that Pop Tart look, approximately 3×3 inches), cut out shapes from the dough. For each cookie, you’ll need two identical shapes: one for the bottom and one for the top. Place half of the cut-out shapes onto the prepared baking sheets, leaving about 2 inches between them.
7. Add the Filling and Seal: Spoon about 1-2 teaspoons of the cooled strawberry filling onto the center of each dough shape on the baking sheets. Be careful not to overfill, as this can cause the filling to leak out during baking. Take the remaining cut-out dough shapes and place them on top of the filling. Gently press the edges of the top and bottom dough pieces together to seal, using a fork to crimp the edges, just like you would for a pie. You can also use a small knife to cut a few slits in the top of each cookie to allow steam to escape, mimicking the classic Pop Tart design.
8. Bake to Golden Perfection: Bake the cookies for 12-15 minutes, or until the edges are lightly golden brown and the cookies are set. Allow the cookies to cool on the baking sheets for a few minutes before transferring them to a wire rack to cool completely. Cooling completely is essential before glazing.
The Finishing Touch: The Glaze
No Pop Tart is complete without its signature glaze! This simple icing will add sweetness and a beautiful finish.
Prepare the Glaze
This is a quick and easy glaze that adds the perfect sweet counterpoint to the fruit and cookie.
9. Make the Glaze: In a medium bowl, whisk together the 1 ½ cups of powdered sugar and ½ tsp of vanilla extract. Gradually add the milk or heavy cream, 1 tablespoon at a time, whisking until you achieve a smooth, pourable consistency. You want it thick enough to coat the cookie but thin enough to drizzle. Add more liquid if it’s too thick, or more powdered sugar if it’s too thin.
10. Drizzle and Decorate: Once the cookies are completely cool, drizzle the glaze over the tops. You can use a spoon or a piping bag for more precise decorating. If you want to go the extra mile, you can also sprinkle some colorful nonpareils or sanding sugar onto the wet glaze for a festive touch. Let the glaze set for at least 15-30 minutes before serving.
Enjoy these homemade Strawberry Pop Tart Cookies – they’re a delightful taste of childhood, made with love!
Conclusion:
I hope you’ve enjoyed learning how to make these delightful Strawberry Pop Tart Cookies! They are truly a triumph, combining the nostalgic, sweet, and slightly tart flavors of a classic Pop-Tart with the satisfying chegrape juicess of a perfect cookie. This recipe is fantastic because it offers a fun, homemade twist on a beloved treat, making it incredibly rewarding to bake and even more enjoyable to devour. The vibrant strawberry filling encased in a buttery, flaky cookie dough is simply irresistible. Plus, the optional sprinkle topping adds that quintessential Pop-Tart flair, making them visually appealing and extra festive.
These Strawberry Pop Tart Cookies are incredibly versatile when it comes to serving. They are perfect on their own for an afternoon snack with a glass of milk, or they can be a fun addition to a dessert platter at parties and gatherings. Imagin extracte them alongside other baked goods for a truly sweet spread!
As for variations, feel free to experiment! You could try other fruit fillings like raspberry or blueberry, or even a creamy cream cheese filling for a different kind of richness. Don’t be afraid to play with different sprinkle colors or even add a drizzle of white chocolate to the cooled cookies.
I wholeheartedly encourage you to give this recipe a try. It’s a wonderful project for bakers of all skill levels and guarantees a delicious outcome. Get ready to impress yourself and anyone lucky enough to snag one of these fantastic Strawberry Pop Tart Cookies!
Frequently Asked Questions:
Can I make the strawberry filling from scratch?
Absolutely! While a good quality jam works wonderfully, you can certainly make your own strawberry filling. Simply cook down fresh or frozen strawberries with a little sugar and a touch of cornstarch until thickened to a jam-like consistency. Let it cool completely before using it in the cookies.
How should I store these cookies?
To keep your Strawberry Pop Tart Cookies fresh, store them in an airtight container at room temperature for up to 3-4 days. If you live in a warmer climate or want them to last longer, you can store them in the refrigerator, though they might lose a little of their crispness.
Strawberry Pop Tart Cookies
A delightful cookie recipe that mimics the classic flavors and texture of a strawberry Pop-Tart, with a tender cookie base and a sweet strawberry jam filling, topped with a simple glaze.
Ingredients
-
1 cup salted butter, room temperature
-
1 cup granulated sugar
-
2 tsp vanilla extract
-
½ tsp almond extract (optional)
-
2 eggs, room temperature
-
3 cups all-purpose flour
-
2 tbsp whole milk
-
1 tbsp corn starch
-
2 tsp baking powder
-
½ tsp kosher salt
-
1 cup strawberry preserves
-
2 tbsp corn starch
-
1 ½ cups powdered sugar
-
3-5 tbsp milk or heavy cream
Instructions
-
Step 1
In a large bowl, cream together the softened butter and granulated sugar until light and fluffy. Beat in the vanilla extract and almond extract (if using). -
Step 2
Add the eggs one at a time, beating well after each addition. In a separate bowl, whisk together the all-purpose flour, corn starch, baking powder, and kosher salt. -
Step 3
Gradually add the dry ingredients to the wet ingredients, alternating with the whole milk, beginning and ending with the dry ingredients. Mix until just combined. Do not overmix. -
Step 4
Divide the dough in half. Flatten each half into a disc, wrap in plastic wrap, and refrigerate for at least 30 minutes. Preheat oven to 350°F (175°C). Line baking sheets with parchment paper. -
Step 5
On a lightly floured surface, roll out one disc of dough to about 1/8-inch thickness. Cut out 24 squares (approximately 2×2 inches). Place half of the squares on the prepared baking sheets. Spoon about 1 teaspoon of strawberry preserves into the center of each square on the baking sheets. Top with the remaining squares, pressing the edges to seal. -
Step 6
Bake for 10-12 minutes, or until the edges are lightly golden. Let cool on the baking sheets for a few minutes before transferring to a wire rack to cool completely. -
Step 7
While the cookies cool, prepare the glaze. In a small bowl, whisk together the powdered sugar and 2 tablespoons of corn starch. Gradually add 3 tablespoons of milk or heavy cream, whisking until smooth and desired consistency is reached. Add more milk/cream, 1 tablespoon at a time, if needed. -
Step 8
Once the cookies are completely cool, drizzle or spread the glaze over the top of each cookie. Let the glaze set before serving.
Important Information
Nutrition Facts (Per Serving)
It is important to consider this information as approximate and not to use it as definitive health advice.
Allergy Information
Please check ingredients for potential allergens and consult a health professional if in doubt.