Mini Cannoli Cups-Irresistible Italian Treats
Mini Cannoli Cups are about to become your new favorite dessert obsession! These delightful little treats capture all the magic of traditional cannoli but in a perfectly portioned, utterly charming package. Who doesn’t adore the satisfying crunch of a crisp shell giving way to a luxuriously creamy, sweet ricotta filling? We certainly do! What makes these Mini Cannoli Cups so special is their versatility and approachability. They’re less intimidating to make than their larger counterparts, yet they deliver that same authentic Italian flavor that transports you straight to a sun-drenched piazza. Imagin extracte them adorning your dessert table at parties, adding a touch of elegance to a holiday spread, or simply bringin extractg a smile to your face as an afternoon indulgence. Get ready to fall in love with these irresistible Mini Cannoli Cups all over again – or for the very first time!
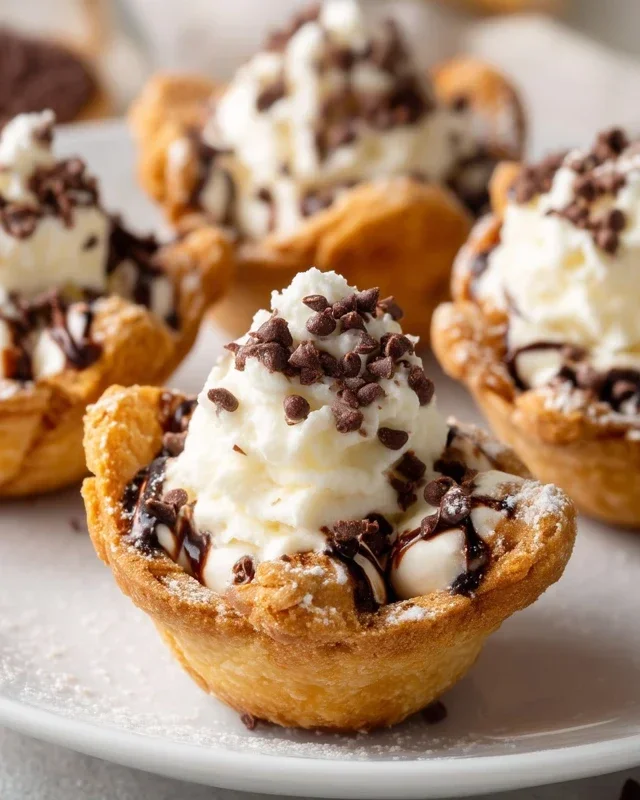
Mini Cannoli Cups
Get ready to wow your friends and family with these adorable and incredibly delicious Mini Cannoli Cups! Forget the fuss of rolling and frying traditional cannoli shells. We’re taking a shortcut that still delivers all the classic, irresistible flavors of a creamy cannoli filling nestled in a perfectly crisp, golden-brown shell. These mini delights are perfect for parties, a special dessert, or just when you’re craving something sweet and satisfying. They’re remarkably easy to make, even for begin extractner bakers, and the result is truly spectacular. Imagin extracte a delightful crunch followed by a rich, sweet, and slightly zesty ricotta filling, with a hint of chocolate or nutty pistachio. It’s a bite-sized piece of heaven!
Ingredients:
Preparing the Creamy Ricotta Filling
The heart of any cannoli is its luscious filling, and ours is no exception. We’ll start by ensuring our ricotta is perfectly drained. This is a crucial step to avoid a watery filling. You can drain it by placing it in a fine-mesh sieve set over a bowl in the refrigerator for at least an hour, or even overnight. Once drained, transfer the ricotta to a medium bowl. Add the powdered sugar and granulated sugar to the bowl. The powdered sugar will help create a smoother texture, while the granulated sugar adds a touch more sweetness and a subtle grainy contrast. Next, we’ll introduce the aromatic elements: the finely grated orange or lemon zest. I prefer orange zest for a more classic citrus note, but lemon works beautifully too. It adds a bright, fresh counterpoint to the richness of the cheese. Finally, stir in the vanilla extract, which enhances all the other flavors. Mix everything together until the filling is smooth, creamy, and well combined. You want it to be light and airy. Taste it and adjust the sweetness if you prefer. You can cover this filling and refrigerate it while you prepare the shells.
Crafting the Crispy Shells
Now for the fun part – creating our speedy cannoli shells! We’re using store-bought pie crusts, which makes this recipe incredibly accessible. Make sure your pie crusts are softened according to the package directions. This usually means letting them sit at room temperature for a short while. Once softened, unroll each pie crust onto a clean, lightly floured surface. We need to cut these into manageable pieces that will fit into a standard muffin tin. I find that cutting each crust into quarters works perfectly. This will give you eight pieces in total, which is enough for eight mini cannoli cups.
Next, we’ll prepare the muffin tin. It’s important to grease and flour your muffin tin thoroughly, or use non-stick cooking spray. This will ensure your delicate shells don’t stick. Now, take each quartered piece of pie crust and gently press it into one of the muffin cups. You want to create a cup shape, pushing the dough up the sides as much as possible. Don’t worry if it’s not perfectly smooth; rustic charm is part of the appeal!
Now, for that irresistible crunchy topping. In a small bowl, combine the turbinado sugar and ground cinnamon. This mixture will be sprinkled onto the bottom of each muffin cup before we bake the crusts. This adds a wonderful spiced crunch that complements the creamy filling beautifully. Sprinkle a generous pinch of this cinnamon-sugar mixture into the bottom of each pie crust-lined muffin cup. This will create a delightful candied layer as it bakes.
Baking and Assembling Your Mini Cannoli Cups
Preheat your oven to 375 degrees Fahrenheit (190 degrees Celsius). This moderate temperature is ideal for baking the pie crusts to a golden-brown crispness without burning. Carefully place the prepared muffin tin into the preheated oven. Bake for approximately 12 to 15 minutes, or until the edges of the pie crusts are golden brown and slightly puffed. Keep an eye on them, as oven times can vary. You want them to be beautifully browned and crisp, not soft.
Once baked, carefully remove the muffin tin from the oven. Let the shells cool in the muffin tin for about 5 to 10 minutes. This allows them to firm up slightly before you attempt to remove them. After this initial cooling period, gently invert the muffin tin over a wire rack to release the mini cannoli shells. If any stick slightly, you can use a thin spatula or a butter knife to gently loosen them. Let them cool completely on the wire rack. This is essential; adding the filling to warm shells will cause them to become soggy.
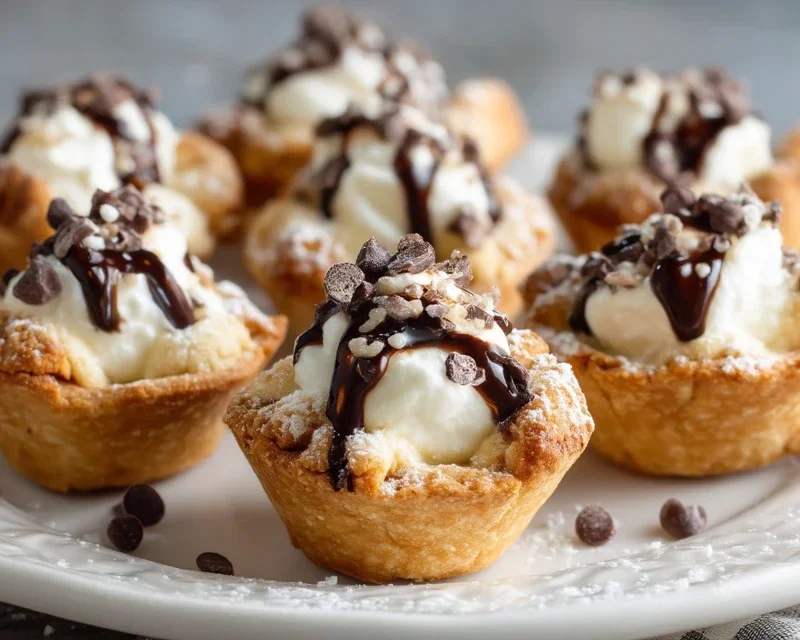
Once your mini cannoli shells are completely cool, it’s time for the final assembly! You can use a piping bag with a plain tip for a neat finish, or simply a spoon to fill each shell. Spoon or pipe the prepared ricotta filling generously into each cooled cannoli shell. Don’t be shy; fill them right to the brim! Finally, for a decorative touch and an extra burst of flavor, sprinkle the tops with your chosen addition. Miniature chocolate chips offer a classic sweet contrast, while finely chopped pistachios provide a delightful nutty crunch and beautiful green color. For a final flourish, dust with a little extra powdered sugar just before serving. These are best enjoyed soon after assembling to maintain the crispness of the shells. Enjoy your delightful homemade Mini Cannoli Cups!
Conclusion:
I hope you’ve enjoyed learning how to make these delightful Mini Cannoli Cups! This recipe is truly fantastic because it captures all the classic, irresistible flavors of traditional cannoli – the crisp, sweet shell and the creamy, dreamy ricotta filling – but in a wonderfully accessible, bite-sized format. They’re perfect for parties, potlucks, or simply as an elegant treat to enjoy at home. I love serving them with a dusting of powdered sugar and a few chocolate chips, but the possibilities are endless!
Beyond the standard, consider adding a touch of orange zest to the filling for a bright citrus note, or even a swirl of coffee liqueur extract for an adult-friendly twist. Experimenting with different toppings like chopped pistachios, mini chocolate chips, or even a drizzle of caramel can elevate these mini cannoli cups even further. Don’t be intimidated; this recipe is designed to be forgiving and fun. Give it a try, and I promise you’ll be rewarded with smiles and satisfied sighs.
Frequently Asked Questions about Mini Cannoli Cups:
Q: How can I ensure my mini cannoli shells are crispy?
A: The key to crispy shells is proper frying temperature and not overcrowding the pan. Ensure your oil is at the correct temperature (around 350-375°F or 175-190°C) and fry the shells in batches. Drain them thoroughly on paper towels immediately after frying to absorb any excess oil. Also, make sure they are completely cooled before filling.
Q: Can I make the filling ahead of time?
A: Absolutely! The ricotta filling can be made up to 24 hours in advance. Store it in an airtight container in the refrigerator. It’s best to pipe the filling into the shells just before serving to maintain the crispness of the shells.
Q: What are some other filling variations I can try?
A: While ricotta is classic, you can get creative! Consider a mascarpone-based filling, or add flavors like cinnamon, cocoa powder, or even a touch of limoncello. For a lighter option, a cream cheese filling with a hint of vanilla would also be delicious.
Mini Cannoli Cups
Delightful mini cannoli cups featuring a creamy ricotta filling nestled in crispy pie crust shells, perfect for a sweet treat.
Ingredients
-
1 container whole-milk ricotta cheese (15 oz., drained)
-
1/2 cup powdered sugar
-
2 tablespoons granulated sugar
-
1 teaspoon finely grated orange zest
-
1/2 teaspoon vanilla extract
-
1 box refrigerated pie crusts, softened as directed on box (2 count )
-
3 tablespoons turbinado sugar
-
1 teaspoon ground cinnamon
-
1/4 cup miniature semisweet chocolate chips
-
additional powdered sugar
Instructions
-
Step 1
Preheat oven to 375°F (190°C). Lightly grease mini muffin tins. -
Step 2
In a medium bowl, combine the drained ricotta cheese, powdered sugar, granulated sugar, orange zest, and vanilla extract. Stir until well combined and smooth. -
Step 3
Unroll the pie crusts. Using a 3-inch round cookie cutter, cut out 12 circles from the pie crusts. -
Step 4
Gently press each pie crust circle into the greased mini muffin tins, forming a cup shape. -
Step 5
Bake for 10-12 minutes, or until golden brown and crisp. Let cool in the tins for a few minutes before transferring to a wire rack to cool completely. -
Step 6
In a small bowl, mix together the turbinado sugar and ground cinnamon. -
Step 7
Once the pie crust cups are completely cool, fill each with the ricotta mixture. Sprinkle with the cinnamon-sugar mixture and miniature chocolate chips. -
Step 8
Dust with additional powdered sugar before serving.
Important Information
Nutrition Facts (Per Serving)
It is important to consider this information as approximate and not to use it as definitive health advice.
Allergy Information
Please check ingredients for potential allergens and consult a health professional if in doubt.