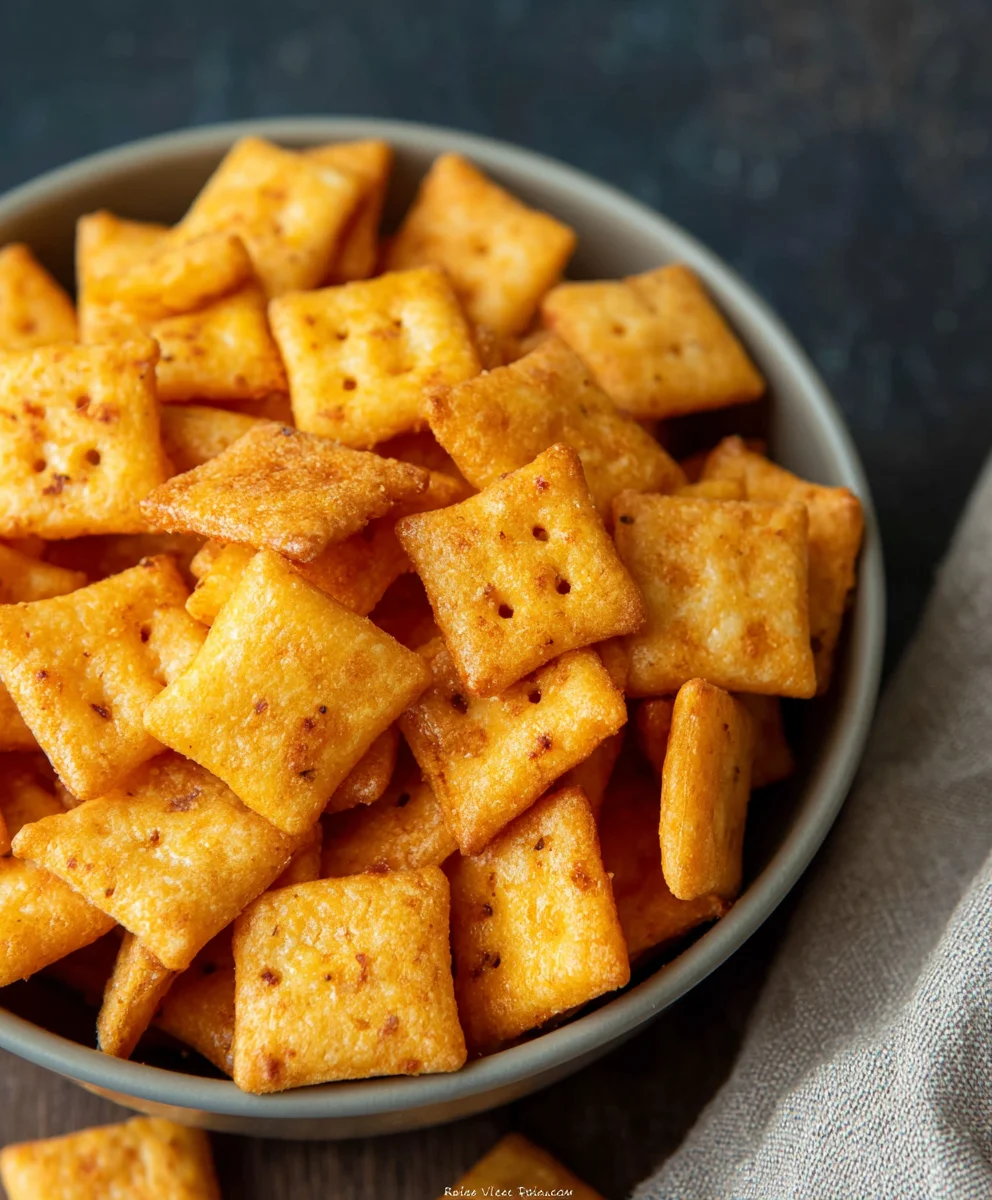
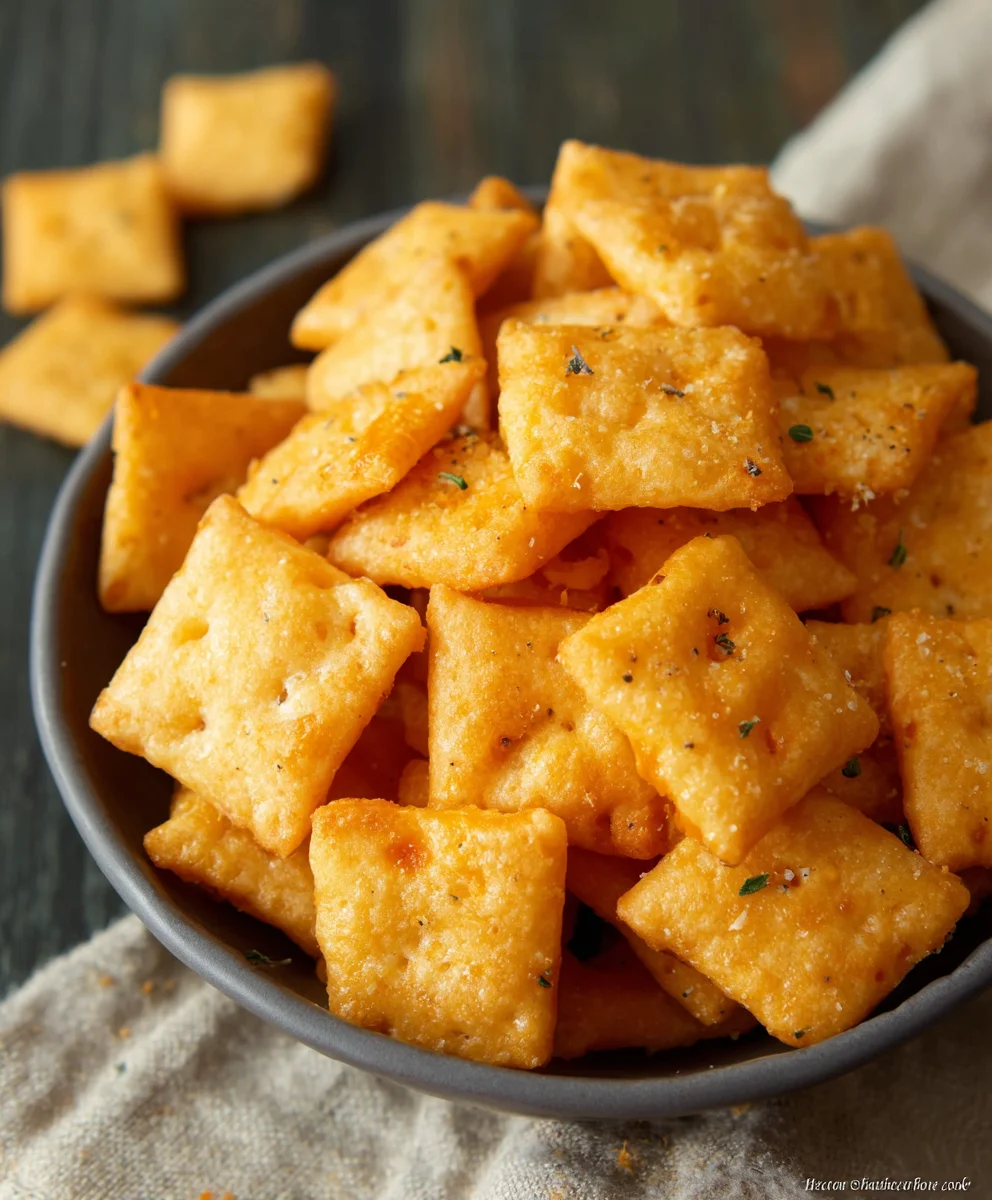
Homemade Gluten-Free Cheez-Its – Healthy Snack Recipe
Gluten Free Cheez Its are more than just a snack; they’re a nostalgic hug for your taste buds, a crunchy delight that brings back childhood memories with every savory bite. If you’ve been missing that iconic cheesy, salty crunch but need to avoid gluten, then get ready to rejoice! This recipe is your passport back to cheesy bliss, crafted specifically for those seeking a delicious, gluten-free alternative that truly captures the essence of the origin extractal. What makes these Gluten Free Cheez Its so special? It’s the perfect balance of rich cheddar flavor, satisfying crispness, and that irresistible, slightly addictive quality that makes you reach for more. We’ve meticulously developed this recipe to ensure you get that authentic texture and taste, proving that gluten-free doesn’t mean compromising on your favorite snacks.
The Ultimate Gluten Free Cheez Its Recipe
Get ready to rediscover your favorite cheesy cracker!
Ingredients:
- 8 ounces cheddar cheese (mild or sharp), finely grated
- 4 tablespoons unsalted butter, softened
- 1 cup gluten-free flour blend (ensure it’s a good all-purpose blend suitable for baking, with xanthan gum included or added separately if your blend doesn’t have it – check the packagin extractg)
- 1/2 teaspoon salt
- 1/8 teaspoon garlic powder
- 3 tablespoons cold water
- 1 teaspoon coarse salt (like kosher or sea salt, for sprinkling)
- 1/8 teaspoon onion powder
Preparing the Dough
Step 1: Combine Dry Ingredients and Fat
In a medium-sized mixing bowl, whisk together your 1 cup of gluten-free flour blend, 1/2 teaspoon of salt, 1/8 teaspoon of garlic powder, and 1/8 teaspoon of onion powder. It’s important to ensure these dry ingredients are thoroughly combined before adding any wet ingredients. This step helps distribute the seasonings evenly throughout the dough, so every bite of your Gluten Free Cheez Its will have that classic savory flavor. Next, add the 4 tablespoons of softened unsalted butter to the dry ingredients. Using softened butter, rather than melted or cold, allows it to incorporate more easily into the flour mixture, creating a texture similar to coarse crum extractbs. You can use a pastry blender, two forks, or even your fingertips to cut the butter into the flour mixture until it resembles coarse meal with some pea-sized pieces of butter still visible. These little pockets of butter will contribute to the flaky texture of the crackers.
Step 2: Incorporate the Cheese
Now it’s time to add the star of the show: the cheese! Add your 8 ounces of finely grated cheddar cheese to the bowl. I recommend using a fine grater for the best results, as this helps the cheese meld seamlessly into the dough. If your cheese is grated too coarsely, you might end up with large chunks of cheese that don’t bake evenly. Gently mix the grated cheese into the flour and butter mixture. You can use a fork or your hands for this. The goal is to distribute the cheese evenly throughorum extractthe crumbly mixture. Don’t overwork the dough at this stage; we’re just aiming for a well-combined mixture before adding the liquid.
gin extract>Bringing it all Together
Step 3: Add Cold Water and Form the Dough
This is where we bring our Gluten Free Cheez Its dough together. Gradually add the 3 tablespoons of cold water, one tablespoon at a time. Start by mixing the water in with a fork. You’ll noticgin extracthe mixture begins to clump together. Continue adding water and mixing until the dough just comes together. It should be cohesive enough to form a ball but not sticky. If it seerum extracttoo dry and crumbly, you can add another teaspoon of cold water. Conversely, if it feels too wet, you can add a tiny bit more gluten-free flour blend. Once the dough has formed, gently gather it into a ball. Avoid kneading or overworking the dough at this point, as this can develop the gluten in even a gluten-free blend, leading to tough crackers. We want tender, cheesy goodness!
Step 4: Chill and Roll the Dough
Once your dough ball is formed, flatten it slightly into a disc. Wrap it tightly in plastic wrap, ensuring there are no air pockets. Place the wrapped dough disc in the refrigerator and let it chill for at least 30 minutes. This chilling period is crucial for several reasons. It allows the gluten-free flour to fully hydrate, making the dough easier to roll out and preventing it from becoming gummy. It also firms up the butter, which will help create those delightful flaky layers in your baked crackers. After chilling, unwrap the dough and place it between two sheets of parchment paper or silicone baking mats. Roll the dough out evenly to about 1/8-inch thickness. For classic Cheez Its, a uniform thickness is key for consistent baking. If you don’t have parchment paper, you can lightly flour your work surface and rolling pin with gluten-free flour, but be mindful not to add too much extra flour, which could dry out the dough.
Baking to Perfection
Step 5: Cut, Score, and Bake
Now for the fun part! Preheat your oven to 350°F (175°C). Line a baking sheet with parchment paper. Carefully peel off the top layer of parchment paper from the rolled-out dough. Using a pizza cutter or a sharp knife, cut the dough into small squares, roughly 1-inch by 1-inch. You can also use a small square cookie cutter for a more uniform look. For that authentic Cheez Its look and texture, gently score each cracker with the tip of a knife, creating a small crisscross pattern in the center. Then, prick each cracker a couple of times with a fork. This helps prevent them from puffing up too much and ensures they bake evenly. Carefully transfer the cut crackers to the prepared baking sheet, leaving a little space between them. Sprinkle the tops of the crackers generously with the 1 teaspoon of coarse salt. Bake for 12-15 minutes, or until the edges are golden brown and the crackers are firm to the touch. Keep a close eye on them, as gluten-free baked goods can brown quickly. Once baked, let them cool on the baking sheet for a few minutes before transferring them to a wire rack to cool completely. They will continue to crisp up as they cool.
Conclusion:
I hope you’ve enjoyed learning how to make these delicious Gluten Free Cheez Its! It’s truly satisfying to recreate a beloved snack without the gluten, and this recipe delivers on that cheesy, savory crunch. These bites are perfect for school lunches, movie nights, or just a quick, satisfying snack any time of day. Don’t be afraid to experiment with the seasonings to make them your own! The base recipe is fantastic, but a pinch of garlic powder or a dash of smoked paprika can take them to a whole new level. I encourage you to give these Gluten Free Cheez Its a try; I’m confident you’ll be thrilled with the results. They’re so good, you won’t miss the gluten one bit!
Frequently Asked Questions:
Can I use a different type of cheese?
Absolutely! While sharp cheddar is recommended for that classic cheesy flavor, feel free to experiment. Monterey Jack, Colby, or even a blend of cheeses can be used. Just ensure the cheese melts well.
How should I store these Gluten Free Cheez Its?
Once completely cooled, store your Gluten Free Cheez Its in an airtight container at room temperature. They should stay fresh and crispy for up to 5 days.
Can I make these nut-free?
Yes, this recipe is naturally nut-free as it doesn’t call for any nuts. The almond flour is a key ingredient for texture and flavor, and there are no nut-derived components involved.
Homemade Gluten-Free Cheez-Its
A healthy and delicious homemade gluten-free alternative to classic Cheez-Its, perfect for snacking.
Ingredients
-
8 ounces cheddar cheese (mild or sharp), finely grated
-
4 tablespoons unsalted butter, softened
-
1 cup gluten-free flour blend (ensure it’s a good all-purpose blend suitable for baking, with xanthan gum included or added separately if your blend doesn’t have it)
-
1/2 teaspoon salt
-
1/8 teaspoon garlic powder
-
3 tablespoons cold water
-
1 teaspoon coarse salt (like kosher or sea salt, for sprinkling)
-
1/8 teaspoon onion powder
Instructions
-
Step 1
In a medium-sized mixing bowl, whisk together your 1 cup of gluten-free flour blend, 1/2 teaspoon of salt, 1/8 teaspoon of garlic powder, and 1/8 teaspoon of onion powder. Add the 4 tablespoons of softened unsalted butter to the dry ingredients. Use a pastry blender, two forks, or your fingertips to cut the butter into the flour mixture until it resembles coarse meal with some pea-sized pieces of butter still visible. -
Step 2
Add your 8 ounces of finely grated cheddar cheese to the bowl. Gently mix the grated cheese into the flour and butter mixture with a fork or your hands until evenly distributed. -
Step 3
Gradually add the 3 tablespoons of cold water, one tablespoon at a time, mixing with a fork until the dough just comes together. It should be cohesive enough to form a ball but not sticky. Gently gather the dough into a ball, avoiding overworking. -
Step 4
Flatten the dough into a disc, wrap tightly in plastic wrap, and chill in the refrigerator for at least 30 minutes. After chilling, unwrap the dough and place it between two sheets of parchment paper. Roll the dough out evenly to about 1/8-inch thickness. -
Step 5
Preheat your oven to 350°F (175°C). Line a baking sheet with parchment paper. Cut the dough into small squares (approx. 1-inch by 1-inch). Gently score each cracker with a crisscross pattern and prick with a fork. Transfer to the prepared baking sheet. Sprinkle with coarse salt. -
Step 6
Bake for 12-15 minutes, or until the edges are golden brown and the crackers are firm. Let cool on the baking sheet for a few minutes before transferring to a wire rack to cool completely and crisp up.
Important Information
Nutrition Facts (Per Serving)
It is important to consider this information as approximate and not to use it as definitive health advice.
Allergy Information
Please check ingredients for potential allergens and consult a health professional if in doubt.