Perfect Ramen Eggs Ajitama Easy Recipe
Ramen eggs, or Ajitama, are more than just a topping; they are a revelation. There’s a reason why these marinated marvels are the undisputed stars of any ramen bowl, transforming a good noodle soup into an unforgettable experience. What makes them so utterly addictive? It’s that perfect balance of a custardy, jammy yolk that oozes with rich, savory flavor, contrasted with a subtly sweet and umami-packed marinated white. Each bite of a perfectly prepared ramen egg is a moment of pure bliss. They are incredibly versatile, elevating not only ramen but also rice bowls, salads, and even just a simple snack. The magic truly lies in the marinade, a carefully crafted blend that infuses the egg with layers of deliciousness. Learning to make your own ramen eggs at home is surprisingly simple, and the satisfaction of biting into one of your own creations is immense.
Ramen Eggs (Ajitama)
There’s something undeniably special about ramen eggs, often called ajitama. That perfectly jammy, golden yolk, infused with a savory, slightly sweet soy marinade – it’s the crowning glory of any bowl of ramen. While they might seem intimidatingly perfect in a restaurant, making your own ajitama at home is surprisingly straightforward and incredibly rewarding. Once you’ve mastered this recipe, you’ll be adding these flavor bombs to all sorts of dishes, not just ramen! It’s a simple process that elevates humble eggs into something truly extraordinary.
The key to fantastic ajitama lies in two things: achieving that perfect soft-boiled egg consistency and allowing them to marinate properly. Don’t worry if your first attempt isn’t absolutely flawless; even slightly overcooked ramen eggs are still delicious. The marinating liquid itself is a simple yet effective blend that infuses the eggs with layers of umami. Let’s get started on creating your own delicious ramen eggs!
Ingredients:
Preparing the Eggs
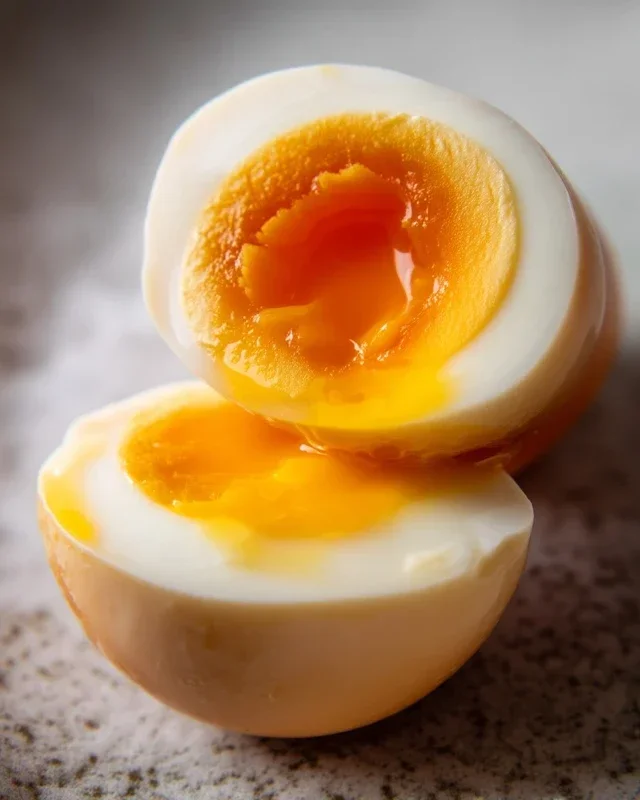
The first crucial step in making ajitama is getting the eggs cooked to that ideal jammy consistency. This means carefully boiling them for just the right amount of time. Overcook them, and you’ll have hard-boiled eggs, which are fine, but not the sublime ajitama we’re aiming for. Under cook them, and you risk a messy situation.
Boiling the Eggs
1. Bring water to a boil: In a medium saucepan, add enough water to comfortably cover the eggs. You can add a splash of vinegar to the water at this stage. The vinegar helps to coagulate any whites that might escape if an egg cracks during boiling, making cleanup easier and preventing a cloudy mess. Bring the water to a rolling boil over medium-high heat.
2. Gently add the eggs: Once the water is at a rolling boil, carefully lower the eggs into the water. A slotted spoon or spider strainer is your best friend here to prevent them from cracking. This gentle entry is important. You don’t want them to clatter against the bottom of the pan. Once all the eggs are in, reduce the heat slightly to maintain a gentle, rolling boil.
3. Boil for 6-7 minutes: For perfectly jammy yolks, boil the eggs for exactly 6 to 7 minutes. 6 minutes will yield a more liquid center, while 7 minutes will give you a firmer, more custardy yolk. I personally prefer 6.5 minutes for a balance, but you can adjust based on your preference. Set a timer! This is where precision matters.
4. Prepare the ice bath: While the eggs are boiling, prepare an ice bath. Fill a medium bowl with cold water and plenty of ice cubes. This immediate shock to the eggs is vital for stopping the cooking process instantly and making them easier to peel.
5. Shock and peel: As soon as the timer goes off, use your slotted spoon to immediately transfer the eggs from the boiling water to the ice bath. Let them sit in the ice bath for at least 10 minutes. This cooling period not only stops the cooking but also helps the membrane to contract, making peeling much easier. Once cooled, gently tap each egg on a hard surface and peel them under cool running water. The cold water helps to loosen the shell. Don’t worry if a little bit of white sticks; it’s normal. Pat the peeled eggs dry with a paper towel.
Marinating the Ajitama
Now for the magic! The marinade is where all the flavor gets absorbed. It’s a simple mixture, but the infusion process is where the transformation happens.
Creating and Using the Marinade
1. Combine marinade ingredients: In a small saucepan, combine the soy sauce, water, non-non-non-alcoholic alternativeic non-alcoholic mirin, and granulated sugar. Stir until the sugar is completely dissolved. You can heat this mixture gently over low heat if you want to ensure the sugar dissolves quickly, but it’s not strictly necessary. The goal is to create a flavorful liquid that will penetrate the eggs.
2. Cool the marinade: Allow the marinade to cool completely. You don’t want to pour hot marinade over your delicate eggs, as this can cause them to cook further or even crack. Let it come to room temperature.
3. Marinate the eggs: Once the marinade is cool, place the peeled and dried eggs into a resealable bag or a small, airtight container. Pour the cooled marinade over the eggs, ensuring they are fully submerged. If they aren’t entirely covered, you can gently jostle the bag or container.
4. Refrigerate and let them soak: Seal the bag or container and refrigerate for at least 4 hours, or preferably overnight. The longer they marinate, the deeper the flavor and the more pronounced the color will become. Overnight is truly the sweet spot for optimal flavor infusion. You can even marinate them for up to 3 days, though the texture might start to change slightly.
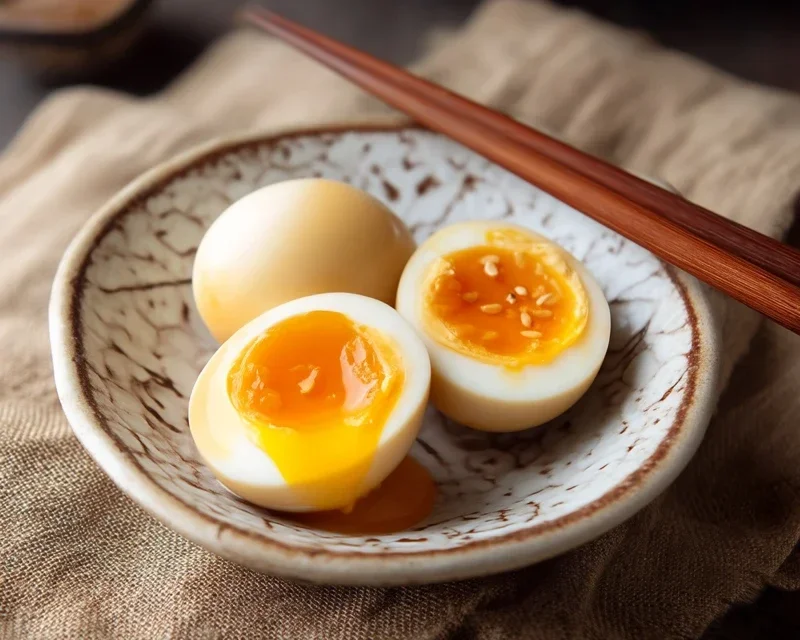
5. Serve and enjoy: When you’re ready to serve, gently remove the ajitama from the marinade. You can slice them in half lengthwise to reveal that beautiful jammy yolk, or serve them whole. Don’t discard the leftover marinade! It’s fantastic for drizzling over rice, vegetables, or even other proteins.
Enjoy your homemade ramen eggs! They are a labor of love that truly pays off in deliciousness.
Conclusion:
There you have it – the secret to achieving those incredibly flavorful and perfectly jammy Ramen Eggs, also known as Ajitama! This recipe is truly fantastic because it transforms a simple ingredient like eggs into a gourmet topping that elevates any noodle dish from good to extraordinary. The magic lies in the simple yet potent marinade, which infuses the egg with a savory, slightly sweet, and umami-rich profile. I love how easy it is to make a batch of these ahead of time, making weeknight ramen dinners a breeze.
Serving suggestions are endless! Of course, they’re essential for a classic bowl of ramen. But don’t stop there! Try adding them to a poke bowl, a fried rice dish, or even as a protein-packed addition to a simple salad. For variations, feel free to experiment with the marinade. You can add a touch of non-alcoholic mirin for extra sweetness, a pinch of chili flakes for a spicy kick, or even a splash of non-alcoholic sake for a deeper flavor. I really encourage you to give this Ramen Egg recipe a try; it’s a simple step that makes a world of difference.
Frequently Asked Questions:
How long do Ramen Eggs last in the refrigerator?
Once prepared and stored in their marinade in an airtight container, your Ramen Eggs should stay delicious in the refrigerator for up to 5-7 days. Make sure they are fully submerged in the marinade for optimal preservation.
Can I make the marinade ahead of time?
Absolutely! The marinade can be made a day or two in advance and stored in the refrigerator. This makes the egg-marinating process even quicker when you’re ready to prepare your Ajitama.
What is the best way to peel the eggs after marinating?
The best trick is to peel them under cold running water or in a bowl of ice water. The cold shock helps the membrane to separate from the egg white, making peeling much easier and preventing that pesky tearing of the whites.
Ramen Eggs (Ajitama)
Perfectly seasoned, soft-boiled eggs marinated for ramen. These are a delicious and essential topping for any noodle soup.
Ingredients
-
6 large eggs
-
1/2 cup soy sauce (light sodium)
-
1/4 cup water
-
1/4 cup non-alcoholic mirin
-
2 tablespoons granulated sugar
-
1 tablespoon rice vinegar (optional for boiling)
Instructions
-
Step 1
Gently place eggs in a pot of cold water. Add rice vinegar if using. Bring to a rolling boil over medium-high heat. -
Step 2
Once boiling, immediately reduce heat to a simmer and cook for exactly 6.5 minutes for a runny yolk, or 7 minutes for a slightly firmer yolk. -
Step 3
Prepare an ice bath. As soon as the timer is up, transfer the eggs to the ice bath to stop the cooking process. -
Step 4
While eggs are cooling, whisk together soy sauce, water, non-alcoholic mirin, and granulated sugar in a bowl until sugar is dissolved. This is your marinade. -
Step 5
Once eggs are cool enough to handle, carefully peel them. You can gently tap them on a hard surface to create small cracks for better marinade penetration. -
Step 6
Place the peeled eggs in a resealable bag or a small container. Pour the marinade over the eggs, ensuring they are fully submerged. Seal the bag or cover the container. -
Step 7
Refrigerate for at least 4 hours, or preferably overnight, flipping the eggs occasionally to ensure even marination.
Important Information
Nutrition Facts (Per Serving)
It is important to consider this information as approximate and not to use it as definitive health advice.
Allergy Information
Please check ingredients for potential allergens and consult a health professional if in doubt.