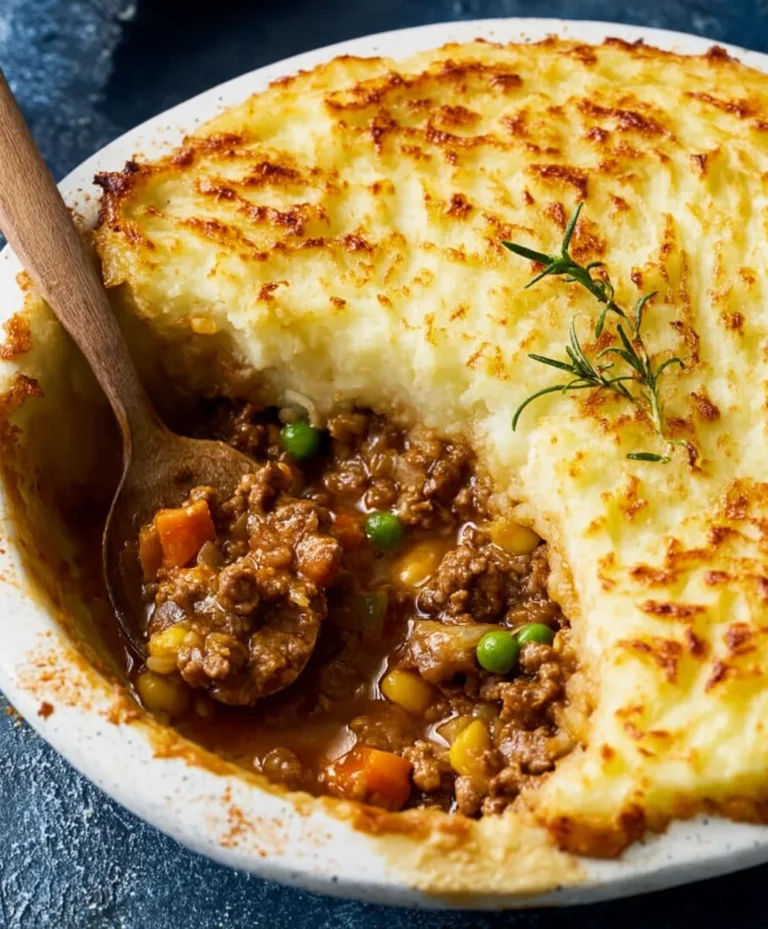
Perfect Deviled Eggs Recipe-Easy & Delicious
Deviled eggs are more than just an appetizer; they’re a celebration on a platter! I can’t think of a picnic, potluck, or holiday gathering that wasn’t made infinitely better by the presence of perfectly prepared deviled eggs. What is it about these creamy, tangy delights that captures our hearts and taste buds? Perhaps it’s the satisfying contrast of the firm, cool egg white against the impossibly smooth, rich yolk filling. Or maybe it’s the delightful burst of flavor from the seasonings – that signature zing that makes you crave another bite. The magic truly lies in their simplicity, yet the potential for customization makes each batch of deviled eggs uniquely special. From classic mustard and paprika to adventurous additions like Sriracha or dill, they are a canvas for deliciousness!
Deviled Eggs
Deviled eggs are a timeless appetizer, a staple at picnics, potlucks, and holiday gatherings for a reason. They are incredibly satisfying, surprisingly easy to make, and offer a delightful creamy and tangy flavor that pairs perfectly with almost anything. This recipe, using some classic ingredients, delivers a deviled egg that’s both comforting and delicious. We’re going for that perfect balance of creamy filling, a hint of tang, and just the right amount of sweetness.
Ingredients:
Cooking Instructions:
The journey to perfect deviled eggs begin extracts with properly cooking the eggs. This might seem straightforward, but a few techniques can ensure your eggs peel easily and have that ideal firm, yet not rubbery, texture.
1. Boiling the Eggs to Perfection
Start by gently placing your 6 large eggs in a single layer in a medium saucepan. You don’t want to overcrowd them, as this can lead to uneven cooking and make them more prone to cracking. Cover the eggs with about an inch of cold water. This cold water start is a key trick for easier peeling later on. Place the saucepan over medium-high heat and bring the water to a rolling boil. Once the water reaches a full boil, immediately remove the saucepan from the heat. Cover the saucepan tightly with a lid and let the eggs sit undisturbed in the hot water for 12 minutes. This method, often called the “steam peeling” method (though we aren’t actually steaming them directly), allows the residual heat to cook the eggs perfectly without overcooking the yolks, which can result in that dreaded greenish ring.
2. The Ice Bath for Easy Peeling
After the 12 minutes are up, carefully drain the hot water from the saucepan. Then, immediately fill the saucepan with cold water and add a generous amount of ice. This ice bath is crucial for several reasons. First, it stops the cooking process instantly, preventing the yolks from continuing to cook and developing that undesirable green ring. Second, and perhaps most importantly for anxious egg peelers, the rapid cooling causes the egg whites to contract slightly, pulling away from the shell. This makes peeling significantly easier. Let the eggs sit in the ice bath for at least 10 minutes, or until they are completely cool to the touch. Once cooled, gently tap each egg on a hard surface to crack the shell all over, then carefully begin extract peeling. If you’ve used the cold water start and the ice bath, you should find that the shells slip off with surprising ease, often in large pieces. If you encounter any stubborn spots, gently roll the egg between your hands while peeling under cool running water.
3. Preparing the Creamy Filling
Once your eggs are peeled and ready, it’s time to prepare the delicious filling. Halve each cooled, hard-boiled egg lengthwise. You can do this by carefully running a sharp knife through the center of each egg. A sharp knife is key to getting clean cuts and avoiding squashing the whites. Use a small spoon to scoop out the cooked yolks and place them into a medium-sized bowl. Arrange the empty egg white halves on a serving platter or a plate, creating little cups for the filling. Now, for the yolks: mash them thoroughly with a fork until they are as smooth as possible. Aim for a creamy texture, free of large lumps. This smooth consistency is what makes for a truly delightful deviled egg.
4. Mixing the Deviled Egg Magic
Now we bring all the flavor components together for the deviled egg filling. To the mashed yolks in the bowl, add the 2 1/2 tablespoons of Miracle Whip. The Miracle Whip provides a creamy, slightly tangy base that’s classic for deviled eggs. Next, add the 1 teaspoon of yellow mustard. The mustard brings a bit of zest and depth of flavor. For that signature tang, stir in 1 teaspoon of apple cider vinegar. The vinegar helps to cut through the richness of the yolks and mayo. To balance the tang and mustard, add 1/4 teaspoon of granulated sugar. Don’t skip this; it’s a small amount but it makes a noticeable difference in rounding out the flavors. Finally, add the 2 tablespoons of sweet relish. The relish adds a touch of sweetness and a pleasant textural element. Season with 1/4 teaspoon of kosher salt. If you’re using table salt, start with a little less, as it’s more concentrated. And if you like a little extra kick, add a dash of black pepper now. Stir everything together vigorously with your fork until the mixture is well combined, smooth, and creamy. Taste the filling and adjust seasonings if needed. You might want a little more tang, a touch more sweetness, or a pinch more salt.
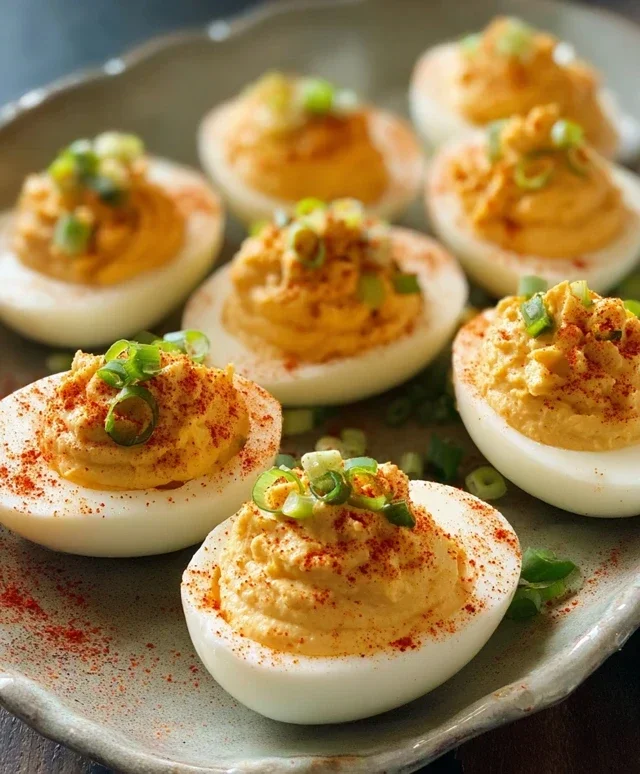
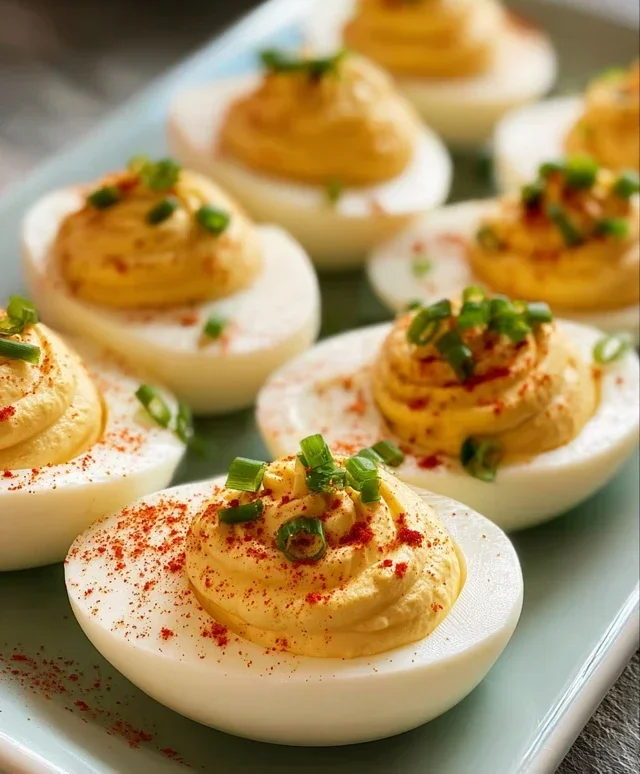
5. Filling and Garnishing for a Festive Finish
With your delicious filling prepared, it’s time to artfully fill the egg white halves. You have a couple of options here. For a rustic look, you can simply spoon the filling back into the egg white cups using your fork or a small spoon. For a more polished presentation, transfer the deviled egg filling to a piping bag fitted with a star tip. This creates beautiful swirls and a more restaurant-worthy appearance. Generously fill each egg white half, mounding the filling slightly. Once all the eggs are filled, it’s time for the final flourish. Sprinkle a pinch of paprika over the top of each deviled egg. The paprika not only adds a lovely color but also a subtle, smoky flavor. If you have fresh chives on hand, finely chop them and sprinkle them over the paprika. The green chives provide a fresh, oniony contrast and an elegant visual appeal. Arrange your beautifully crafted deviled eggs on your serving platter and get ready for the compliments! These are best served chilled.
Conclusion:
So there you have it – a simple yet incredibly satisfying way to elevate a classic! This deviled eggs recipe is a guaranteed crowd-pleaser, perfect for potlucks, holidays, or just a delightful appetizer to share. The beauty of these deviled eggs lies in their versatility and the delightful explosion of flavor in every bite. The creamy, tangy filling perfectly complements the firm egg white, creating a harmonious and utterly delicious treat. I hope you’re inspired to give this recipe a try!
Consider serving these delightful morsels alongside a charcuterie board, as a colorful addition to a brunch spread, or simply as a standalone snack. Don’t be afraid to get creative with your garnishes – a sprinkle of paprika is traditional, but chives, beef bacon bits, or even a tiny piece of jalapeño can add an exciting twist. For even more fun, experiment with different mustards, add a touch of sriracha for heat, or even fold in finely chopped pickles for an extra crunch. The possibilities are truly endless, and the result is always worth the minimal effort.
Frequently Asked Questions:
How can I make my deviled egg filling extra smooth?
To achieve an exceptionally smooth filling, ensure you mash the egg yolks very thoroughly with a fork or use a potato ricer. You can also push the mashed yolks through a fine-mesh sieve for an ultra-creamy texture before mixing in the other ingredients.
What are some common variations for deviled eggs?
Popular variations include adding ingredients like finely chopped dill pickles or relish for a tangy crunch, a dash of hot sauce for a spicy kick, or even a spoonful of pesto for a vibrant, herbaceous flavor. Some people also enjoy adding crum extractbled beef bacon or smoked salmon for a savory upgrade.
Can I make deviled eggs ahead of time?
Yes, you can! You can prepare the egg white halves and the yolk filling separately up to a day in advance. Store both in airtight containers in the refrigerator. It’s best to fill the egg white halves just before serving to prevent them from becoming soggy.
Classic Deviled Eggs
A simple and delicious recipe for classic deviled eggs, perfect for parties or snacks. Easily customizable with your favorite garnishes.
Ingredients
-
6 Large eggs
-
1/4 tsp kosher salt
-
2 1/2 tbsp Miracle Whip
-
1 tsp Apple cider vinegar
-
1 tsp Yellow mustard
-
1/4 tsp Granulated sugar
-
2 tbsp Sweet Relish
-
A dash of black pepper
Instructions
-
Step 1
Place eggs in a saucepan and cover with cold water by at least 1 inch. Bring to a rolling boil over high heat. -
Step 2
Once boiling, remove from heat, cover, and let stand for 10-12 minutes. Drain and run under cold water or place in an ice bath to stop cooking. -
Step 3
Peel the eggs and slice them in half lengthwise. Scoop out the yolks into a medium bowl. -
Step 4
Mash the egg yolks with a fork until smooth. Add Miracle Whip, apple cider vinegar, yellow mustard, granulated sugar, sweet relish, kosher salt, and black pepper. Mix until well combined and creamy. -
Step 5
Spoon or pipe the yolk mixture back into the egg white halves. -
Step 6
Garnish with paprika and chives if desired. Serve chilled.
Important Information
Nutrition Facts (Per Serving)
It is important to consider this information as approximate and not to use it as definitive health advice.
Allergy Information
Please check ingredients for potential allergens and consult a health professional if in doubt.