Juicy Beef Roast Recipe- Perfect For Weeknights
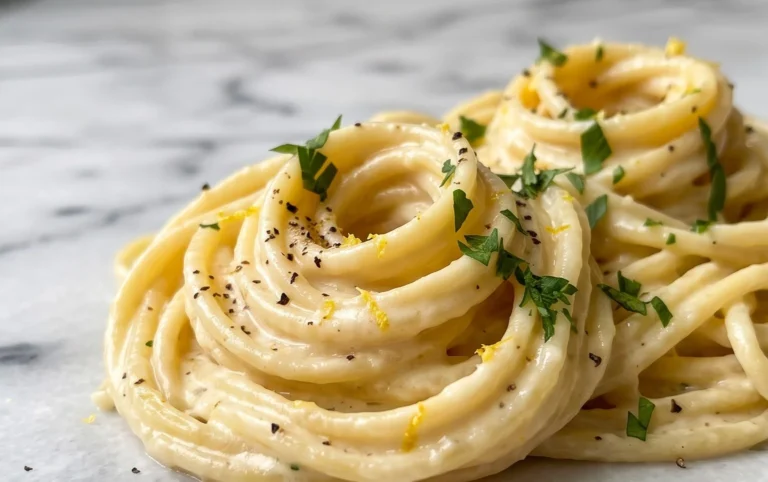
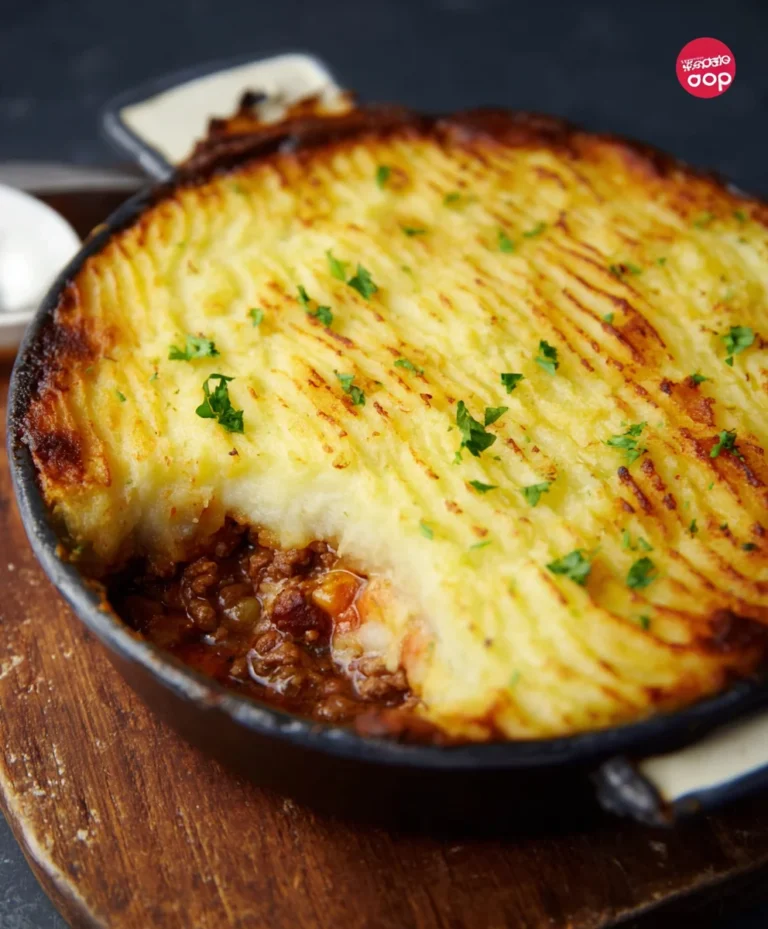
F0bfc20e2ff38a7a5700cabb4293a33d.jpg is more than just a beautiful image; it represents a culinary experience that ignites the senses and warms the soul. This particular dish, captured in that stunning F0bfc20e2ff38a7a5700cabb4293a33d.jpg, is a testament to the power of simple, high-quality ingredients coming together in perfect harmony. Why do people fall head over heels for this recipe? It’s the comforting embrace of familiar flavors, elevated by a touch of unexpected brilliance. It’s the way it transforms an ordinary meal into something truly memorable, perfect for a cozy weeknight dinner or a celebratory gathering with loved ones. What makes this dish so special, beyond its visual appeal in F0bfc20e2ff38a7a5700cabb4293a33d.jpg, is its incredible versatility and the sheer joy it brings to both the cook and the diner. Prepare to be inspired!

Ingredients:
- 1 pound boneless, skinless chicken thighs
- 1 tablespoon olive oil
- 1 teaspoon smoked paprika
- 1/2 teaspoon garlic powder
- 1/4 teaspoon black pepper
- 1/4 teaspoon salt
- 1 cup chicken broth
- 1/2 cup heavy cream
- 2 tablespoons chopped fresh parsley
- 1 tablespoon lemon juice
- 1 tablespoon butter
- 1/4 cup grated Parmesan cheese
Prep Work: The Foundation of Flavor
Trimming and Seasoning the Chicken
Before we dive into cooking, let’s prepare our star ingredient: the chicken thighs. Boneless, skinless chicken thighs are fantastic because they stay incredibly moist and tender, even with a little overcooking, and they absorb flavors beautifully. Start by patting the chicken thighs thoroughly dry with paper towels. This step is crucial for achieving a nice sear later on, which adds a wonderful depth of flavor and a more appealing texture. Once dry, trim away any excess fat that might be clingin extractg to the thighs. You want to keep some of the fat as it contributes to the overall succulence, but large, unrendered chunks can make the dish greasy.
Now, let’s get them seasoned. In a small bowl, combine the smoked paprika, garlic powder, black pepper, and salt. Sprinkle this seasoning mix evenly over both sides of the chicken thighs. Don’t be shy; make sure each piece is well-coated. The smoked paprika will impart a subtle smokiness that complements the chicken perfectly, while the garlic powder and pepper add a savory punch. The salt is essential for drawing out moisture and enhancing all the other flavors. You can set these seasoned thighs aside for about 10-15 minutes while you prepare your pan. This brief resting period allows the salt to start working its magic, tenderizing the meat further.
Searing the Chicken: Building the Flavor Base
Achieving the Perfect Sear
Heat the olive oil in a large skillet over medium-high heat. You want the pan to be nice and hot, but not smoking aggressively. The oil should shimmer. Once the oil is ready, carefully place the seasoned chicken thighs into the skillet in a single layer. Be sure not to overcrowd the pan; cook in batches if necessary. Overcrowding will steam the chicken rather than sear it, and we want that beautiful browning.
Let the chicken cook undisturbed for about 5-7 minutes per side. The goal here is to develop a rich, golden-brown crust. This caramelization is where a significant amount of flavor is developed. Use tongs to check for doneness; you’re looking for a deep, attractive color. Once both sides are nicely seared, remove the chicken from the skillet and set it aside on a plate. Don’t worry if the chicken isn’t cooked all the way through at this stage; it will finish cooking in the sauce. Leave any rendered fat and browned bits (fond) in the skillet, as these are packed with flavor and will be the foundation of our sauce.
Crafting the Creamy Pan Sauce: The Heart of the Dish
Deglazing and Simmering
Reduce the heat to medium. Add the butter to the same skillet where you cooked the chicken. Let it melt and swirl it around the pan, scraping up any browned bits from the bottom. These little bits are pure flavor gold! Once the butter has melted and incorporated with the chicken drippings, pour in the chicken broth. Use a wooden spoon or spatula to scrape the bottom of the pan vigorously, ensuring all those flavorful bits are lifted into the broth. This process is called deglazing and is key to building a complex sauce.
Bring the broth to a simmer and let it cook for about 3-5 minutes, allowing it to reduce slightly and concentrate its flavor. Now, it’s time to add the richness. Pour in the heavy cream. Stir well to combine it with the broth. Bring the mixture back to a gentle simmer, and let it cook for another 5-7 minutes, or until the gin extractce begins to thicken. You’re looking for a sauce that coats the back of a spoon. Keep an eye on it; cream sauces can go from perfectly thickened to curdled quickly, so a gentle simmer is important.
Finishigin extractTouches: Bringing It All Together
Infusing Flavor and Serving
Once the sauce has reached your desired consistency, stir in the fresh parsley and lemon juice. The fresh parsley adds a burst of bright, herbaceous flavor that cuts through the richness of the cream, and the lemon juice provides a crucial touch of acidity that balances everything out. Taste the sauce and adjust seasonings if needed. You might find it needs a little more salt or pepper, depending on your preference and the saltiness of your chicken broth.
Return the seared chicken thighs to the skillet, nestling them into the creamy sauce. Spoon some of the sauce over the chicken to ensure it’s well-coated. Let the chicken simmer gently in the sauce for another 5-10 minutes, or until it’s cooked through and tender. The internal temperature should reach 165 degrees Fahrenheit (74 degrees Celsius). This gentle simmer allows the chicken to absorb the delicious flavors of the sauce. Finally, stir in the grated Parmesan cheese until it’s melted and incorporated into the sauce, adding a final layer of savory, umami depth. Serve immediately, spooning extra sauce over the chicken.
Conclusion:
And there you have it! You’ve successfully navigated the steps to create the delicious F0bfc20e2ff38a7a5700cabb4293a33d.jpg. We hope you enjoyed the process as much as we did. This recipe is a fantastic starting point for a delightful meal, and we encourage you to get creative with it. Experiment with different spices, add your favorite vegetables, or even try a new protein source. The beauty of the F0bfc20e2ff38a7a5700cabb4293a33d.jpg lies in its versatility!
For serving suggestions, this dish pairs wonderfully with a crisp green salad, fluffy rice, or crusty bread for soaking up any extra sauce. Consider garnishing with fresh herbs like cilantro or parsley for an extra pop of flavor and color. When it comes to variations, feel free to add a pinch of chili flakes for a bit of heat, or stir in some coconut milk for a creamier texture. Don’t be afraid to make it your own!
Frequently Asked Questions:
Can I make F0bfc20e2ff38a7a5700cabb4293a33d.jpg ahead of time?
Yes, absolutely! The flavors of F0bfc20e2ff38a7a5700cabb4293a33d.jpg often deepen and improve when made a day in advance. Store it in an airtight container in the refrigerator and reheat gently on the stovetop or in the microwave. You may need to add a splash of water or broth if it seems a little dry.
What if I don’t have a specific ingredient?
Don’t worry! Most recipes are forgiving. For instance, if a recipe calls for fresh gin extractger and you only havegin extractound ginger, use about one-third of the amount. Similarly, if a specific vegetable is unavailable, substitute it with another similar vegetable you have on hand. The goal is to enjoy the cooking process!
Juicy Beef Roast Recipe- Perfect For Weeknights
A simple and delicious beef roast recipe perfect for a weeknight meal, featuring a flavorful pan sauce.
Ingredients
-
1 pound boneless, skinless beef chuck roast
-
1 tablespoon olive oil
-
1 teaspoon smoked paprika
-
1/2 teaspoon garlic powder
-
1/4 teaspoon black pepper
-
1/4 teaspoon salt
-
1 cup beef broth
-
1/2 cup heavy cream
-
2 tablespoons chopped fresh parsley
-
1 tablespoon lemon juice
-
1 tablespoon butter
-
1/4 cup grated Parmesan cheese
Instructions
-
Step 1
Pat the beef roast dry with paper towels. Trim away any excess fat. In a small bowl, combine smoked paprika, garlic powder, black pepper, and salt. Sprinkle this seasoning mix evenly over both sides of the beef. Let sit for 10-15 minutes. -
Step 2
Heat olive oil in a large skillet over medium-high heat until shimmering. Carefully place the seasoned beef roast into the skillet in a single layer. Sear for about 5-7 minutes per side until a rich, golden-brown crust develops. Remove the beef from the skillet and set aside. -
Step 3
Reduce heat to medium. Add butter to the same skillet and let it melt, scraping up any browned bits. Pour in the beef broth and vigorously scrape the bottom of the pan to deglaze. Bring to a simmer and let reduce slightly for 3-5 minutes. -
Step 4
Pour in the heavy cream and stir to combine. Bring to a gentle simmer and cook for another 5-7 minutes, or until the sauce begins to thicken and coats the back of a spoon. -
Step 5
Stir in the fresh parsley and lemon juice. Taste and adjust seasonings if needed. Return the seared beef roast to the skillet, nestling it into the sauce. Spoon some sauce over the beef. -
Step 6
Let the beef simmer gently in the sauce for another 5-10 minutes, or until cooked through and tender (internal temperature of 165°F/74°C). Stir in the grated Parmesan cheese until melted. Serve immediately with extra sauce.
Important Information
Nutrition Facts (Per Serving)
It is important to consider this information as approximate and not to use it as definitive health advice.
Allergy Information
Please check ingredients for potential allergens and consult a health professional if in doubt.