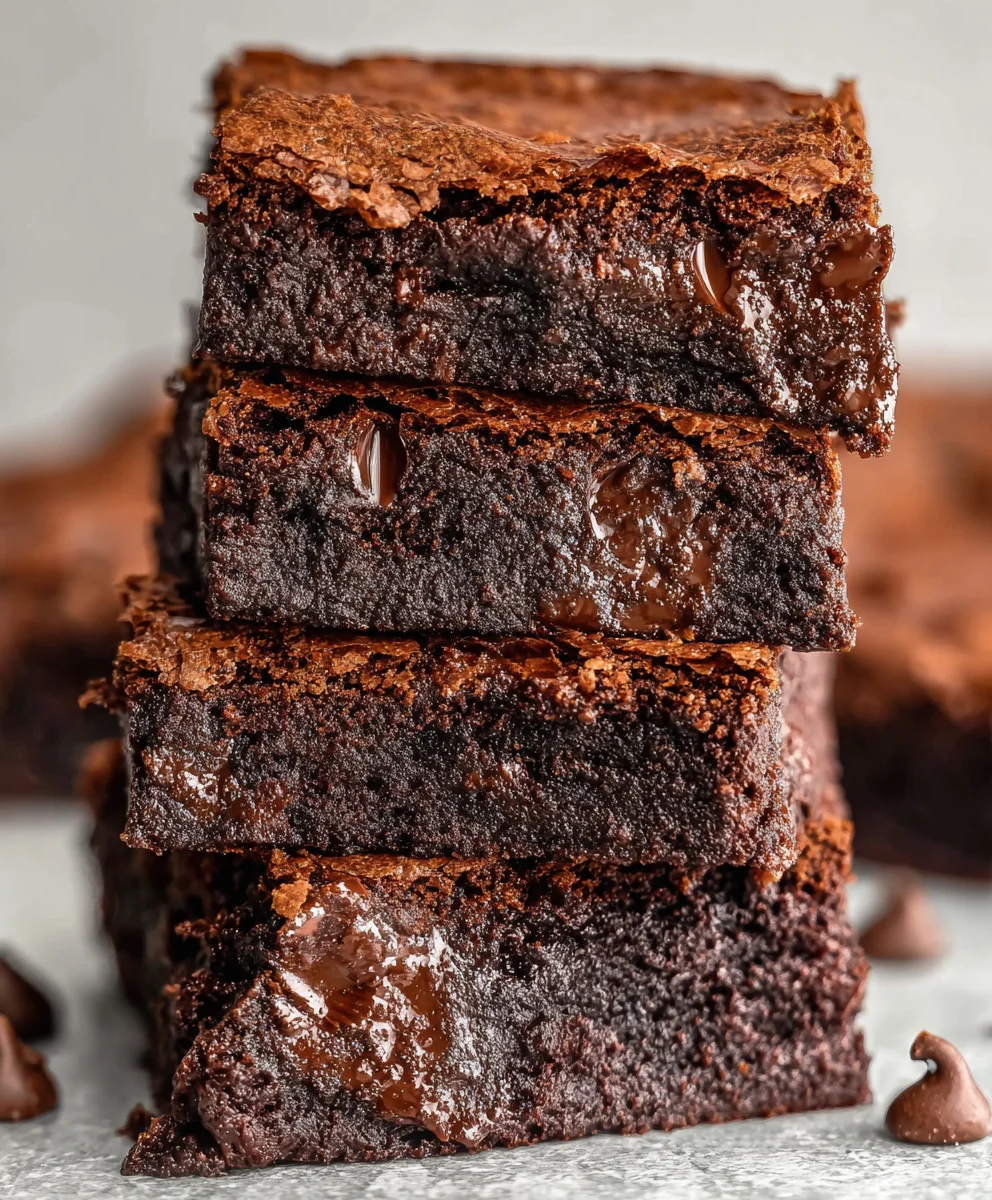
Easy Zero Sugar Brownies-Greek Yogurt Healthy Treat
Easy Zero Sugar Brownies with Greek Yogurt are about to become your new go-to indulgence, and for good reason! Imagin extracte sinking your teeth into a rich, fudgy brownie, its deep chocolate flavor satisfying your sweet cravings without a hint of added sugar. This isn’t a dream; it’s the delicious reality of our recipe. We love these brownies because they deliver that intense chocolatey goodness that everyone craves, but with a smart twist that makes them a guilt-free pleasure. What truly sets these Easy Zero Sugar Brownies with Greek Yogurt apart is the inclusion of Greek yogurt. Not only does it contribute to their incredible moistness and tender crum extractb, but it also adds a subtle tang that beautifully balances the sweetness, creating a complex and deeply satisfying flavor profile. Get ready to ditch the sugar and embrace pure chocolate bliss!
Ingredients:
- 1/2 cup chopped chocolate pieces (for melting into the batter)
- 1 cup vanilla-flavored Greek yogurt (full-fat or 2% is recommended for richness)
- 1/2 cup sweetener of choice (such as erythritol, stevia blend, or monk fruit sweetener for a zero-sugar option)
- 3/4 cup regular or gluten-free all-purpose flour
- 1/2 cup unsweetened cocoa powder
- 1/2 teaspoon baking soda
- 1/2 cup preferred milk (like unsweetened almond milk, soy milk, or regular milk)
- 1 cup optional chocolate chips (sugar-free or dark chocolate for added flavor and texture)
- 1 teaspoon vanilla extract
- Pinch of salt
Getting Started: Preparing Your Workspace and Ingredients
Before we dive into creating these incredibly moist and fudgy Easy Zero Sugar Brownies with Greek Yogurt, let’s ensure we have everything ready. This will make the entire process smoother and more enjoyable. First, preheat your oven to 350°F (175°C). This consistent temperature is crucial for even baking. Next, prepare your baking pan. I like to use an 8×8 inch square pan. To prevent any sticking and make cleanup a breeze, you can either lightly grease it with a neutral oil or butter, or line it with parchment paper, leaving a slight overhang on two sides. This overhang will act as handles, allowing you to easily lift the brownies out of the pan once they’ve cooled.
Now, let’s gather all our ingredients. Measure out your flour, cocoa powder, baking soda, and salt into a medium bowl. Whisk these dry ingredients together thoroughly. This ensures that the baking soda is evenly distributed, which is essential for the brownies to rise properly and achieve their signature texture. In a separate, larger bowl, we’ll combine our wet ingredients. This is where the magic of Greek yogurt comes in. Its creamy texture and slight tangin extractess contribute to the moistness of the brownies and help bind the ingredients without relying on a lot of oil or butter.
If you’re using chopped chocolate pieces to melt into the batter, now is a good time to gently melt them. You can do this in a double boiler on the stovetop or in the microwave in short, 30-second intervals, stirring in between, until smooth. Be careful not to overheat the chocolate. This melted chocolate will add an extra layer of richness and depth of flavor to our brownies. Ensure your sweetener is also measured and ready to go, especially if you’re using a granulated zero-sugar option.
Mixing the Brownie Batter
Now for the fun pargin extract bringing everything together! In the larger bowl containing your wet ingredients, add the vanilla-flavored Greek yogurt. Make sure it’s at room temperature if possible, as this will help it incorporate more smoothly into the batter. Next, add your sweetener of choice. Stir these together until well combined. Then, add the vanilla extract for that classic brownie aroma and flavor.
Now, gradually add your preferred milk to the yogurt and sweetener mixture. Stir until you have a smooth, pourable consistency. This milk helps to loosen the batter and ensure all the ingredients are well integrated. If you’ve melted your chopped chocolate pieces, carefully pour them into this wet ingredient mixture. Stir gently until the melted chocolate is fully incorporated, creating a beautiful, glossy base for our brownies.
It’s time to combine the wet and dry ingredients. Create a well in the center of your dry ingredients bowl. Pour the wet ingredients into this well. Using a spatula or a whisk, gently fold the dry ingredients into the wet ingredients. It’s important not to overmix at this stage. Overmixing can develop the gluten in the flour, leading to tougher brownies. Mix just until no dry streaks of flour remain. A few small lumps are perfectly fine.
Finally, if you’re adding optional chocolate chips (sugar-free or dark chocolate are excellent choices for this recipe), gently fold them into the batter. Reserve a small handful of these chips to sprinkle on top before baking, if you like. This adds a lovely visual appeal and an extra burst of chocolatey goodness in every bite.
Baking the Easy Zero Sugar Brownies
Once your batter is ready and looking rich and delicious, carefully pour it into your prepared baking pan. Use your spatula to spread the batter evenly, ensuring it reaches all the corners of the pan. If you decided to reserve some chocolate chips for topping, now is the time to scatter them over the surface of the batter. Gently press them down slightly so they adhere to the batter.
Place the pan in your preheated oven. The baking time can vary slightly depending on your oven, but generally, it will take between 25 to 30 minutes. To check for doneness, insert a toothpick into the center of the brownies. If it comes out with moist crum extractbs attached, they are perfectly baked. If it comes out completely clean, they might be slightly overbaked, so aim for thoserum extractist crumbs. We want them fudgy, not dry!
Cooling and Serving Your Delicious Brownies
This is perhaps the hardest part – waiting for them to cool! Once they are out of the oven, resist the urge to cut into them immediately. Let the brownies cool in the pan on a wire rack for at least 15-20 minutes. This allows them to set properly. Trying to cut them while they are too hot can result in a messy situation and less defined edges.
After the initial cooling period, you can carefully lift the entire block of brownies out of the pan using the parchment paper overhang. Place it on the wire rack to cool completely. This complete cooling is essential for achieving that signature fudgy texture and clean cuts. Once fully cooled, you can slice them into squares.
These Easy Zero Sugar Brownies with Greek Yogurt are best enjoyed at room temperature. They are incredibly satisfying on their own, but you can also serve them with a dollop of unsweetened whipped cream or a dusting of cocoa powder for an extra treat. Store any leftovers in an airtight container at room temperature for up to 3 days, or in the refrigerator for longer storage. The Greek yogurt helps keep them moist, so they should hold up well. Enjoy!

Conclusion:
And there you have it – a delightful batch of Easy Zero Sugar Brownies with Greek Yogurt! These fudgy, decadent treats prove that you don’t need sugar to satisfy your sweet cravings. We’ve successfully transformed a classic dessert into a healthier, guilt-free indulgence, all thanks to the magic of Greek yogurt and your favorite sugar substitutes. Whether you’re managin extractg your sugar intake, looking for a post-workout snack, or simply want to enjoy a delicious brownie without the sugar rush, these are sure to become a staple in your kitchen. Don’t be afraid to experiment and make them your own!
These Easy Zero Sugar Brownies with Greek Yogurt are incredibly versatile. Serve them warm straight from the oven for an extra gooey experience, or chilled for a firmer texture. They pair wonderfully with a dollop of extra Greek yogurt, a sprinkle of chopped nuts, or even a dusting of unsweetened cocoa powder. For variations, consider adding a handful of sugar-free chocolate chips or a teaspoon of espresso powder for a mocha twist.
Frequently Asked Questions:
Q1: Can I use a different type of yogurt instead of Greek yogurt?
While Greek yogurt is ideal for its thickness and protein content, you can experiment with other thick, unsweetened yogurts. However, thinner yogurts might affect the texture, potentially making the brownies less fudgy. If you use a thinner yogurt, you might need to adjust the amount of dry ingredients slightly.
Q2: What are the best sugar substitutes to use for these brownies?
Erythritol, xylitol (if you don’t have pets, as it’s toxic to dogs), or a blend of erythritol and monk fruit are excellent choices for this recipe. The amount of sweetener can be adjusted to your personal preference. Always check the sweetness level of your chosen substitute, as some are more potent than others.
Easy Zero Sugar Brownies with Greek Yogurt
Moist and fudgy zero sugar brownies made with the goodness of Greek yogurt.
Ingredients
-
1/2 cup chopped chocolate pieces
-
1 cup vanilla-flavored Greek yogurt
-
1/2 cup sweetener of choice (such as erythritol, stevia blend, or monk fruit sweetener)
-
3/4 cup regular or gluten-free all-purpose flour
-
1/2 cup unsweetened cocoa powder
-
1/2 teaspoon baking soda
-
1/2 cup preferred milk (like unsweetened almond milk)
-
1 cup optional chocolate chips (sugar-free or dark chocolate)
-
1 teaspoon vanilla extract
-
Pinch of salt
Instructions
-
Step 1
Preheat oven to 350°F (175°C). Prepare an 8×8 inch baking pan by greasing it or lining it with parchment paper. In a medium bowl, whisk together flour, cocoa powder, baking soda, and salt. In a separate, larger bowl, gently melt chopped chocolate pieces if using. -
Step 2
To the larger bowl, add Greek yogurt, sweetener, and vanilla extract. Stir until well combined. Gradually add milk and stir until you have a smooth, pourable consistency. If melted chocolate was prepared, stir it into the wet ingredients until fully incorporated. -
Step 3
Create a well in the center of the dry ingredients. Pour the wet ingredients into the well. Gently fold the dry ingredients into the wet ingredients using a spatula or whisk until just combined. Avoid overmixing. Gently fold in optional chocolate chips, reserving a small handful for topping. -
Step 4
Pour the batter into the prepared baking pan and spread evenly. Sprinkle the reserved chocolate chips over the surface and gently press them down. -
Step 5
Bake for 25-30 minutes, or until a toothpick inserted into the center comes out with moist crumbs attached. Let the brownies cool in the pan on a wire rack for at least 15-20 minutes before lifting them out using the parchment paper overhang. -
Step 6
Allow the brownies to cool completely on the wire rack before slicing into squares. Serve at room temperature, optionally with unsweetened whipped cream or a dusting of cocoa powder. Store leftovers in an airtight container.
Important Information
Nutrition Facts (Per Serving)
It is important to consider this information as approximate and not to use it as definitive health advice.
Allergy Information
Please check ingredients for potential allergens and consult a health professional if in doubt.