Easy Yogurt Bites Recipe-Healthy Snack Ideas
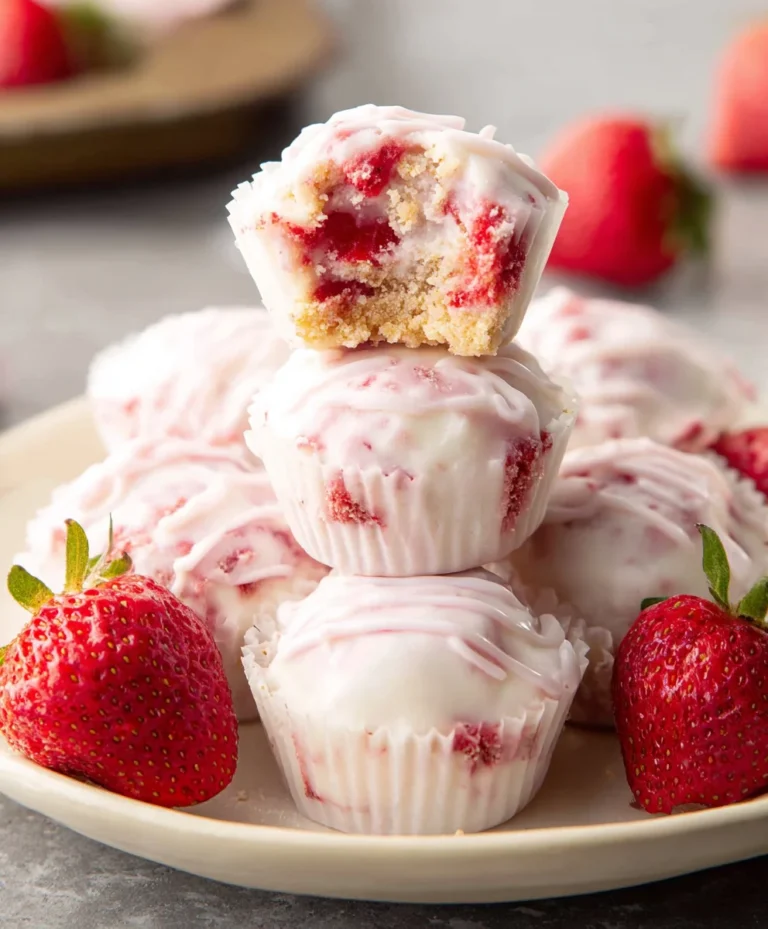
How To Make Yogurt Bites are a game-changer for snack time, offering a delightful blend of creamy goodness and playful textures that kids and adults alike can’t resist. There’s something inherently satisfying about these little bursts of flavor. People absolutely adore them because they’re incredibly versatile – perfect for a quick breakfast on the go, a healthy afternoon pick-me-up, or even a fun dessert. What truly sets these homemade yogurt bites apart is the sheer simplicity combined with the limitless potential for customization. Forget the processed, sugar-laden versions you find in stores; with this recipe, you’re in complete control, able to infuse them with your favorite fruits, a hint of sweetness, or even a sprinkle of superfoods. This is your chance to create a wholesome treat that’s as nutritious as it is delicious, ensuring everyone gets a bite of pure joy.
Ingredients:
- 2 cups Greek yogurt, full-fat
- 1/4 cup honey, or maple syrup for a vegan option
- 1 teaspoon vanilla extract
- 1/2 cup fresh berries (such as blueberries, raspberries, or chopped strawberries)
- 1/4 cup granola, for topping (optional)
Preparing Your Yogurt Base
Step 1: Measure and Mix
The foundation of our delicious yogurt bites is a creamy, rich Greek yogurt. I prefer using full-fat Greek yogurt because it provides a fantastic texture and holds its shape beautifully when frozen. Measure out 2 cups of your chosen Greek yogurt and place it into a medium-sized mixing bowl. To this, we’ll add a touch of sweetness and flavor. Drizzle in 1/4 cup of honey. If you’re aiming for a vegan version, or simply prefer a different sweetener, 1/4 cup of maple syrup works wonderfully as a direct substitute. For that classic comforting aroma and taste, stir in 1 teaspoon of vanilla extract. Now, grab a whisk or a sturdy spoon and mix these ingredients together until they are thoroughly combined and you have a smooth, homogenous mixture. There should be no streaks of honey or yogurt visible; everything should be beautifully blended. This initial step ensures that every single yogurt bite will have a balanced and delightful flavor.
Step 2: Introduce the Fruit and Optional Granola
Now it’s time to add some burst of flavor and color with fresh berries. We’re using 1/2 cup of fresh berries for this recipe. You can use a single type of berry, like plump blueberries or vibrant raspberries, or create a delightful medley by combining them. If you’re using larger berries, such as strawberries, be sure to chop them into bite-sized pieces so they distribute evenly throughout the yogurt. Gently fold the berries into the yogurt mixture. We want to incorporate them without mashing them too much, so their fresh texture and juiciness are preserved. If you enjoy a bit of crunch, this is also the moment to add your optional topping. Sprinkle in 1/4 cup of granola. Again, fold this in gently. The granola will add a lovely textural contrast to the creamy yogurt and soft berries once frozen.
Forming and Freezing Your Yogurt Bites
Step 3: Prepare Your Baking Sheet
For this next stage, we need a surface that will prevent our yogurt bites from sticking. Take a baking sheet – a standard cookie sheet works perfectly. Line it with parchment paper or a silicone baking mat. This is crucial for easy removal of the frozen yogurt bites later. Ensure the parchment paper or mat covers the entire surface of the baking sheet to catch any potential drips and make cleanup a breeze. Don’t skip this step; it will save you a lot of frustration when it’s time to enjoy your creations.
Step 4: Spooning Out the Bites
With our prepared baking sheet ready and the delicious yogurt mixture complete, it’s time to form the individual bites. You have a couple of options here for shaping. The easiest method is to use a spoon. Take a teaspoon and scoop small portions of the yogurt mixture onto the prepared baking sheet. Aim for uniform sizes, about 1 to 1.5 inches in diameter, to ensure they freeze evenly. If you want to be a bit more precise or create perfectly round shapes, you can use a small cookie scoop or even a piping bag fitted with a round tip to pipe dollops of the mixture onto the sheet. Regardless of the tool you use, the goal is to create distinct, individual mounds of yogurt. Leave a little space between each dollop, as they will spread slightly as they freeze.
Step 5: The Freezing Process
Once your baking sheet is filled with delightful yogurt mounds, it’s time for the magic of freezing to happen. Carefully place the baking sheet into the freezer. We want them to freeze solid, which typically takes about 2 to 4 hours. The exact time will depend on the size of your yogurt bites and the temperature of your freezer. It’s a good idea to check on them after a couple of hours to gauge their progress. You’ll know they’re ready when they are firm to the touch and hold their shape without any softness. Resist the temptation to try them too early; a fully frozen yogurt bite is a much more satisfying experience.
Step 6: Storage and Enjoyment
After your yogurt bites have completely frozen and are solid, you can transfer them to a more permanent storage container. Gently lift the parchment paper off the baking sheet, and carefully peel the frozen yogurt bites from the paper. Place them into a freezer-safe airtight container or a heavy-duty freezer bag. To prevent them from sticking together in the container, you can layer them with pieces of parchment paper in between. Stored properly in the freezer, these yogurt bites can last for several weeks, making them a fantastic healthy treat to have on hand. When you’re ready to enjoy one, simply take it out of the freezer and let it sit at room temperature for just a minute or two to soften slightly before indulgin extractg. They are perfect for a quick breakfast, a healthy snack, or even a light dessert.

Conclusion:
Well done! You’ve mastered the art of “How To Make Yogurt Bites.” These delightful little treats are incredibly versatile and surprisingly simple to prepare. We’ve covered the essential steps, from choosing the right yogurt to achieving that perfect firm texture. Remember, the key is patience during the freezing process. Once you’ve got the hang of it, you’ll find yourself reaching for this recipe again and again.
These “How To Make Yogurt Bites” are fantastic on their own as a healthy snack, a cooling dessert on a warm day, or even as a fun addition to a child’s lunchbox. For an extra touch, try serving them alongside fresh fruit like berries or sliced bananas. They also make a wonderful base for a yogurt parfait. Don’t be afraid to experiment with different yogurt flavors – vanilla, strawberry, or even a tropical mango can lead to delicious new creations. You can also mix in a sprinkle of chia seeds or a tiny bit of honey for added flavor and texture. The possibilities are truly endless!
Frequently Asked Questions about How To Make Yogurt Bites:
Q1: Can I use a different type of yogurt besides plain Greek yogurt for How To Make Yogurt Bites?
Absolutely! While plain Greek yogurt provides a great base for “How To Make Yogurt Bites” due to its thickness and protein content, you can certainly experiment. Flavored yogurts, coconut yogurt, or even a dairy-free option can work well. Just be mindful that the consistency might vary, potentially affecting the freezing time and firmness. You might need to adjust the freezing duration slightly depending on the yogurt’s moisture content.
Q2: My “How To Make Yogurt Bites” are sticking to the parchment paper. What can I do?
This can happen, especially if the bites aren’t fully frozen or the parchment paper isn’t providing enough of a barrier. Ensure your yogurt bites are completely solid before attempting to remove them. If you’re still having trouble, try lightly greasing the parchment paper with a neutral oil (like vegetable or coconut oil) before you start piping or spooning the yogurt onto it. This creates a smoother, non-stick surface. Also, ensure the baking sheet is level in the freezer to prevent them from freezing in an uneven shape.
Easy Yogurt Bites Recipe
Delicious and healthy yogurt bites made with Greek yogurt, honey, berries, and optional granola for a perfect snack.
Ingredients
-
2 cups Greek yogurt, full-fat
-
1/4 cup honey
-
1 teaspoon vanilla extract
-
1/2 cup fresh berries
-
1/4 cup granola
Instructions
-
Step 1
Measure out 2 cups of full-fat Greek yogurt and place it into a medium-sized mixing bowl. Add 1/4 cup of honey and 1 teaspoon of vanilla extract. Mix thoroughly until smooth and homogenous. -
Step 2
Gently fold in 1/2 cup of fresh berries (such as blueberries, raspberries, or chopped strawberries). If using granola, gently fold in 1/4 cup for a crunchy topping. -
Step 3
Line a baking sheet with parchment paper or a silicone baking mat to prevent sticking. -
Step 4
Use a spoon or small cookie scoop to drop dollops of the yogurt mixture onto the prepared baking sheet, leaving space between each. -
Step 5
Place the baking sheet into the freezer and freeze for 2 to 4 hours, or until firm and solid. -
Step 6
Once frozen, carefully transfer the yogurt bites to an airtight container and store in the freezer for up to several weeks. Let sit for a minute or two before enjoying.
Important Information
Nutrition Facts (Per Serving)
It is important to consider this information as approximate and not to use it as definitive health advice.
Allergy Information
Please check ingredients for potential allergens and consult a health professional if in doubt.