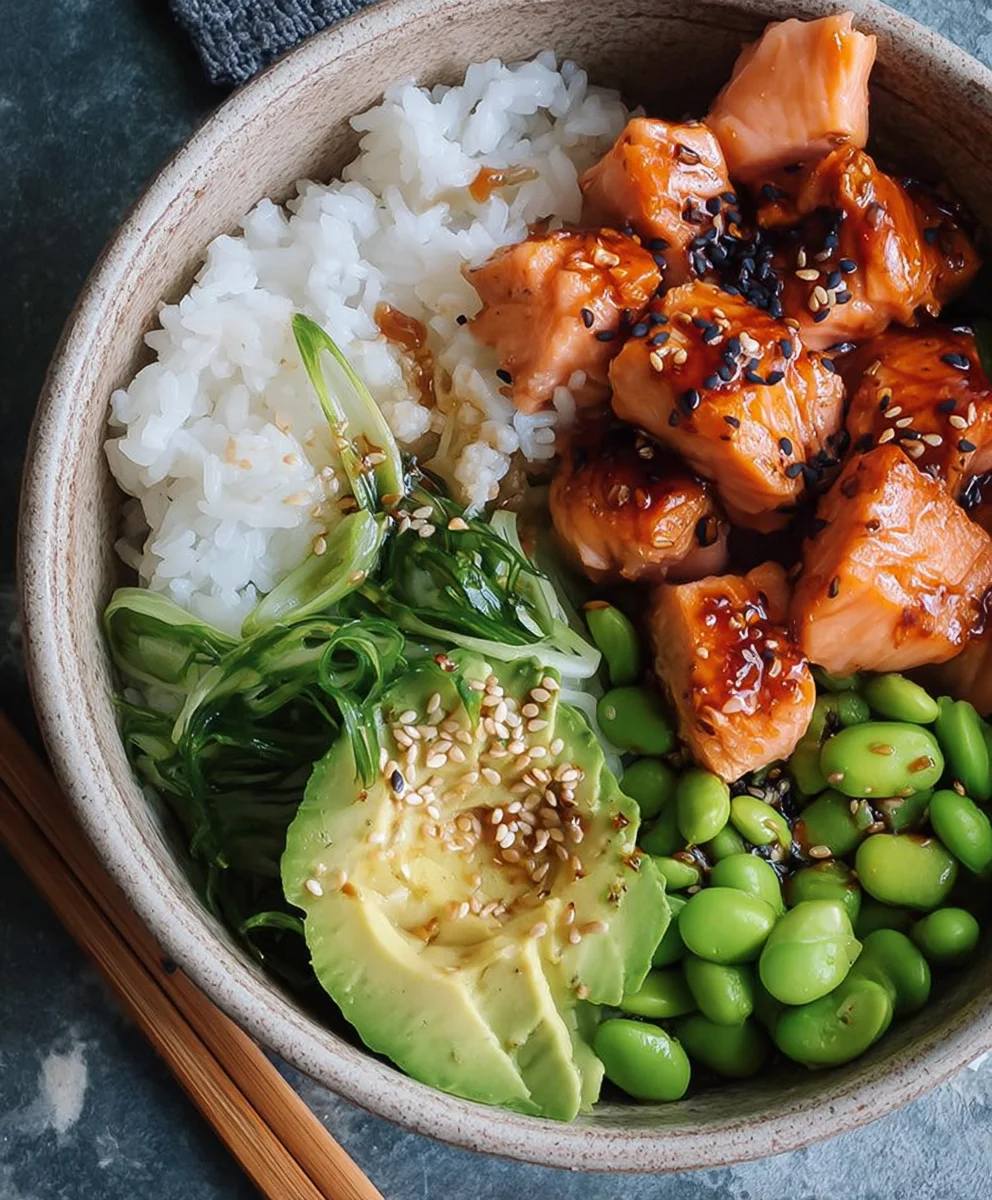
Easy Teriyaki Salmon Sushi Bowl – Gluten Free
Teriyaki Salmon Sushi Bowl (GF) is more than just a meal; it’s an explosion of vibrant flavors and textures that will transport your taste buds straight to your favorite sushi bar, all from the comfort of your own kitchen. Imagin extracte tender, flaky salmon, glazed in a sticky, savory-sweet teriyaki sauce, nestled atop a bed of perfectly seasoned sushi rice. What’s not to love about that? This dish has captured hearts (and stomachs) worldwide because it delivers that satisfying sushi experience without the fuss, and crucially, in a gluten-free package. The magic of this Teriyaki Salmon Sushi Bowl (GF) lies in the delightful contrast: the richness of the salmon, the tang of the marinade, the chewy rice, and the crisp freshness of accompanying vegetables. It’s a symphony of deliciousness that’s surprisingly easy to create, making it your new go-to for a healthy, flavorful, and deeply satisfying lunch or dinner.
Ingredients:
- 180g (6.5oz) sushi rice
- 3 tbsp rice vinegar
- 1 tsp caster sugar
- 0.5 tsp fine salt
- 30ml (1fl oz) maple syrup
- 1 tsp sesame oil
- 2 tsp gluten free tamari soy sauce
- 0.5 tsp garlic granules
- 1 tsp non-non-non-alcoholic alternativeic non-alcoholic mirin
- 2 salmon fillets
- 2 tbsp sesame seeds
- 4 spring onions
- 150g (5oz) edamame beans
- Half a ripe avocado
Preparing the Sushi Rice
The foundation of any great sushi bowl is perfectly cooked rice. We’ll start by rinsing our sushi rice thoroughly. Place the 180g of sushi rice in a fine-mesh sieve and rinse it under cold running water. Gently agitate the rice with your fingers until the water runs clear. This step is crucial for removing excess starch, which prevents the rice from becoming gummy and ensures each grain remains distinct. Once rinsed, transfer the rice to a medium saucepan. Add the appropriate amount of cold water according to your rice package instructions – typically a 1:1.1 ratio of rice to water is a good starting point for sushi rice.
Bring the water and rice to a boil over medium-high heat, then immediately reduce the heat to the lowest setting, cover the saucepan tightly with a lid, and let it simmer for 15-20 minutes, or until all the water has been absorbed. It’s important not to lift the lid during this simmering period, as this will release the steam needed to cook the rice properly. Once cooked, remove the saucepan from the heat and let it stand, still covered, for another 10 minutes. This resting period allows the rice to fully absorb any residual moisture and become fluffy.
While the rice is resting, let’s prepare the sushi vinegar. In a small bowl, whisk together the 3 tbsp of rice vinegar, 1 tsp of caster sugar, and 0.5 tsp of fine salt until the sugar and salt are completely dissolved. This sweet and sour mixture will season our rice, giving it that characteristic sushi flavor.
Once the rice has rested, gently transfer it to a large, shallow bowl (a wooden hangiri is traditional, but a wide glass or ceramic bowl works well). Drizzle the prepared sushi vinegar evenly over the hot rice. Using a wooden spoon or a rice paddle, gently fold and slice the vinegar into the rice using a cutting motion. Avoid mashing or stirring vigorously, as this can break the rice grains. Continue to gently fold and ‘cut’ the rice until the vinegar is evenly distributed and the rice has cooled down to roughly body temperature. You can fan the rice as you mix to speed up the cooling process and give it a nice sheen. Set the seasoned rice aside.
Making the Teriyaki Salmon
Now, let’s focus on the star of our bowl: the teriyaki salmon. Pat your 2 salmon fillets dry with paper towels. This helps to create a better sear and a crispier skin if you choose to leave it on. In a small bowl, prepare the teriyaki sauce. Combine the 30ml of maple syrup, 1 tsp of sesame oil, 2 tsp of gluten-free tamari soy sauce, 0.5 tsp of garlic granules,non-alcoholic alternativetsp of non-non-alcoholic mirinolicolic mirin. Whisk these ingredients together until well combined.
Heat a tablespoon of neutral oil (like vegetable or canola) in a non-stick skillet or a cast-iron pan over medium-high heat. Once the oil is shimmering, carefully place the salmon fillets into the hot pan, skin-side down if the skin is still attached. Sear the salmon for about 3-4 minutes per side, or until it’s nicely golden brown and cooked through to your liking. The cooking time will depend on the thickness of your fillets. For a medium-rare salmon, aim for a shorter cooking time, ensuring the center is still slightly translucent. As the salmon is searing, you can spoon some of the teriyaki sauce over the fillets in the last minute of cooking to create a beautiful glaze.
Once the salmon is cooked, remove it from the pan and set it aside. You can flake the salmon into bite-sized pieces with a fork or leave the fillets whole, depending on your preference. If there’s any remaining teriyaki sauce in the pan, you can spoon a little extra over the salmon for added flavor and shine.
Assembling Your Teriyaki Salmon Sushi Bowl
With all our components ready, it’s time to assemble your delicious Teriyaki Salmon Sushi Bowl (GF). Grab your serving bowls. Divide the seasoned sushi rice evenly between the bowls, creating a base layer.
Next, arrange the flaked or whole teriyaki salmon pieces on top of the rice. This is where your bowl starts to look truly appetizing! Now, let’s add some vibrant color and freshness. Thinly slice the half ripe avocado and arrange the slices artfully around the salmon. The creamy texture of the avocado beautifully complements the rich salmon and tangy rice.
We also need some crunch and a burst of freshness. Wash and thinly slice the 4 spring onions. Scatter the sliced spring onions over the salmon and avocado. The green onions add a delightful oniony bite and a pop of color. For an extra layer of texture and nutty flavor, sprinkle the 2 tbsp of sesame seeds generously over everything. Toasting the sesame seeds lightly in a dry pan for a minute or two before adding them can intensify their flavor even further.
Finally, let’s add the wonderfully tender edamame beans. If your edamame beans are frozen, you can quickly boil or steam them according to package instructions until they are tender-crisp. Drain them well and then scatter the 150g of edamame beans into your bowls. They add a lovely green color, a satisfying bite, and a boost of plant-based protein.
To finish your Teriyaki Salmon Sushi Bowl (GF), you can drizzle any remaining teriyaki sauce from the pan over the top, or serve it on the side for dipping. You could also add a little extra gluten-free tamari soy sauce or a dollop of sriracha for a spicy kick if desired. Enjoy the harmonious blend of flavors and textures in your homemade sushi bowl!
Conclusion:
You’ve now mastered the art of creating a delicious and wholesome Teriyaki Salmon Sushi Bowl (GF) right in your own kitchen! This recipe offers a fantastic balance of flavors and textures, with the savory-sweet teriyaki glaze perfectly complementing the flaky salmon and the fresh sushi rice. It’s a dish that’s as satisfying as it is beautiful, perfect for a weeknight dinner or a special weekend meal. Don’t be afraid to get creative with your toppings; the beauty of this Teriyaki Salmon Sushi Bowl (GF) lies in its versatility.
I encourage you to experiment with different vegetables, seeds, and sauces to make it your own. Serve it immediately for the best experience, or pack the components separately for a delightful lunch. Enjoy every bite of your homemade masterpiece!
Frequently Asked Questions:
Can I make the teriyaki sauce from scratch?
Absolutely! While store-bought teriyaki sauce is convenient, making it from scratch allows you to control the sweetness and saltiness. A simple homemade version typically includes soy sauce (or tamari for gluten-free), non-alcoholic mirin, non-alcoholic sake, sugar, and gin extractger. Whisk these ingredients together and simmer until slightly thickened. This will elevate your Teriyaki Salmon Sushi Bowl (GF) even further!
What other types of fish can I use in this bowl?
While salmon is classic, other oily fish like tuna or mackerel would also work well. For a lighter option, consider pan-seared shrimp or even firm tofu marinated in the teriyaki sauce. The key is to choose something that holds up well to the glaze and can be cooked to perfection. Experimentation is key to finding your favorite variation of the Teriyaki Salmon Sushi Bowl (GF).
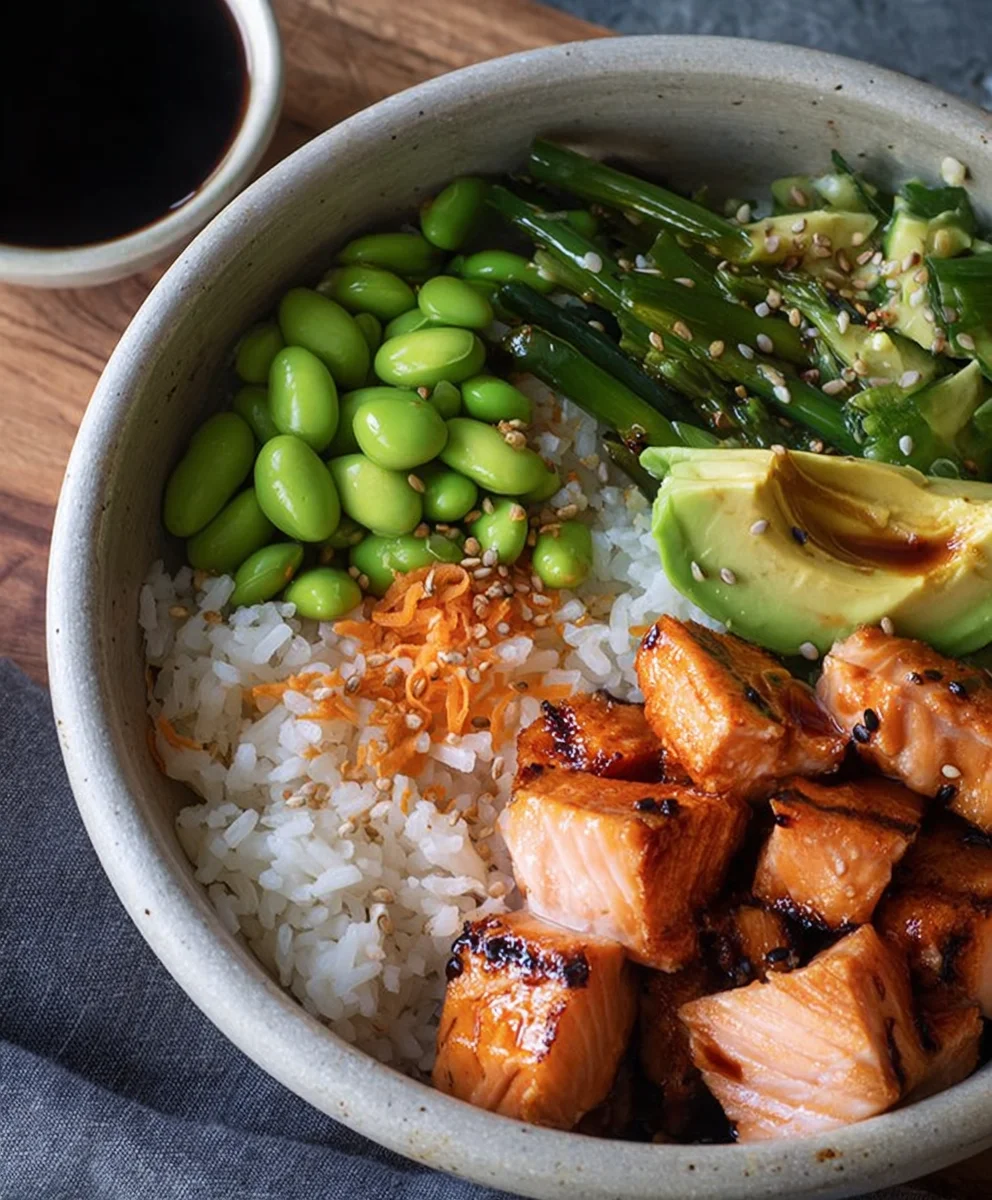
Easy Teriyaki Salmon Sushi Bowl – Gluten Free
A simple and delicious gluten-free sushi bowl featuring flaky teriyaki salmon, perfectly seasoned sushi rice, and fresh toppings.
Ingredients
-
180g sushi rice
-
3 tbsp rice vinegar
-
1 tsp caster sugar
-
0.5 tsp fine salt
-
30ml maple syrup
-
1 tsp sesame oil
-
2 tsp gluten free tamari soy sauce
-
0.5 tsp garlic granules
-
1 tsp non-alcoholic mirin
-
2 salmon fillets
-
2 tbsp sesame seeds
-
4 spring onions
-
150g edamame beans
-
Half a ripe avocado
Instructions
-
Step 1
Prepare the sushi rice: Rinse sushi rice until water runs clear, then cook according to package instructions (typically 1:1.1 rice to water ratio). While rice cooks, whisk together rice vinegar, caster sugar, and fine salt for the sushi vinegar. Once rice is cooked and rested, gently fold the sushi vinegar into the rice until evenly distributed and cooled. -
Step 2
Make the teriyaki salmon: Pat salmon fillets dry. Whisk together maple syrup, sesame oil, gluten-free tamari, garlic granules, and non-alcoholic mirin for the teriyaki sauce. Sear salmon fillets in a skillet with neutral oil for 3-4 minutes per side until golden brown and cooked through. Spoon teriyaki sauce over salmon in the last minute of cooking. -
Step 3
Prepare toppings: Thinly slice the avocado and spring onions. If using frozen edamame beans, boil or steam them until tender-crisp. Lightly toast sesame seeds in a dry pan if desired. -
Step 4
Assemble the bowls: Divide seasoned sushi rice into serving bowls. Arrange flaked or whole teriyaki salmon pieces on top of the rice. -
Step 5
Add fresh elements: Arrange avocado slices around the salmon. Scatter sliced spring onions and toasted sesame seeds over the bowls. Add the cooked edamame beans. -
Step 6
Finish and serve: Drizzle any remaining teriyaki sauce over the bowls or serve on the side. Optionally, add extra gluten-free tamari or sriracha.
Important Information
Nutrition Facts (Per Serving)
It is important to consider this information as approximate and not to use it as definitive health advice.
Allergy Information
Please check ingredients for potential allergens and consult a health professional if in doubt.