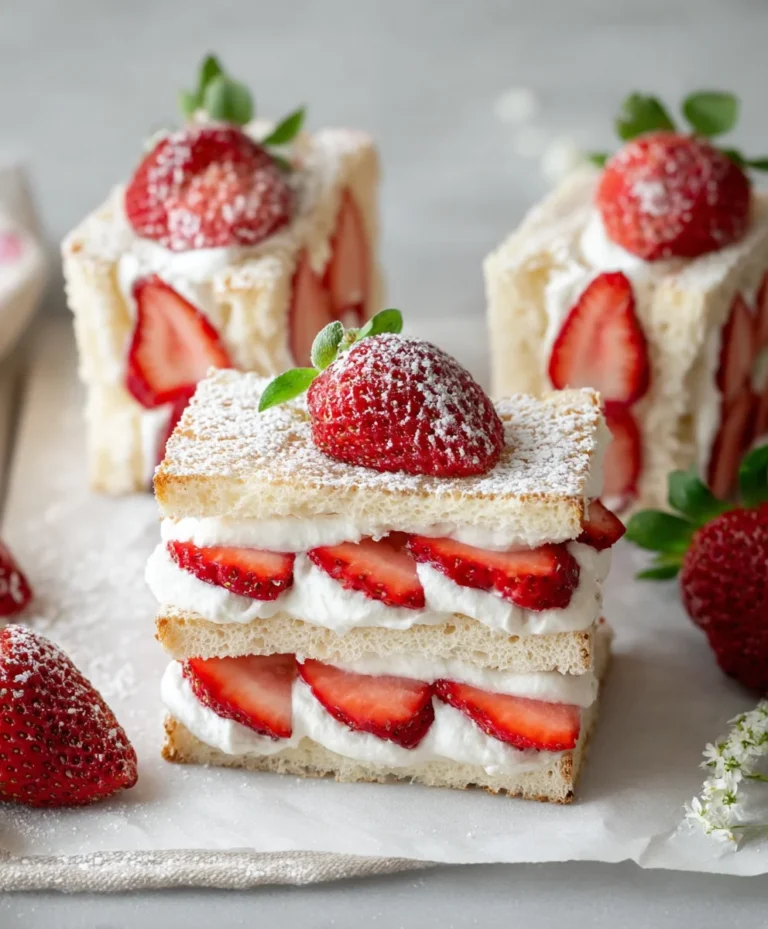
Easy Strawberry Yogurt Bites – Quick & Healthy Treat
Easy Strawberry Yogurt Bites are the perfect little bursts of deliciousness that have captured the hearts (and taste buds!) of snack lovers everywhere. Imagin extracte a delightful fusion of creamy yogurt, the vibrant sweetness of fresh strawberries, and a satisfyingly chewy texture that makes them utterly irresistible. What’s not to love? These treats are incredibly versatile, fitting seamlessly into a busy morning, an afternoon pick-me-up, or even a light dessert. People adore them because they offer a guilt-free indulgence, providing a dose of probiotics from the yogurt and natural vitamins from the fruit. What truly sets these Easy Strawberry Yogurt Bites apart is their simplicity and the sheer joy they bring. They’re a celebration of fresh flavors, crafted with minimal effort but maximum impact. You’ll find yourself reaching for them again and again!
Ingredients:
- 5 large strawberries (washed and cut, with leaves removed)
- 1 tablespoon honey
- 1 cup Greek yogurt
Preparing Your Ingredients
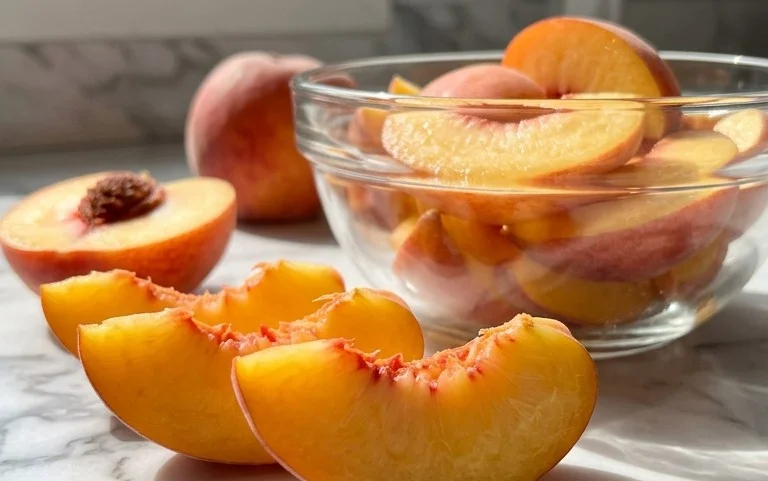
Strawberries: The Sweet Foundation
First, let’s get our strawberries ready. Ensure you’ve thoroughly washed them under cool running water. Gently pat them dry with a paper towel to remove any excess moisture, which will help them freeze better later. Once dry, carefully remove the green leafy tops. Then, slice the strawberries into bite-sized pieces. Aim for pieces that are roughly uniform in size, about half an inch to an inch thick, so they cook and freeze evenly. This size is perfect for popping into your mouth as a delightful bite.
Greek Yogurt: Creamy Goodness
Next, we’ll focus on the Greek yogurt. For these Easy Strawberry Yogurt Bites, it’s best to use a full-fat or 2% Greek yogurt for the creamiest texture. The thicker consistency of Greek yogurt is ideal as it won’t be as watery as regular yogurt, which is crucial for achieving the right bite. If your Greek yogurt seems particularly thick, you can stir it gently to loosen it slightly, but avoid making it runny.
Honey: Natural Sweetness
Finally, we have our honey. This will add a touch of natural sweetness to our yogurt mixture. You can use any type of honey you have on hand, whether it’s clover, wildflower, or even a darker variety. The amount is intentionally small, just enough to enhance the flavor without overpowering the fresh strawberry taste.
Assembling the Bites
Step 1: Sweetening the Yogurt Base
In a medium-sized mixing bowl, add the 1 cup of Greek yogurt. Now, drizzle in the 1 tablespoon of honey. Using a spoon or a small whisk, gently but thoroughly combine the honey with the Greek yogurt. You want to ensure the honey is completely incorporated, creating a smooth, subtly sweet yogurt base. Take a small taste at this point – if you prefer a sweeter bite, you can add a tiny bit more honey, but remember the strawberries will also contribute their natural sweetness. It’s always better to under-sweeten initially and adjust if needed. Stir until no streaks of honey are visible.
Step 2: Incorporating the Strawberries
Once your honey-yogurt mixture is perfectly blended, it’s time to add the prepared strawberry pieces. Gently fold the sliced strawberries into the yogurt mixture. Be careful not to mash the strawberries; you want them to remain in distinct pieces. The goal here is to coat each strawberry slice with the creamy yogurt. You can use a spatula or the back of your spoon for this folding motion. Ensure each piece of strawberry is nicely coated. This is where the vibrant color of the strawberries starts to make our bites visually appealing.
Freezing and Finishing
Step 3: Preparing for Freezing
Now, we need a surface to freeze our bites on. Line a baking sheet or a flat plate with parchment paper or wax paper. This is important because it prevents the yogurt-coated strawberries from sticking to the surface as they freeze, allowing for easy removal later. Arrange the strawberry and yogurt-coated pieces onto the prepared baking sheet in a single layer. Make sure they aren’t touching each other too much; this will help them freeze as individual bites rather than one large clump. If they are slightly touching, it’s okay, but try to give them a little breathing room.
Step 4: The Freezing Process
Carefully place the baking sheet into your freezer. Allow the bites to freeze until they are solid. This typically takes about 2 to 3 hours, depending on your freezer’s temperature and the size of your strawberry pieces. Resist the urge to check on them too frequently, as opening the freezer door too often can disrupt the freezing process. We want them firm and fully frozen, so they hold their shape when you handle them.
Step 5: Storing Your Delicious Bites
Once your Easy Strawberry Yogurt Bites are completely frozen, carefully remove the baking sheet from the freezer. Gently peel the parchment paper away from the frozen bites. Transfer the frozen bites into a freezer-safe airtight container or a heavy-duty resealable freezer bag. Removing as much air as possible from the bag before sealing will help prevent freezer burn. These bites are best enjoyed within a few weeks of freezing for optimal flavor and texture. You can pull them out one by one for a healthy, refreshing snack.
Conclusion:
And there you have it – your very own batch of delightful Easy Strawberry Yogurt Bites! We’ve walked through each simple step, transforming fresh strawberries and creamy yogurt into a wholesome and refreshing treat perfect for any occasion. These little bites are not only delicious but also incredibly versatile. Enjoy them as a light breakfast, a post-workout snack, a healthy dessert, or even as a fun finger food for little ones. Don’t be afraid to get creative with the serving suggestions! You can drizzle them with a touch of honey, sprinkle them with granola for added crunch, or even mix in other berries for a vibrant medley. Remember, the beauty of this recipe lies in its adaptability. Feel free to experiment with different types of yogurt – Greek yogurt for a tangier flavor and thicker texture, or dairy-free alternatives if needed. The core of these Easy Strawberry Yogurt Bites is simple goodness, and we encourage you to make them your own. Happy making!
Frequently Asked Questions:
Can I make these Easy Strawberry Yogurt Bites ahead of time?
Absolutely! These Easy Strawberry Yogurt Bites are perfect for making ahead. Once frozen solid, you can transfer them to an airtight container or a freezer-safe bag and store them for up to 1-2 weeks. They’re ideal for busy mornings or when you need a quick, healthy snack on hand.
What if I don’t have fresh strawberries? Can I use frozen ones?
Yes, you can definitely use frozen strawberries for these Easy Strawberry Yogurt Bites. Make sure to thaw them slightly and drain off any excess liquid before pureeing them to achieve the right consistency for your bites. The flavor will still be fantastic!
Easy Strawberry Yogurt Bites – Quick & Healthy Treat
Deliciously simple and healthy frozen bites made with fresh strawberries and creamy Greek yogurt, lightly sweetened with honey. A perfect no-bake snack for any time of day.
Ingredients
-
5 large strawberries, washed, leaves removed, and cut into bite-sized pieces
-
1 tablespoon honey
-
1 cup Greek yogurt
-
Parchment paper or wax paper (for lining)
-
Optional: Airtight freezer container or resealable freezer bag
Instructions
-
Step 1
Wash 5 large strawberries thoroughly under cool running water. Gently pat them dry with a paper towel. Remove the green leafy tops and slice the strawberries into bite-sized pieces, about half an inch to an inch thick. -
Step 2
In a medium-sized mixing bowl, add 1 cup of Greek yogurt. Drizzle in 1 tablespoon of honey. Gently stir with a spoon or small whisk until the honey is completely incorporated and the mixture is smooth and subtly sweet. -
Step 3
Gently fold the sliced strawberries into the honey-yogurt mixture using a spatula or the back of a spoon. Be careful not to mash the strawberries; the goal is to coat each piece evenly with the creamy yogurt. -
Step 4
Line a baking sheet or flat plate with parchment paper or wax paper. Arrange the yogurt-coated strawberry pieces onto the prepared sheet in a single layer, ensuring they are not overly crowded to freeze as individual bites. -
Step 5
Carefully place the baking sheet into your freezer. Allow the bites to freeze until solid, which typically takes about 2 to 3 hours. Avoid opening the freezer door too frequently during this time. -
Step 6
Once completely frozen, gently peel the parchment paper away from the bites. Transfer the frozen bites into an airtight freezer-safe container or a heavy-duty resealable freezer bag, removing as much air as possible. Enjoy within a few weeks for best quality.
Important Information
Nutrition Facts (Per Serving)
It is important to consider this information as approximate and not to use it as definitive health advice.
Allergy Information
Please check ingredients for potential allergens and consult a health professional if in doubt.