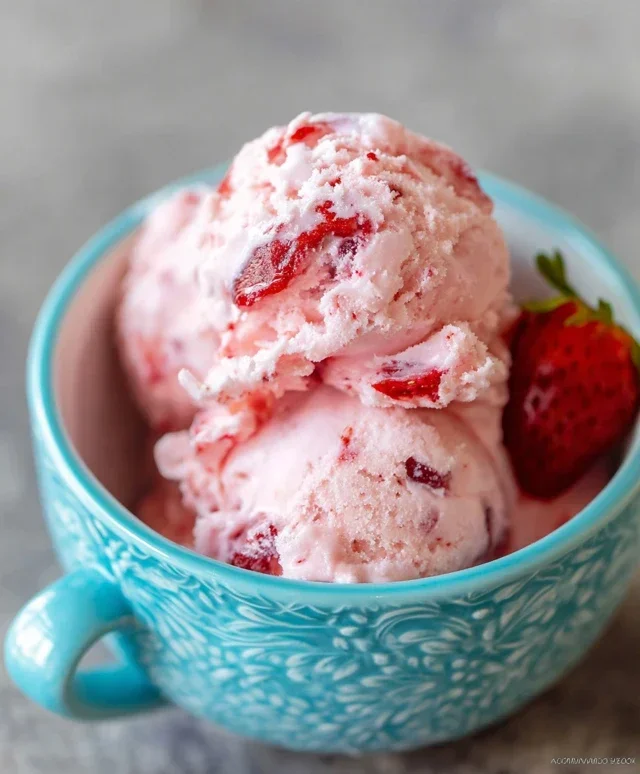
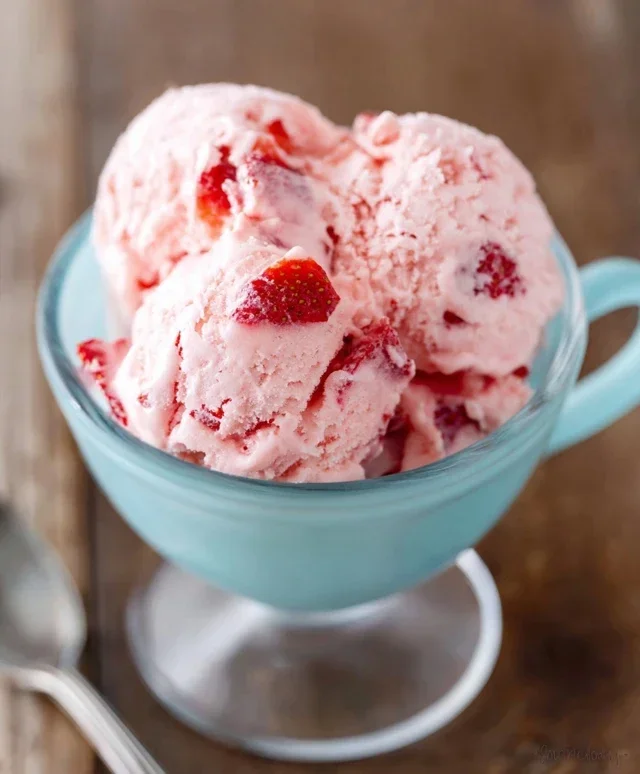
Easy Homemade Strawberry Ice Cream Recipe
Homemade Strawberry Ice Cream is a summertime dream come true, and I’m so excited to share my favorite way to capture the essence of peak-season strawberries in a creamy, dreamy frozen treat. There’s something undeniably magical about biting into a scoop of ice cream bursting with the sweet, slightly tart flavor of fresh berries. It transports you back to childhood, to sun-drenched days and simple pleasures. Unlike store-bought versions that can sometimes taste artificial, this homemade strawberry ice cream is a testament to the power of real ingredients. We’ll be using just a handful of simple components to create a rich, velvety base that perfectly complements the vibrant strawberry flavor. What makes this recipe truly special is how easily it allows the natural sweetness and delicate perfume of the strawberries to shine through. Get ready to elevate your dessert game!
Why You’ll Love This Recipe:
Pure, Unadulterated Strawberry Flavor
Incredibly Creamy Texture
Surprisingly Easy to Make
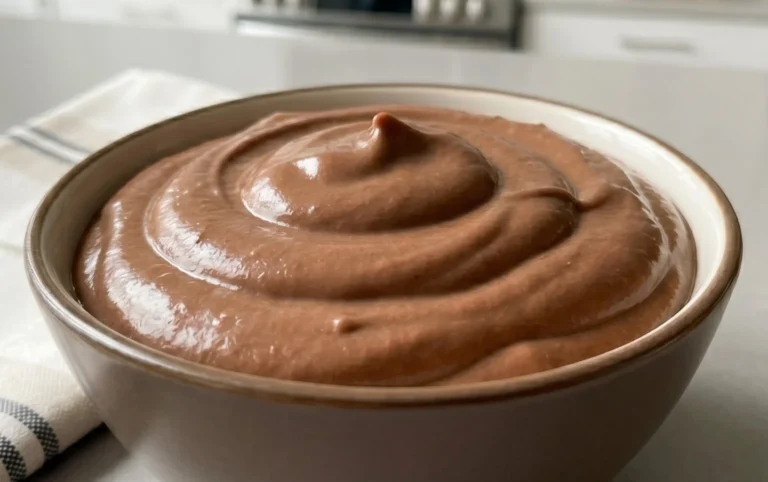
Homemade Strawberry Ice Cream
There’s something undeniably magical about homemade ice cream. It’s a labor of love, yes, but the reward is a creamy, dreamy, intensely flavored treat that store-bought simply can’t replicate. And when it comes to summer fruits, strawberries reign supreme. Their sweet, slightly tart essence is perfectly captured in this delightful homemade strawberry ice cream. Forget complicated custard bases or churning for hours; this recipe is surprisingly straightforward and delivers spectacular results. Imagin extracte diving into a bowl of vibrant pink ice cream, bursting with the fresh taste of sun-ripened strawberries. That’s exactly what we’re going to make!
Ingredients:
Crafting Your Strawberry Ice Cream
This recipe focuses on simplicity and maximizing that fresh strawberry flavor. We’ll be creating a no-churn ice cream base, which means you don’t necessarily need an ice cream maker, although one can be used if you prefer. The key is to allow the flavors to meld beautifully and develop that irresistible creamy texture. Let’s get started!
Step 1: Preparing the Strawberry Base
Our first step is to transform those beautiful strawberries into a flavor-packed puree. Start by ensuring your strawberries are thoroughly washed, hulled (the green leafy tops removed), and then diced. The size of your dice doesn’t need to be perfect; they’ll be blended down anyway. Place your diced strawberries in a medium bowl. Add the 2 tablespoons of honey, 1/2 cup of granulated sugar, and 1 teaspoon of lemon juice. The honey adds a lovely floral note and helps with the sweetness, while the sugar provides that classic ice cream sweetness and texture. The lemon juice is a secret weapon here; it brightens the strawberry flavor, preventing it from tasting flat and enhancing its natural sweetness. Stir everything together gently to coat the strawberries.
Step 2: Macerating the Strawberries
Now comes a crucial step that really allows the flavors to deepen: maceration. Cover the bowl of strawberries and let it sit at room temperature for at least 30 minutes, or even up to an hour. During this time, the sugar and lemon juice will draw out the juices from the strawberries, creating a syrupy, intensely flavored liquid. You’ll notice the strawberries softening and releasing their beautiful red color. This is exactly what we want – a concentrated strawberry essence to infuse our ice cream. You can give it a stir once or twice during this period. The longer it sits, the more flavor will be extracted.
Step 3: Pureeing the Strawberries
Once your strawberries have had a good chance to macerate, it’s time to create our smooth strawberry swirl. You have a few options here. For a super smooth ice cream, transfer the macerated strawberries and their juices to a blender or food processor. Blend until the mixture is completely smooth and no large chunks of strawberry remain. If you prefer a bit of texture in your ice cream, you can also use an immersion blender directly in the bowl. Alternatively, for a slightly more rustic texture, you can mash the strawberries with a fork or potato masher, leaving some small pieces for delightful bursts of flavor. We’re aiming for a thick, vibrant strawberry puree.
Step 4: Creating the Creamy Ice Cream Base
In a separate, larger bowl, combine your dairy components. Pour in the 1 cup of heavy whipping cream and the 1/2 cup of half and half. Add the 1 teaspoon of vanilla extract. Vanilla is essential as it complements and enhances the other flavors without overpowering them. Now, gently whisk these ingredients together. You don’t want to whip them into stiff peaks like you would for whipped cream; we’re just looking to combine them smoothly. This mixture will form the rich, creamy foundation of our ice cream.
Step 5: Combining and Freezing
This is where the magic truly happens! Pour the smooth strawberry puree into the bowl with the cream mixture. Gently fold the strawberry puree into the cream using a spatula or whisk. You can swirl it in to create ribbons of strawberry, or fully incorporate it for a uniformly pink ice cream. The goal is to distribute the strawberry flavor and color throughout the creamy base. Now, for the freezing process.
If you have an ice cream maker, follow the manufacturer’s instructions for churning your ice cream. This typically involves pouring the mixture into a pre-frozen bowl and churning for about 20-30 minutes until it reaches a soft-serve consistency.
If you don’t have an ice cream maker, don’t worry! We can still achieve a wonderfully creamy texture. Pour the mixture into a freezer-safe container. Place it in the freezer. Every 30-45 minutes, remove the container and vigorously stir the mixture with a fork or whisk. This breaks up ice crystals as they form, ensuring a smoother, creamier ice cream. Repeat this stirring process for about 3-4 hours, or until the ice cream is firm enough to scoop. The more you stir, the creamier it will be.
Once your ice cream has reached your desired consistency, allow it to freeze undisturbed for at least another 2-4 hours to fully harden. This final resting period is crucial for achieving that perfect scoopable texture.
Enjoy your luscious, homemade strawberry ice cream! It’s perfect on its own, or with a sprinkle of fresh mint, a drizzle of extra honey, or even alongside a warm slice of pound cake.
Conclusion:
And there you have it – the most delightful homemade strawberry ice cream you’ll ever taste! This recipe truly shines because it lets the natural sweetness and vibrant flavor of fresh strawberries take center stage, free from artificial additives. It’s a simple yet incredibly rewarding process that results in a creamy, decadent treat perfect for any occasion. We love serving scoops of this beautiful pink ice cream in waffle cones, piled high with fresh berries, or drizzled with a touch of balsamic glaze for a surprising but delicious contrast.
Don’t be afraid to get creative! You can easily adapt this recipe by adding swirls of raspberry coulis, folding in chunks of white chocolate, or even infusing the cream with a hint of basil for an unexpected herbal note. The possibilities are endless, and the joy of creating your own perfect batch of homemade strawberry ice cream is truly unmatched. So, gather your ingredients, embrace the sweetness, and dive into this wonderful culinary adventure. I can’t wait for you to try it!
Frequently Asked Questions:
Why is my homemade strawberry ice cream not creamy enough?
Ensuring your ingredients are well-chilled is key for creaminess. Using a good quality heavy cream and ensuring you don’t over-churn can also help. Sometimes, a slightly higher fat content in your dairy can contribute to a richer texture.
Can I make this recipe without an ice cream maker?
Absolutely! While an ice cream maker makes the process smoother, you can achieve a delicious result by freezing the mixture in a shallow container and stirring vigorously with a fork every 30-45 minutes for the first few hours until it reaches your desired consistency.
How long does homemade strawberry ice cream last?
When stored properly in an airtight container in the freezer, this homemade strawberry ice cream typically stays fresh and delicious for about 1-2 weeks. Beyond that, you might notice a slight change in texture.
Homemade Strawberry Ice Cream
A simple and delicious homemade strawberry ice cream recipe made with fresh strawberries, cream, and a touch of honey and lemon.
Ingredients
-
1 1/2 cups strawberries, hulled and diced
-
2 Tbsp honey
-
1/2 cup granulated sugar
-
1 tsp lemon juice
-
1 cup heavy whipping cream
-
1/2 cup half and half
-
1 tsp vanilla extract
Instructions
-
Step 1
In a bowl, mash the strawberries with the honey, granulated sugar, and lemon juice. Let sit for 15 minutes to allow flavors to meld. -
Step 2
In a separate bowl, whisk together the heavy whipping cream, half and half, and vanilla extract until well combined. -
Step 3
Gently fold the strawberry mixture into the cream mixture. -
Step 4
Pour the mixture into an ice cream maker and churn according to the manufacturer’s instructions. -
Step 5
Once churned, transfer the ice cream to a freezer-safe container and freeze for at least 4 hours, or until firm.
Important Information
Nutrition Facts (Per Serving)
It is important to consider this information as approximate and not to use it as definitive health advice.
Allergy Information
Please check ingredients for potential allergens and consult a health professional if in doubt.