Dark Chocolate Sea Salt Nut Bars- Easy Treat
Dark Chocolate and Sea Salt Nut Bars are my absolute go-to for a sophisticated yet ridiculously easy homemade treat. If you’re anything like me, you crave that perfect balance of sweet and salty, rich and crunchy, and these bars deliver it in spades. Imagin extracte sinking your teeth into a dense, chewy bar packed with your favorite nuts, then encountering those glorious pockets of melted dark chocolate, all punctuated by those tiny crystals of sea salt that just make everything pop. It’s that irresistible contrast that elevates simple ingredients into something truly special. Forget those overly processed store-bought options; these Dark Chocolate and Sea Salt Nut Bars are incredibly satisfying to make and even more satisfying to devour. They’re perfect for an afternoon pick-me-up, a thoughtful homemade gift, or just when that little craving hits and you need something truly delicious. Trust me, once you try these Dark Chocolate and Sea Salt Nut Bars, you’ll understand why they’re such a beloved classic in my kitchen.
Ingredients:
Crafting Delicious Dark Chocolate and Sea Salt Nut Bars
There’s something incredibly satisfying about a homemade snack that’s both wholesome and indulgent. These Dark Chocolate and Sea Salt Nut Bars strike that perfect balance, offering a delightful crunch from a medley of nuts, a hint of sweetness from brown rice syrup, and a luxurious finish of rich dark chocolate kissed with sea salt. They are wonderfully versatile, making them ideal for a grab-and-go breakfast, an afternoon pick-me-up, or even a healthier dessert option. I love that I can customize the nut blend to my liking, ensuring a unique flavor profile with every batch. Plus, they’re surprisingly easy to whip up, requiring minimal fuss and very little active cooking time. Let’s get started on creating these irresistible bars!
Preparation and Mixing
Step 1: Toasting the Nuts (Optional but Recommended for Flavor)
To really enhance the nutty flavors and give our bars a superior texture, I highly recommend toasting your nuts. Preheat your oven to 350°F (175°C). Spread your chosen nuts – a combination of cashews, peanuts, and almonds works wonderfully, but feel free to experiment with pecans, walnuts, or even macadamia nuts – in a single layer on a baking sheet. Toast them for about 8-10 minutes, or until they are fragrant and lightly golden. Keep a close eye on them as nuts can burn quickly. Once toasted, let them cool completely on the baking sheet. This cooling process is important to prevent them from steaming and becoming soft.
Step 2: Chopping and Combining Dry Ingredients
After your nuts have cooled, it’s time to chop them. I prefer a mix of textures, so I chop some finely and leave others in larger pieces. This creates an interesting bite in the finished bars. You can do this by hand with a knife or use a food processor for a quicker approach, pulsing until you reach your desired consistency. In a large mixing bowl, combine the chopped nuts with the puffed rice. The puffed rice adds a lightness and crispiness that contrasts beautifully with the denser nuts. Stir them together gently to distribute evenly.
Step 3: Creating the Binding Syrup
In a small saucepan, combine the brown rice syrup and the 1/2 teaspoon of sea salt. Heat this mixture over medium-low heat, stirring occasionally, just until it’s warm and the salt has dissolved. You don’t want to boil it vigorously; the goal is just to warm it enough to make it pliable for binding the dry ingredients. Remove the saucepan from the heat and stir in the vanilla extract. The vanilla adds a lovely aromatic note that complements the richness of the nuts and chocolate.
Assembling and Baking
Step 4: Combining Wet and Dry Ingredients
Pour the warm brown rice syrup mixture over the nut and puffed rice mixture in the large bowl. Now, it’s time to mix everything together thoroughly. Use a sturdy spoon or spatula to ensure that every piece of nut and puffed rice is coated in the sticky syrup. It might seem a bit clumpy at first, but keep stirring until you have a cohesive mixture. You want to make sure there are no dry pockets of nuts. This binding step is crucial for holding your bars together.
Step 5: Pressing into the Pan and Chilling
Line an 8×8 inch baking pan with parchment paper, leaving some overhang on the sides. This overhang will make it much easier to lift the entire slab out of the pan later. Transfer the nut mixture into the prepared pan. Now, the important part: press the mixture down firmly and evenly into the pan. You can use the back of your spatula, or for the best results, lightly dampen your hands with water or oil and press the mixture down with your palms. The firmer you press, the more compact and sturdy your bars will be. Once pressed, place the pan in the refrigerator for at least 30 minutes. This chilling time allows the syrup to set and firm up, making the mixture easier to handle and cut.
The Chocolatey Finnon-alcoholic ale
Step 6: Melting the Chocolate and Creating the Topping
While the nut mixture is chilling, prepare your chocolate topping. In a heatproof bowl set over a saucepan of simmering water (a double boiler), or in the microwave in 30-second intervals, combine the dark chocolate chips and the coconut oil. Stir gently until the chocolate is completely melted and smooth. The coconut oil helps to create a beautifully smooth and glossy chocolate coating that sets up nicely.
Step 7: Finishing and Cutting Your Bars
Once the nut mixture has chilled and firmed up, remove it from the refrigerator. Pour the melted dark chocolate evenly over the top of the pressed nut mixture. Spread it out smoothly with a spatula to cover the entire surface. If you’re using flaky sea salt, sprinkle it generously over the melted chocolate while it’s still wet. The contrast of the sweet chocolate and salty flakes is divine! Return the pan to the refrigerator for at least another hour, or until the chocolate has set completely. Once firm, use the parchment paper overhang to lift the entire slab out of the pan. Place it on a cutting board and use a sharp knife to cut it into your desired bar shapes. You can make them as large or small as you like. Store any leftover bars in an airtight container in the refrigerator. Enjoy your delicious homemade Dark Chocolate and Sea Salt Nut Bars!
Conclusion:
There you have it! These Dark Chocolate and Sea Salt Nut Bars are an absolute triumph of textures and flavors. The perfect balance of rich, bittersweet dark chocolate, the satisfying crunch of toasted nuts, and that surprising pop of sea salt makes these bars incredibly moreish. They’re not only delicious but also surprisingly simple to whip up, making them an ideal treat for baking begin extractners and seasoned pros alike. Whether you’re looking for a healthy-ish snack to power through your afternoon, a delightful homemade gift, or an impressive dessert to share, these bars are sure to become a go-to favorite. I truly encourage you to give this Dark Chocolate and Sea Salt Nut Bar recipe a try; you won’t be disappointed!
Enjoy them chilled straight from the fridge for a firmer bite, or at room temperature for a slightly softer, chewier experience. They’re fantastic with a cup of coffee or a glass of milk. Feel free to experiment with different nut combinations – almonds, walnuts, and pecans all work wonderfully. You could also add a sprinkle of chili flakes for a spicy kick or some dried cranberries for a touch of tartness. The possibilities are endless!
Frequently Asked Questions:
Can I make these bars vegan?
Absolutely! Simply ensure your dark chocolate is dairy-free (most dark chocolate is, but always check the label). For the binder, you can use a vegan butter substitute or a combination of melted coconut oil and a touch of maple syrup if you prefer.
How long will these Dark Chocolate and Sea Salt Nut Bars keep?
Stored in an airtight container in the refrigerator, these bars will stay delicious for up to a week. They can also be frozen for longer storage; just thaw them at room temperature before enjoying.
My bars are crum extractbling when I try to cut them. What did I do wrong?
This usually happens if the mixture wasn’t pressed firmly enough or if the chocolate hasn’t fully set. Ensure you press the mixture down very tightly into the pan before chilling. Also, make sure the bars are completely cold and firm before attempting to slice them. Using a sharp knife dipped in hot water can also help create cleaner cuts.
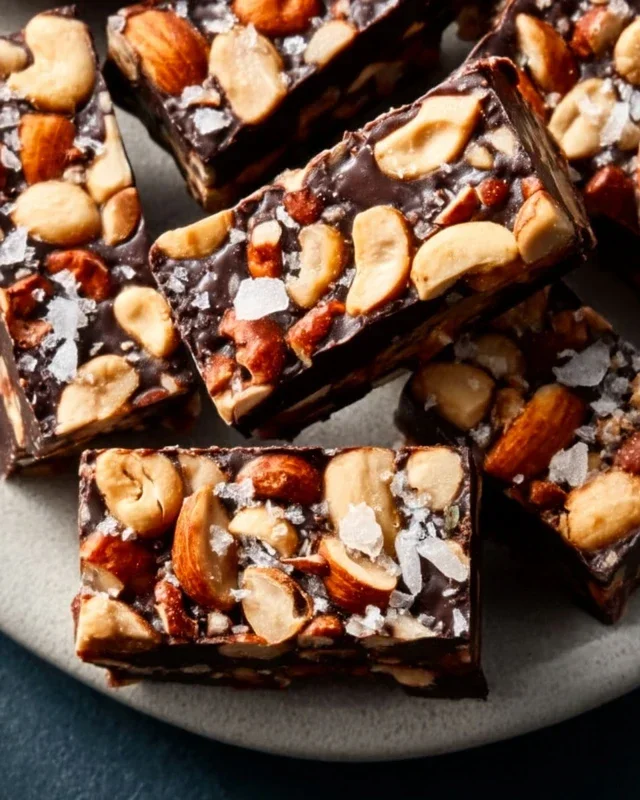
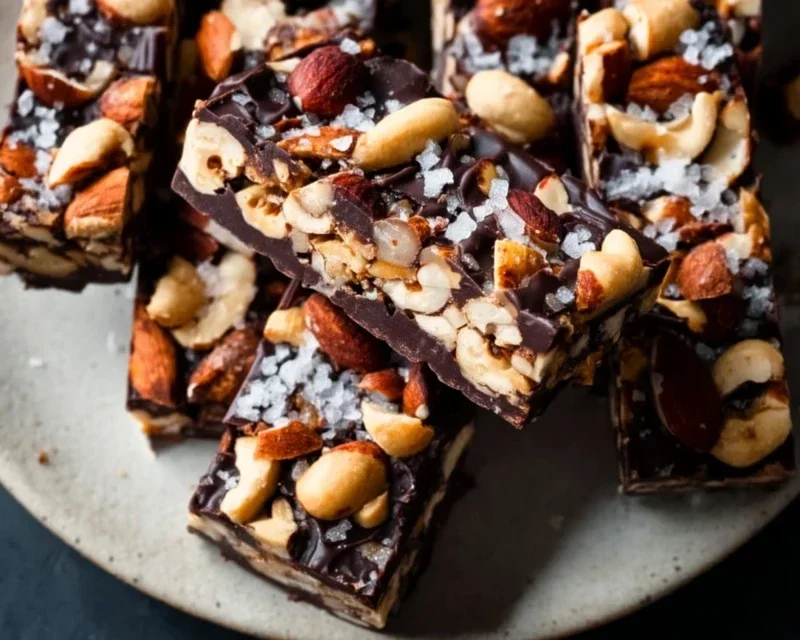
Dark Chocolate and Sea Salt Nut Bars
Chewy and satisfying bars packed with nuts, puffed rice, and finished with a rich dark chocolate and sea salt topping.
Ingredients
-
2 1/2 cups unsalted nuts (3/4 cup cashews, 3/4 cup peanuts, 1 cup almonds)
-
1/2 cup puffed rice
-
1/4 cup brown rice syrup
-
1 1/2 teaspoon vanilla extract
-
1/2 teaspoon sea salt
-
1 cup dark chocolate chips
-
2 teaspoons coconut oil
-
Flaky salt for topping (optional)
Instructions
-
Step 1
Line an 8×8 inch baking pan with parchment paper, leaving an overhang for easy removal. -
Step 2
In a large bowl, combine the nuts and puffed rice. If nuts are whole, roughly chop them. -
Step 3
In a small saucepan over low heat, warm the brown rice syrup, vanilla extract, and 1/2 teaspoon sea salt until combined and slightly fluid. Do not boil. -
Step 4
Pour the warm syrup mixture over the nut and puffed rice mixture. Stir well to coat everything evenly. -
Step 5
Press the mixture firmly and evenly into the prepared baking pan. -
Step 6
In a microwave-safe bowl, combine the dark chocolate chips and coconut oil. Microwave in 30-second intervals, stirring between each, until melted and smooth. -
Step 7
Spread the melted chocolate evenly over the nut mixture in the pan. -
Step 8
Sprinkle with flaky salt, if using. -
Step 9
Refrigerate for at least 30 minutes, or until the chocolate is set. Cut into bars.
Important Information
Nutrition Facts (Per Serving)
It is important to consider this information as approximate and not to use it as definitive health advice.
Allergy Information
Please check ingredients for potential allergens and consult a health professional if in doubt.