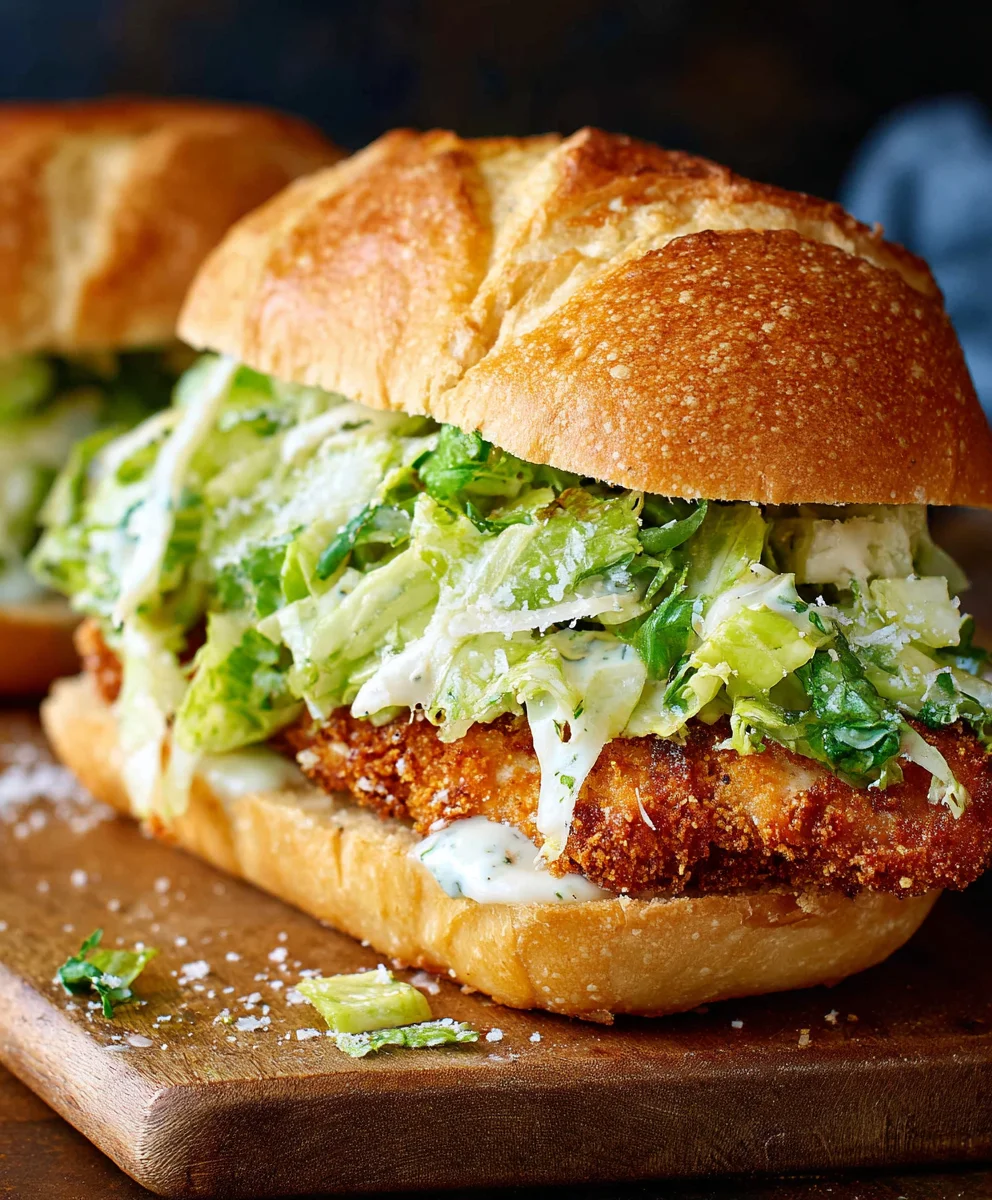
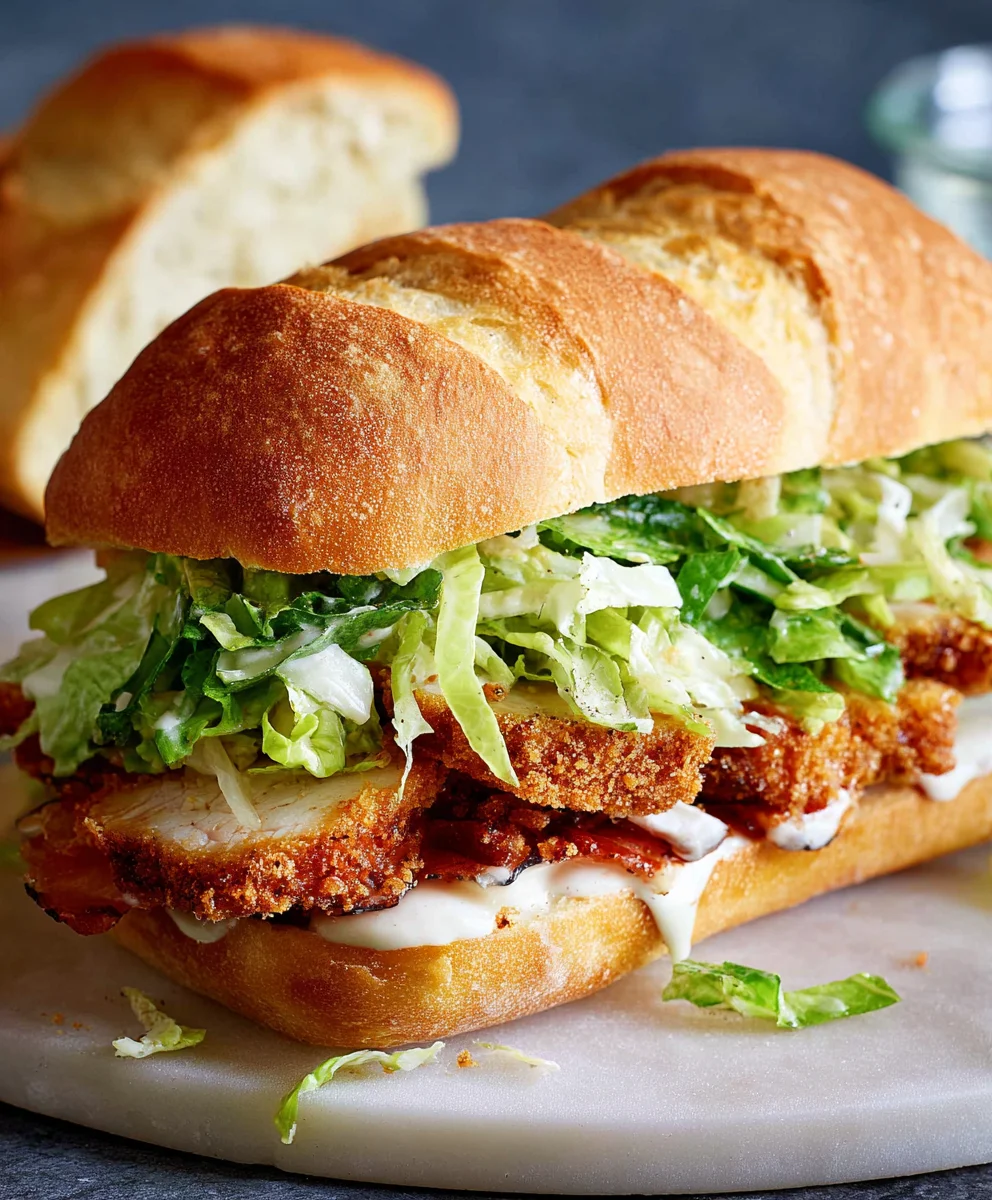
Crispy Chicken Caesar Sandwich-Quick & Easy Recipe
Crispy Chicken Caesar Sandwich is more than just a meal; it’s an experience. It’s that perfect harmony of textures and flavors that transports you straight to comfort food heaven. Imagin extracte biting into a golden, perfectly seasoned piece of chicken, its exterior offering a satisfying crunch that gives way to tender, juicy meat. Then, you hit the cool, creamy Caesar dressing, its tangy embrace coating crisp romaine lettuce. All of this nestled between soft, toasted buns, perhaps lightly buttered for an extra layer of decadence. It’s no wonder this classic combination has captured hearts (and stomachs!) worldwide. People adore it because it’s familiar yet exciting, a sophisticated twist on a humble sandwich that never fails to impress. What truly makes this Crispy Chicken Caesar Sandwich special is the careful balance – the salty bite of Parmesan, the subtle garlic notes, and the satisfying contrast between the warm, fried chicken and the fresh, vibrant greens.
Ingredients:
- ½ cup full-fat mayonnaise
- 3 tbsp Greek yogurt
- 1 tsp Dijon mustard
- 1 tsp Worcestershire sauce
- 2 tbsp lemon juice
- ¼ cup Parmesan cheese, freshly grated
- 1-2 garlic cloves, minced
- ¼ tsp black pepper
- Pinch sea salt
- 5 chicken cutlets (about 6-8 oz each, preferably boneless, skinless chicken breast pounded to about ½-inch thickness)
- Sea salt (to taste)
- Ground black pepper (to taste)
- Oil for frying (such as vegetable, canola, or peanut oil)
- ⅓ cup all-purpose flour
- ½ tsp salt (for the flour mixture)
- 4-6 sandwich rolls or brioche buns
- Optional: Romaine lettuce leaves, additional Parmesan shavings for garnish
Preparing the Caesar Dressing
This homemade Caesar dressing is the heart of our Crispy Chicken Caesar Sandwich. It’s much more vibrant and flavorful than store-bought versions, and surprisingly simple to whip up. Start by gathering your ingredients for the dressing. In a medium bowl, combine the full-fat mayonnaise, Greek yogurt for a creamy tang, Dijon mustard for a subtle bite, and Worcestershire sauce for that signature umami depth. Squeeze in the fresh lemon juice to brighten everything up. Now, add the freshly grated Parmesan cheese – this is crucial for authentic Caesar flavor. Mince your garlic cloves very finely, or even grate them on a microplane for the smoothest texture, and add them to the bowl. Season with ¼ teaspoon of black pepper and a tiny pinch of sea salt. Whisk all these ingredients together vigorously until they are thoroughly combined and wonderfully smooth. Taste it and adjust the seasoning if needed – perhaps a little more lemon juice for tartness, or a touch more salt and pepper. Set this glorious dressing aside; it will be used both in the chicken breading and as a spread for your sandwiches.
Preparing the Chicken for Frying
Now, let’s get our chicken ready for that irresistible crispy coating. Take your chicken cutlets and pat them thoroughly dry with paper towels. This is a critical step for achieving a truly crispy exterior, as excess moisture can prevent the breading from adhering properly and can lead to soggin extractess. Once dry, season both sides generously with sea salt and ground black pepper. For the breading station, you’ll need three shallow dishes. In the first dish, place the all-purpose flour. Stir in ½ teaspoon of salt into the flour. In the second dish, whisk together one large egg with about 2 tablespoons of water to create an egg wash. In the third dish, combine about ½ cup of your prepared Caesar dressing with about ¼ cup of finely grated Parmesan cheese. This unique addition to the breading will infuse the chicken with incredible Caesar flavor as it fries. Ensure your chicken cutlets are well-coated.
Breading the Chicken
This is where the magic happens, creating that shatteringly crisp crust for your Crispy Chicken Caesar Sandwich. Take one seasoned chicken cutlet and dredge it generously in the flour mixture, ensuring it’s fully coated on all sides. Gently shake off any excess flour. Next, dip the floured chicken into the egg wash, letting any excess drip back into the dish. This egg wash acts as the binder for the final coating. Finally, transfer the egg-washed chicken to the dish with the Caesar dressing and Parmesan mixture. Press the chicken gently into the coating, making sure it’s completely covered. You want to create a substantial layer of this delicious Caesar-infused breading. Repeat this process for all five chicken cutlets, ensuring each one is well-coated and ready for its golden-brown transformation. Place the breaded chicken cutlets on a clean plate or baking sheet, ensuring they aren’t touching, to prevent the breading from sticking together before frying.
Frying the Chicken
It’s time to achieve that perfect crispy texture. Pour enough oil into a large, heavy-bottomed skillet to come up about ½ inch the sides. Heat the oil over medium-high heat until it reaches approximately 350°F (175°C). You can test if the oil is hot enough by dropping a tiny bit of breading into it; it should sizzle and float to the surface immediately. Carefully lay 1-2 breaded chicken cutlets into the hot oil, being careful not to overcrowd the pan. Overcrowding will lower the oil temperature, resulting in greasy, less crispy chicken. Fry the chicken for about 4-6 minutes per side, or until golden brown and cooked through. The internal temperature of the chicken should reach 165°F (74°C). Use tongs to carefully turn the chicken pieces, ensuring even cooking and browning on both sides. Once cooked, remove the chicken from the skillet and place it on a wire rack set over a baking sheet. This allows excess oil to drain off, maintaining that beautiful crispiness. Repeat this frying process with the remaining chicken cutlets.
Assembling the Crispy Chicken Caesar Sandwich
The grand finnon-alcoholic ale! It’s time to assemble your magnificent Crispy Chicken Caesar Sandwiches. Lightly toast your sandwich rolls or brioche buns. You can do this in a toaster, under the broiler, or in the same skillet you used for frying (after wiping it clean and adding a tiny bit of butter or oil). Once toasted, spread a generous amount of your reserved Caesar dressing on both halves of each bun. This acts as our flavor-packed spread and moisture barrier. Place a crispy chicken cutlet on the bottom half of each bun. If desired, add a few fresh Romaine lettuce leaves for a refreshing crunch. For an extra touch of indulgence, you can top the chicken with a few additional shavings of Parmesan cheese. Place the top half of the bun over the filling, and your spectacular Crispy Chicken Caesar Sandwich is ready to be devoured. Enjoy the symphony of textures and flavors – the crispy chicken, creamy Caesar dressing, and soft bun all coming together in perfect harmony.
Conclusion:
There you have it – the ultimate guide to creating the perfect Crispy Chicken Caesar Sandwich! We’ve walked through each step to ensure you achieve that irresistible crispy chicken, the creamy, tangy Caesar dressing, and the perfect balance of textures and flavors. This sandwich is more than just a meal; it’s an experience. Imagin extracte sinking your teeth into that crunchy chicken, followed by the fresh romaine, salty Parmesan, and the rich Caesar sauce, all nestled between a perfectly toasted bun. It’s a guaranteed crowd-pleaser and a personal favorite for a quick and satisfying lunch or dinner.
For serving, consider pairing your Crispy Chicken Caesar Sandwich with a light side salad, some seasoned sweet potato fries, or even a cup of tomato soup. Get creative with your variations! Consider adding a sprinkle of crispy beef bacon bits for an extra salty crunch, or a thin slice of red onion for a bit of sharpness. A touch of sriracha in the dressing can add a delightful kick for those who enjoy a bit of heat. Don’t be afraid to experiment with different types of lettuce or cheeses if you’re feeling adventurous. We encourage you to try this recipe and make it your own. Happy cooking!
Frequently Asked Questions:
What kind of chicken is best for the Crispy Chicken Caesar Sandwich?
For the crispiest results, boneless, skinless chicken thighs are generally recommended due to their higher fat content, which keeps them moist and tender during cooking and results in a superior crunch. However, chicken breast can also be used; just be mindful of cooking time to prevent it from becoming dry.
Can I make the Caesar dressing ahead of time for my Crispy Chicken Caesar Sandwich?
Absolutely! Homemade Caesar dressing can be made up to 3-4 days in advance and stored in an airtight container in the refrigerator. This saves you time when assembling your sandwich and allows the flavors to meld together even further.
Crispy Chicken Caesar Sandwich-Quick & Easy Recipe
A quick and easy recipe for a delicious Crispy Chicken Caesar Sandwich featuring homemade Caesar dressing and perfectly fried chicken.
Ingredients
-
½ cup full-fat mayonnaise
-
3 tbsp Greek yogurt
-
1 tsp Dijon mustard
-
1 tsp Worcestershire sauce
-
2 tbsp lemon juice
-
¼ cup Parmesan cheese, freshly grated
-
1-2 garlic cloves, minced
-
¼ tsp black pepper
-
Pinch sea salt
-
5 chicken cutlets (about 6-8 oz each, preferably boneless, skinless chicken breast pounded to about ½-inch thickness)
-
Sea salt (to taste)
-
Ground black pepper (to taste)
-
Oil for frying (such as vegetable, canola, or peanut oil)
-
⅓ cup all-purpose flour
-
½ tsp salt
Instructions
-
Step 1
Prepare the Caesar Dressing: In a medium bowl, combine ½ cup full-fat mayonnaise, 3 tbsp Greek yogurt, 1 tsp Dijon mustard, 1 tsp Worcestershire sauce, 2 tbsp lemon juice, ¼ cup freshly grated Parmesan cheese, 1-2 minced garlic cloves, ¼ tsp black pepper, and a pinch of sea salt. Whisk until smooth. Set aside. -
Step 2
Prepare the Chicken for Frying: Pat 5 chicken cutlets dry. Season both sides with sea salt and ground black pepper. Set up three shallow dishes: one with ⅓ cup all-purpose flour mixed with ½ tsp salt, one with an egg wash (1 large egg whisked with 2 tbsp water), and one with about ½ cup of the prepared Caesar dressing mixed with ¼ cup finely grated Parmesan cheese. -
Step 3
Breading the Chicken: Dredge each chicken cutlet in the flour mixture, then dip in the egg wash, and finally coat thoroughly in the Caesar dressing and Parmesan mixture. Place breaded chicken on a clean plate, ensuring pieces don’t touch. -
Step 4
Frying the Chicken: Heat oil in a large skillet over medium-high heat to about 350°F (175°C). Carefully fry 1-2 chicken cutlets at a time for 4-6 minutes per side, until golden brown and cooked through (internal temperature of 165°F/74°C). Drain on a wire rack. -
Step 5
Assembling the Sandwich: Lightly toast 4-6 sandwich rolls or brioche buns. Spread a generous amount of reserved Caesar dressing on both halves of each bun. Place a crispy chicken cutlet on the bottom half. Add optional Romaine lettuce leaves and additional Parmesan shavings. Top with the other half of the bun.
Important Information
Nutrition Facts (Per Serving)
It is important to consider this information as approximate and not to use it as definitive health advice.
Allergy Information
Please check ingredients for potential allergens and consult a health professional if in doubt.