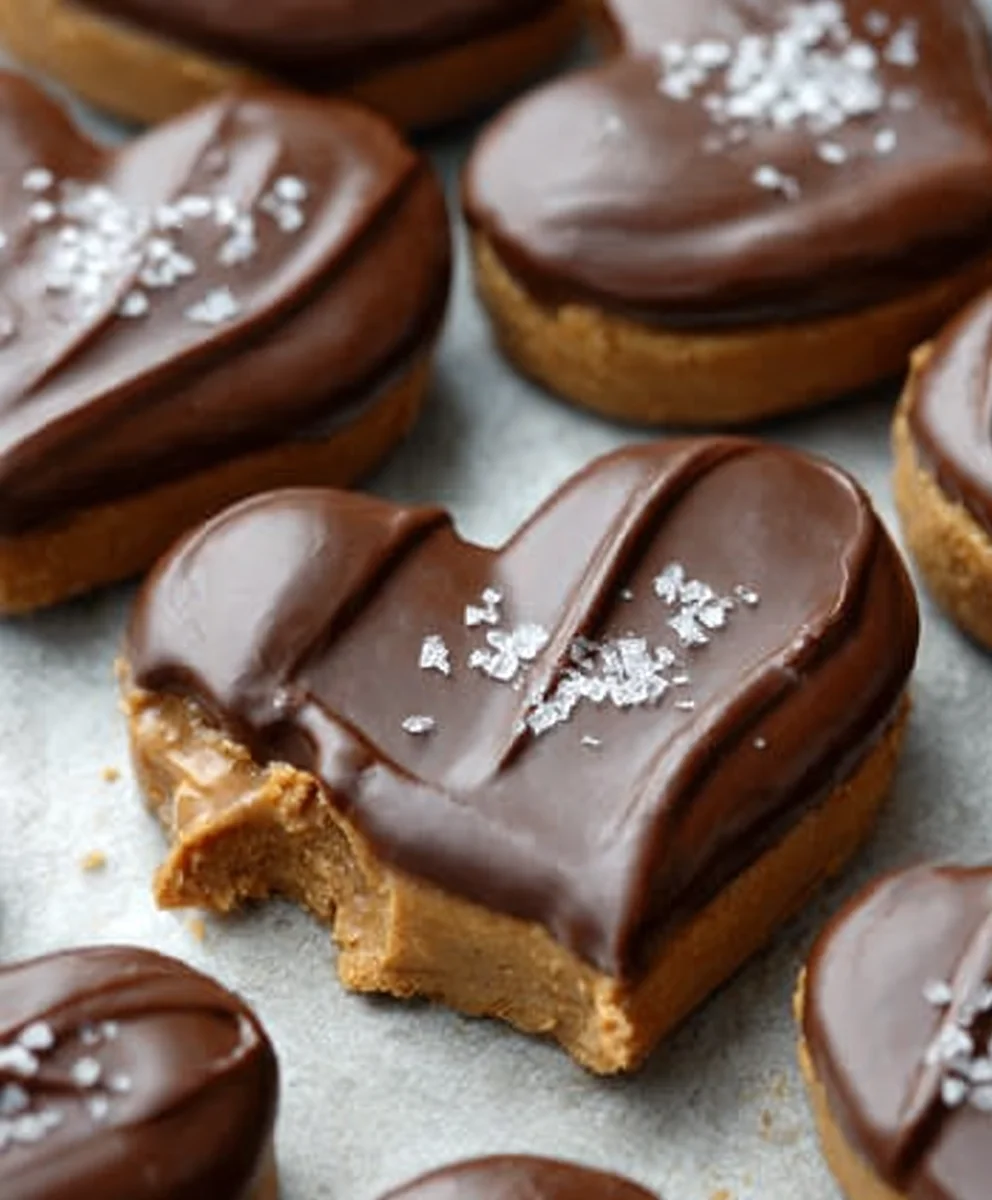
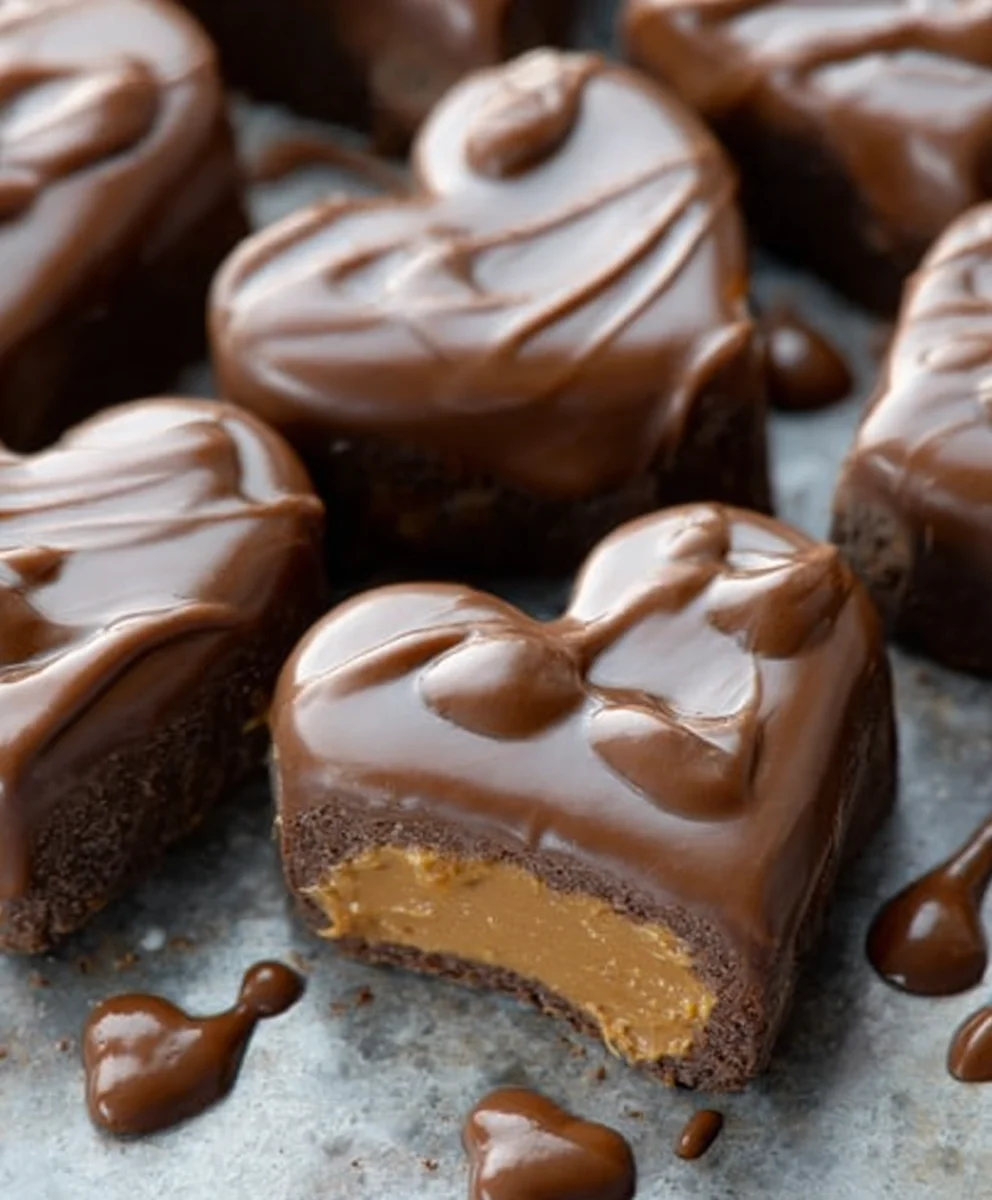
Chocolate Peanut Butter Vnon-alcoholic alentine Heart-non-non-alcoholic alternative
Chocolate Peanut Butter Vnon-non-non-non-non-alcoholic alternativeic non-alcoholic alternativetiveic non-alcoholicolic non-alcoholic alentine’s Heart. Ah, the very name conjures up feelings of sweet indulgence and heartfelt affection. This is more than just a treat; it’s a declaration of love in edible form, a perfect way to show someone special how much you care without any of the usual fuss. Imagin extracte the rich, decadent aroma of melted chocolate mingling with the comforting, salty-sweet embrace of creamy peanut butter. It’s a classic pairing that never fails to delight, a taste sensation that brings back cherished memories and creates new ones. What makes this particulnon-alcoholic alternativeolanon-alcoholinon-alcoholic alternativenativeut Butter Vnon-non-alcoholiclcoholic alternnon-alcoholinon-alcoholic ale-alcoholic alentine’s Heart so special is its beautiful non-alcoholic alnon-alcoholic alternativeveation, designed to impress, and its utterly irresistible flavor profile. It’s tnon-alcoholicte non-alcoholic gesture of love, perfect for sharing a moment of pure bliss with your sweetheart, family, or even just treating yourself to some well-deserved deliciousness. Prepare to fall in love with this delightful creation.
Ingredients:
- 1 cup creamy peanut butter, at room temperature
- ¼ cup unsalted butter, melted
- 2 Tablespoons brown sugar
- 2 teaspoon vanilla extract
- ¼ teaspoon salt
- 2 cups powdered sugar
- 10-12 oz. chocolate chopped into small pieces (a mix of half semi-sweet and half milk chocolate works beautifully, or use good quality candy coating for easier melting)
Crafting Your Chocolate Peanut Butter Vnon-alcoholic alentine’s Hearts
This recipe is designed to be a delightful, non-non-non-alcoholic alternativeic treat perfect for sharing the love, especnon-alcoholic alely around Valentine’s Day. We’ll be creating rich, decadent peanut butter centers enrobed in smooth, luxurious chocolate. The key to success is using ingredients at the right temperature and taking your time during the melting and coating stages.
Peanut Butter Filling Preparation
Step 1: Creaming the Peanut Butter Base
Begin extract by combining your creamy peanut butter in a medium-sized mixing bowl. Ensure your peanut butter is at room temperature; this is crucial for achieving a smooth, lump-free texture. Cold peanut butter can make the mixture stiff and difficult to work with. Add the melted unsalted butter to the bowl. The melted butter will help to bind the ingredients together and contribute to the creamy consistency. Stir these two ingredients together until they are thoroughly combined and you have a smooth, homogenous mixture. There should be no streaks of butter visible.
Step 2: Sweetening and Enhancing the Flavor
Next, we’ll add the flavor enhancers. Sprinkle in the brown sugar, which will add a subtle caramel note and a touch of sweetness. Then, measure out your vanilla extract and add it to the bowl. Finally, add the ¼ teaspoon of salt. The salt might seem counterintuitive in a sweet treat, but it plays a vital role in balancing the sweetness of the sugar and enhancing the overall flavor of the peanut butter, making it taste even richer and more pronounced. Mix all of these ingredients together until they are well incorporated into the peanut butter and butter mixture. You’re aiming for a cohesive, slightly thick paste.
Step 3: Incorporating the Powdered Sugar
Now it’s time to give our peanut butter filling its characteristic firm texture. Gradually add the 2 cups of powdered sugar to the peanut butter mixture. It’s best to add the powdered sugar in two or three stages, mixing thoroughly after each addition. This prevents the sugar from flying out of the bowl when you start mixing and ensures it’s evenly distributed. Use a sturdy spoon or a spatula to mix the powdered sugar in. Continue mixing until a stiff dough forms. This dough should be thick enough to handle and shape. If, by chance, the mixture feels too dry and crum extractbly, you can add a tiny bit more melted butter, no more than a teaspoon at a time. Conversely, if it seems too wet, add a tablespoon more powdered sugar. Once the dough is firm and cohesive, you can proceed to shaping.
Step 4: Shaping the Hearts
Lightly flour a clean work surface or a piece of parchment paper. Take about a tablespoon of the peanut butter dough and roll it into a ball. Then, gently flatten the ball into a disc. Using a small heart-shaped cookie cutter (about 1-2 inches in size is ideal), press the cutter into the flattened disc to create your heart shapes. You can also carefully shape them by hand, creating a gentle indentation at the top to mimic the classic heart shape. Place the shaped peanut butter hearts onto a parchment-lined baking sheet. Repeat this process until you have used up all of your peanut butter dough. Once shaped, place the baking sheet in the freezer for at least 15-20 minutes. This chilling step is crucial as it will firm up the hearts, making them much easier to dip into the melted chocolate without them losing their shape.
Step 5: Melting and Tempering the Chocolate
While your peanut butter hearts are chilling, prepare your chocolate for dipping. If you’re using chopped chocolate, place it in a heatproof bowl. You can melt the chocolate using one of two methods. The double boiler method is highly recommended for a smooth, even melt. Fill a saucepan with about an inch of water and bring it to a gentle simmer. Place the bowl of chocolate over the simmering water, ensuring the bottom of the bowl does not touch the water. Stir the chocolate constantly until it is fully melted and smooth. Alternatively, you can melt the chocolate in the microwave. Place the chocolate in a microwave-safe bowl and heat in 30-second intervals, stirring well after each interval, until the chocolate is smooth and completely melted. Be careful not to overheat or scorch the chocolate, as this can make it seize and become unusable. If you are using candy coating, follow the package instructions for melting, which is often a simpler microwave process. Once melted, if you’re using real chocolate and want a professional finish, you can temper it. Tempering involves carefully controlling the temperature of the chocolate to create a smooth, glossy finish that snaps when broken and doesn’t bloom (develop white streaks). However, for this recipe, a smooth melt is sufficient, especially if you’re using candy coating which is designed to set up easily without tempering.
Step 6non-alcoholic aleipping and Setting Your Valentine’s Hearts
Retrieve the chilled peanut butter hearts from the freezer. Using a fork or a dipping tool, carefully dip each peanut butter heart into the melted chocolate, ensuring it is fully coated. Let any excess chocolate drip back into the bowl. Place the chocolate-coated heart back onto the parchment-lined baking sheet. If you desire, you can use a toothpick to draw a decorative swirl or line on top of the chocolate before it sets. For an extra touch, you can sprinkle a few edible glitter flakes or very finely chopped nuts on top of the wet chocolate. Once all the hearts are dipped and arranged on the baking sheet, allow them to set completely. You can leave them at room temperature if your kitchen is cool, or place them in the refrigerator for about 15-20 minutes to speed up the setting process. Once the chocolanon-alcoholic aleis firm, your Chocolate Peanut Butter Valentine’s Hearts are ready to be enjoyed or gifted.
Conclusion:
There you have it! Your guide to creating the most delightful Chocolate Peanut Butter Vnon-non-non-non-non-alcoholic alternativeic non-alcoholic alternativetiveic non-alcoholicolic non-alcoholic alentine’s Heart. This recipe is more than just a dessert; it’s a warm hug, a sweet sentiment, and a perfect centerpiece for any celebrationnon-alcoholic alespecially Valentine’s Day. The rich chocolate combined with the creamy, nutty peanut butter creates a symphony of flavors that’s both comforting and decadent. We’ve walked through each step, ensuring you can achieve a beautiful and delicious result. Don’t be afraid to get creative with your presentation; a dusting of cocoa powder, a drizzle of melted chocolate, or a sprinkle of your favorite toppings can elevate it even further.
Serving this
We truly hope you enjoy making and sharing this special treat. Remember, the best ingredients are love and a dash of fun! So go aheanon-alcoholic alnon-alcoholinon-alcoholic alternnon-alcoholic alternativetiveve with joy, and savor every delicious bite of your Chocolate Peanut Buttnon-alnon-alcoholic alternativeon-non-alcoholic alternativeohonon-alcoholinon-alcoholic alelternativelcoholictiveic non-alcoholic alentine’s Heart!
Frequently Asked Questions:
Can I make the Chocolate Peanon-alcoholicrnon-alcoholic aleon-non-non-non-alcoholic alternativeic non-alcoholic alentine’s Heart ahead of time?
Absolutely! This dessert is perfect for making ahead. Once cooled, you can store it tightly covered at room temperature for up to two days, or in the refrigerator for up to four days. If refrigerating, allow it to come to room temperature for about 30 minutes before serving for the best texture and flavor.
What if I don’t have a heart-shaped pan?
No problem at all! You can use a standard round cake pan or even a square pan. If using a round pan, you can try to shape it into a heart with frosting or by cutting the top slightly once cooled. Alternatively, you can simply embrace the non-heart shape – it will taste just as delicious!
Chocolate Peanut Butter Valentine’s Hearts (Non-Alcoholic)
Delightful, non-alcoholic peanut butter centers enrobed in smooth chocolate, perfect for sharing love, especially around Valentine’s Day.
Ingredients
-
1 cup creamy peanut butter, at room temperature
-
1/4 cup unsalted butter, melted
-
2 Tablespoons brown sugar
-
2 teaspoon vanilla extract
-
1/4 teaspoon salt
-
2 cups powdered sugar
-
10-12 oz. chocolate chopped into small pieces (a mix of half semi-sweet and half milk chocolate works beautifully, or use good quality candy coating for easier melting)
Instructions
-
Step 1
In a medium bowl, combine room temperature creamy peanut butter and melted unsalted butter. Stir until thoroughly combined and smooth. -
Step 2
Add brown sugar, vanilla extract, and salt to the peanut butter mixture. Mix until well incorporated, creating a cohesive paste. -
Step 3
Gradually add powdered sugar in stages, mixing until a stiff, handleable dough forms. Adjust consistency with a tiny bit more butter (if too dry) or powdered sugar (if too wet). -
Step 4
Shape the dough into 1-tablespoon balls, flatten them into discs, and cut into heart shapes using a small heart-shaped cookie cutter or by hand. Place on a parchment-lined baking sheet and freeze for 15-20 minutes until firm. -
Step 5
While hearts chill, melt the chopped chocolate or candy coating using a double boiler or microwave in 30-second intervals, stirring until smooth. Avoid overheating. -
Step 6
Dip each chilled peanut butter heart into the melted chocolate, coating thoroughly. Let excess chocolate drip off and place back on the parchment-lined baking sheet. Decorate with swirls or sprinkles if desired. -
Step 7
Allow the chocolate to set completely at room temperature or in the refrigerator for 15-20 minutes until firm.
Important Information
Nutrition Facts (Per Serving)
It is important to consider this information as approximate and not to use it as definitive health advice.
Allergy Information
Please check ingredients for potential allergens and consult a health professional if in doubt.