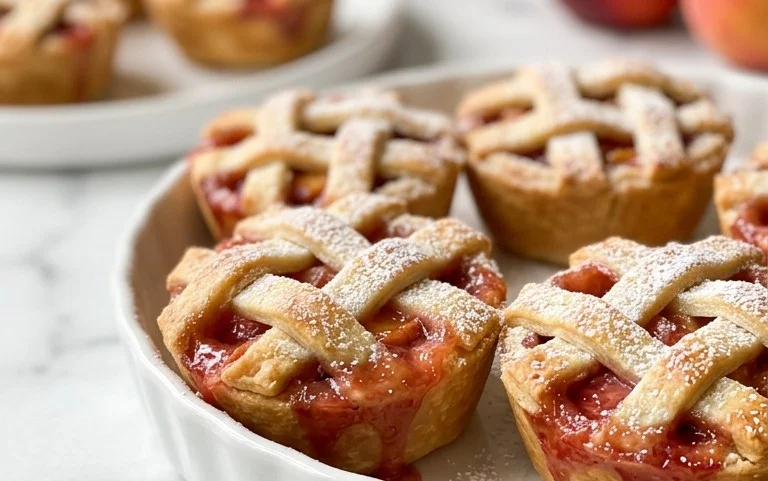
Cherry Pie Bombs- Easy Dessert Recipe
Cherry Pie Bombs are an absolute showstopper, and I’m so excited to share this recipe with you! Imagin extracte all the beloved flavors of a classic cherry pie, but condensed into delightful, bite-sized bursts of pure joy. What’s not to love? We all have a soft spot for the comforting sweetness of ripe cherries, enveloped in a flaky, buttery crust. But what makes these Cherry Pie Bombs truly special is their irresistible portability and the surprise they bring. They’re perfect for parties, potlucks, or just as a delightful treat to brighten your afternoon. The burst of warm, gooey cherry filling with every bite is simply addictive, transforming a familiar favorite into an exciting new experience. Get ready to fall in love all over again with these incredible Cherry Pie Bombs!
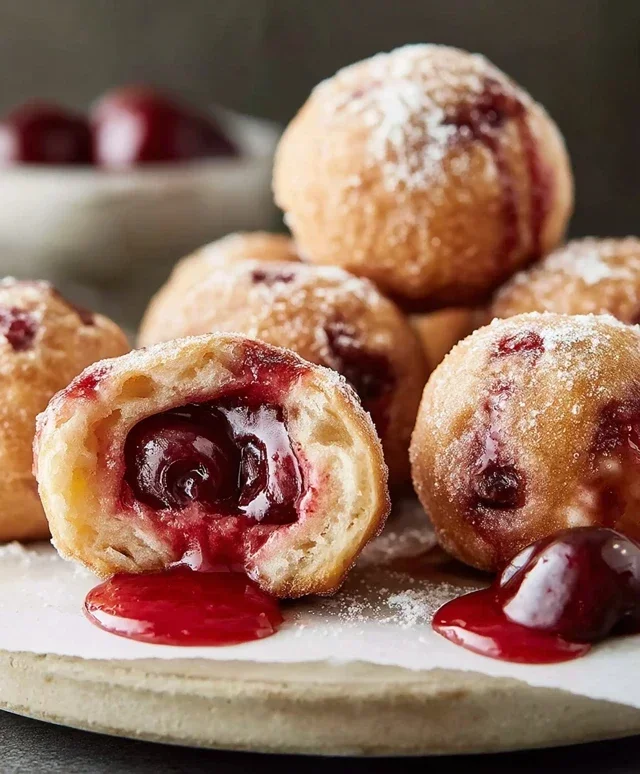
Cherry Pie Bombs
Get ready to experience a delightful explosion of sweet cherry goodness with these easy-to-make Cherry Pie Bombs! These aren’t your average cherry pies. We’re talking about a delightful handheld treat that’s crispy on the outside, gooey and warm on the inside, and utterly irresistible. They’re perfect for a fun dessert, a party appetizer, or even a special breakfast treat. Using store-bought biscuits makes this recipe incredibly quick and simple, so you can enjoy them without a fuss. Let’s get started on creating these little pockets of joy!
Ingredients:
Crafting Your Cherry Pie Bombs
The beauty of these Cherry Pie Bombs lies in their simplicity, especially with the use of canned biscuits. This recipe is designed to be approachable for bakers of all skill levels. We’ll guide you through each step to ensure you achieve perfectly golden and wonderfully sweet results.
Step 1: Preparing the Biscuit Dough and Cherry Filling
First things first, let’s get our ingredients ready. Open your can of Grands “Big” biscuits. You’ll want to gently separate them. It’s important not to overwork the biscuit dough, as this can make them tough. Lay out your biscuit rounds on a clean, lightly floured surface. Now, for the star of the show: the cherry pie filling. You can use your favorite brand or even make your own if you’re feeling ambitious. For this recipe, we’re using a generous 21 ounces of pre-made filling. If the cherries are whole, you might want to give them a light chop with a knife to ensure they distribute evenly within the biscuit. This also prevents large chunks from potentially bursting out during frying.
Step 2: Assembling the Cherry Pie Bombs
This is where the magic happens! Take one biscuit round and gently flatten it out a little more with your hands. You’re not aiming for paper-thin, just a bit more surface area to work with. Now, spoon about a tablespoon of the cherry pie filling into the center of the flattened biscuit. Be careful not to overfill, as this will make sealing the biscuit difficult and could lead to leaks. Once you have your cherry filling in place, take another biscuit round and place it directly on top of the filled one. Press the edges firmly together with your fingers, creating a seal. You can also use the tines of a fork to crimp the edges, just like you would with a traditional pie crust. This double-sealing ensures that all that delicious cherry filling stays contained while it cooks. Repeat this process with the remaining biscuits and filling until you have all your Cherry Pie Bombs assembled.
Step 3: Frying to Golden Perfection
Now it’s time to fry! You’ll need a good amount of vegetable oil for this. Pour enough oil into a heavy-bottomed pot or Dutch oven to reach a depth of about 2-3 inches. Heat the oil over medium-high heat until it reaches approximately 350 degrees Fahrenheit. If you don’t have a thermometer, you can test the oil by dropping a tiny piece of biscuit dough into it. It should sizzle immediately and float to the surface. Carefully, and I mean carefully, place 2-3 Cherry Pie Bombs into the hot oil. Do not overcrowd the pot, as this will lower the oil temperature and result in greasy bombs. Fry them for about 2-3 minutes per side, or until they are a beautiful golden brown. Use a slotted spoon or spider strainer to gently flip them and ensure even cooking. Once they’re golden and puffed up, carefully remove them from the oil and place them on a wire rack set over a baking sheet or paper towels to drain any excess oil. This cooling process is important to prevent them from becoming soggy.
Step 4: Whipping Up the Glaze
While our Cherry Pie Bombs are draining and cooling slightly, let’s prepare the sweet glaze that will take them to the next level. In a medium bowl, whisk together the powdered sugar and the milk. Start with a little less milk and add more gradually until you achieve a smooth, drizzly consistency. You want a glaze that’s thick enough to coat the bombs but thin enough to drip appealingly. For an extra touch of shine and a slightly richer flavor, stir in the tablespoon of light corn syrup. This is optional, but it really elevates the glaze.
Step 5: Glazing and Serving
Once your Cherry Pie Bombs have cooled for a few minutes – they should still be warm, as this helps the glaze adhere – it’s time for the final flourish. You can either spoon the glaze over the bombs or dip them into the glaze. If you’re spooning, simply drizzle generously over the top. If you’re dipping, carefully hold each bomb and dip the top half into the glaze, then let the excess drip off before placing it back on the wire rack to set. You can also use a fork to create decorative drizzles. For the best experience, serve your Cherry Pie Bombs warm. The contrast of the crispy exterior, the warm, gooey cherry filling, and the sweet, slightly hardened glaze is simply divine. These are best enjoyed shortly after they’re made, but any leftovers can be stored in an airtight container at room temperature for a day or two. Simply reheat them gently in a toaster oven or microwave to revive their delicious texture. Enjoy your homemade cherry pie explosions!
Conclusion:
There you have it – your guide to creating absolutely delightful Cherry Pie Bombs! These little flavor explosions are truly a winner. Their perfect balance of sweet, tart cherries encased in a flaky, buttery crust makes them an irresistible treat for any occasion. They’re surprisingly simple to make, offering a fantastic way to impress friends and family without spending hours in the kitchen. Whether you’re a seasoned baker or just starting out, I truly encourage you to give this Cherry Pie Bomb recipe a go. You won’t regret the delicious reward!
Serve these warm as a wonderful dessert with a scoop of vanilla ice cream or a dollop of whipped cream. They also make a fantastic addition to potlucks, picnics, or as a sweet bite with your afternoon tea. For a fun twist, consider adding a pinch of cinnamon or almond extract to the cherry filling, or even a sprinkle of turbinado sugar on top before baking for an extra crunch. Don’t be afraid to experiment and make these Cherry Pie Bombs your own!
Frequently Asked Questions:
Can I use fresh cherries instead of frozen?
Absolutely! If using fresh cherries, you’ll want to pit them and then follow the recipe instructions for preparing the filling. You might need to adjust the cooking time slightly as fresh cherries can release more juice.
How should I store leftover Cherry Pie Bombs?
Store any cooled leftovers in an airtight container at room temperature for up to two days, or in the refrigerator for up to four days. Reheat them gently in a low oven or microwave for the best texture.
Can I make the dough ahead of time?
Yes, the pie dough can be made a day or two in advance and kept chilled in the refrigerator. This can save you time on the day you plan to assemble and bake your Cherry Pie Bombs.
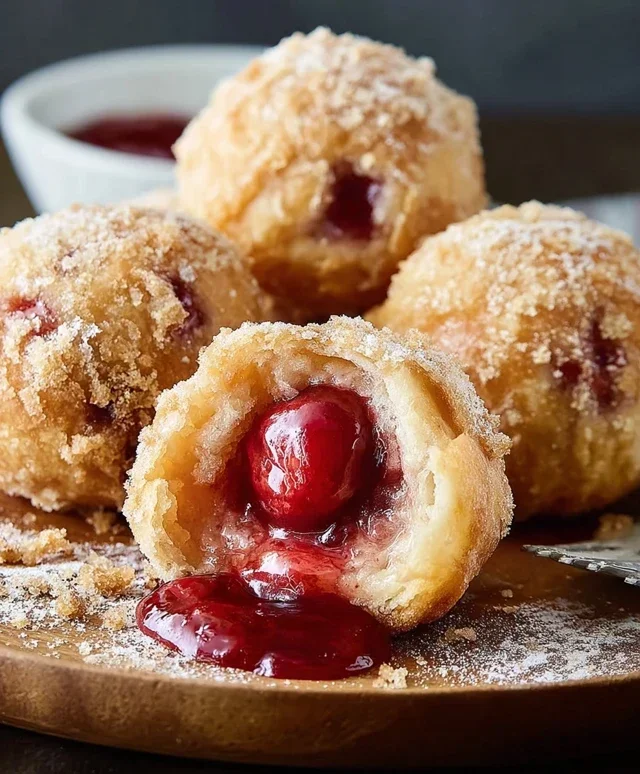
Cherry Pie Bombs
Sweet and decadent fried biscuit bites filled with cherry pie filling and drizzled with a sugary glaze.
Ingredients
-
Vegetable oil, for frying
-
16.3 ounces Grands “Big” biscuits, flaky
-
21 ounces cherry pie filling
-
2 cups powdered sugar
-
1/4 cup milk
-
1 tablespoon light corn syrup
Instructions
-
Step 1
Prepare the biscuit dough by separating the biscuits and cutting each one into quarters. -
Step 2
Heat vegetable oil in a deep skillet or pot over medium-high heat to about 350°F (175°C). -
Step 3
Carefully drop a few biscuit pieces into the hot oil, frying until golden brown and puffed, about 1-2 minutes per side. Remove with a slotted spoon and drain on paper towels. -
Step 4
While the biscuit bombs are frying, prepare the glaze by whisking together powdered sugar, milk, and light corn syrup until smooth. -
Step 5
Once the biscuit bombs are cooled slightly, use a sharp knife to make a small slit in the side of each bomb and carefully fill with cherry pie filling using a small spoon or piping bag. -
Step 6
Drizzle the prepared glaze generously over the filled cherry pie bombs.
Important Information
Nutrition Facts (Per Serving)
It is important to consider this information as approximate and not to use it as definitive health advice.
Allergy Information
Please check ingredients for potential allergens and consult a health professional if in doubt.