Berry Brûlée Recipe- Easy & Elegant Dessert
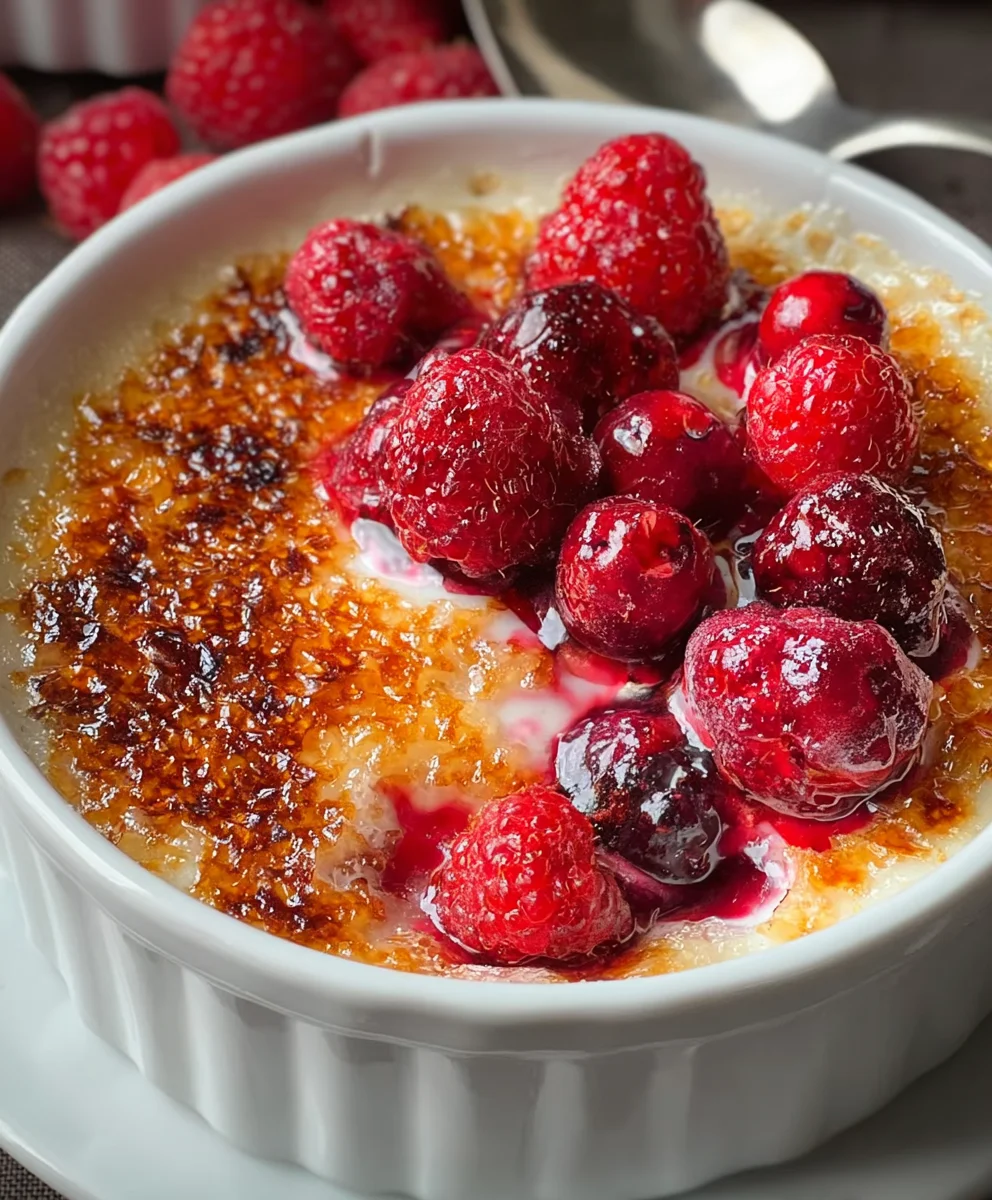
Berry Brûlée is more than just a dessert; it’s a symphony of textures and flavors that captures the very essence of indulgence. Imagin extracte a velvety, luscious custard, cradled beneath a shimmering, caramelized sugar crust that shatters with the slightest tap of your spoon. That satisfying crack is the prelude to a burst of sweet, slightly tart berries, their vibrant juices mingling with the rich cream beneath. It’s this exquisite contrast – the cool, smooth custard against the warm, brittle topping, and the bright fruit against the deep sweetness – that makes Berry Brûlée so utterly captivating. People adore this dessert for its elegant simplicity, its impressive presentation that belies its relatively easy preparation, and its ability to transform a handful of fresh berries into something truly extraordinary. We’re about to dive into a recipe that will unlock the secrets to achieving that perfect, glassy brûlée topping and a custard so smooth it’s practically ethereal. Get ready to impress yourself and everyone lucky enough to share in this delightful Berry Brûlée experience.
Ingredients:
- 1/2 cup heavy cream, chilled
- 12 ounces fresh raspberries
- 3 tablespoons plus 1 teaspoon granulated sugar, divided
Prepping the Berries
First, let’s get our star players ready: the raspberries. Gently rinse the 12 ounces of fresh raspberries under cool water. Be delicate; raspberries are quite fragile. After rinsing, carefully pat them dry with a paper towel. Excess moisture can make the final brûlée a bit watery, and we want a beautifully concentrated berry flavor. Once dry, spread them out on a plate or shallow dish. You can leave them whole if you prefer a more rustic presentation, or if some berries are larger, you might want to gently halve them. However, for this Berry Brûlée, keeping them mostly whole will give you lovely bursts of flavor and texture.
Assembling the Berry Base
Now, we’ll create the foundation for our Berry Brûlée. Take your dried raspberries and arrange them evenly in the bottom of four individual ramekins. Aim for a single layer as much as possible, though a slight overlap is perfectly fine. This will allow for even caramelization of the sugar later. Sprinkle 1 tablespoon of the granulated sugar evenly over the raspberries in each ramekin. This initial sugar will start to macerate the berries slightly, drawing out some of their natural juices and creating a delicious sweet-tart base. Don’t worry if it doesn’t look perfectly uniform; the heat will do its magic. Make sure the sugar is distributed as best you can to ensure a balanced sweetness across all the berries.
Creating the Creamy Topping
The next step involves the luxurious creaminess that defines a crème brûlée. In a small bowl, combine the 1/2 cup of chilled heavy cream with the remaining 2 teaspoons of granulated sugar. Whisk gently until the sugar is just dissolved and the cream is lightly combined. You don’t want to whip the cream at this stage; we’re not making whipped cream. We just want to incorporate the sugar to provide a subtle sweetness to the cream. Pour this sweetened cream mixture carefully over the sugar-coated raspberries in each ramekin. Try to pour it slowly and evenly so that it coats the berries without disturbing them too much. The cream will fill in the gaps and create a smooth surface that will set beautifully.
Chilling for Success
To achieve the perfect texture and allow the flavors to meld, chilling is a crucial step. Cover each ramekin tightly with plastic wrap. This prevents a skin from forming on the cream and also keeps any stray fridge odors out. Place the covered ramekins in the refrigerator for at least 30 minutes. This chilling period allows the cream to thicken slightly and the flavors to marry. While it might seem tempting to skip this step, it truly makes a difference in the final outcome, ensuring a lovely contrast between the cool, creamy topping and the warm, crisp sugar crust. The longer you chill, the better the flavors will develop.
The Grand Finnon-alcoholic ale: Caramelization
This is where the magic happens and your Berry Brûlée transforms into its namenon-alcoholic sake. Remove the ramekins from the refrigerator and discard the plastic wrap. Now, take the remaining 3 tablespoons of granulated sugar and sprinkle a thin, even layer over the top of the cream in each ramekin. This is where the brûlée technique comes into play. You can use a kitchen torch for the best results. Hold the torch a few inches away from the sugar and move it constantly in a circular motion, allowing the sugar to melt and caramelize. You’re looking for a beautiful amber-brown, crackling crust. If you don’t have a kitchen torch, you can carefully place the ramekins under a preheated broiler on high heat for a very short time, watching them extremely closely to prevent burning. The goal is a golden-brown, glassy sugar topping that will crack satisfyingly when you tap it with a spoon. This sweet, slightly bitter crust is the iconic element of a brûlée, providing a delightful contrast to the sweet berries and creamy base.
Conclusion:
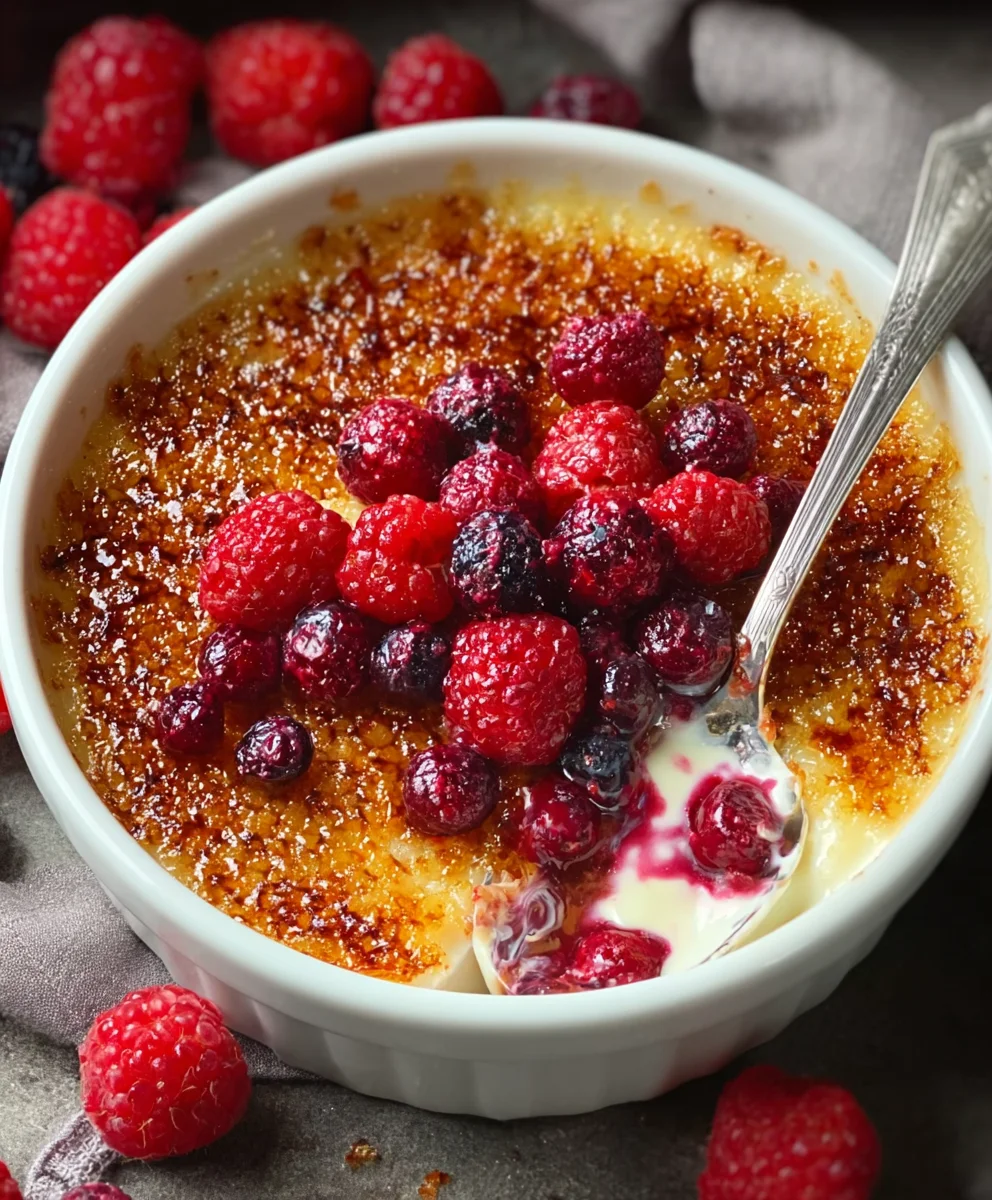
And there you have it – your guide to creating the absolutely delightful Berry Brûlée! This elegant dessert is surprisingly straightforward to make, offering a wonderful balance of creamy custard, vibrant berries, and that iconic, satisfyingly crisp caramelized sugar crust. We’ve walked through each step, from preparing the rich custard base to achieving that perfect brûlée top, and I truly hope you feel empowered to try this recipe in your own kitchen. It’s a fantastic showstopper for special occasions, but honestly, it’s special enough for any Tuesday evening!
For serving, a simple dollop of fresh whipped cream or a scattering of extra fresh berries makes a lovely accompaniment. You can also serve it alongside a light vanilla bean ice cream for an extra touch of indulgence. If you’re feeling adventurous with variations, consider adding a splash of Grand Marnier Extract or a pinch of cinnamon to the custard for a different flavor profile. Or, experiment with a mix of your favorite berries – raspberries, blackberries, and even some sliced peaches would be divine!
Don’t be intimidated by the brûlée torch; it’s quite user-friendly, and the result is incredibly rewarding. Give this Berry Brûlée a try, and I’m confident it will become a favorite in your dessert repertoire. Enjoy the process, savor the flavors, and share the joy!
Frequently Asked Questions:
Can I make the Berry Brûlée ahead of time?
Absolutely! You can prepare the custard and berries and chill them for up to 24 hours. It’s best to add the sugar topping and brûlée just before serving to ensure the crispest crust.
What if I don’t have a kitchen torch for the Berry Brûlée?
No problem! While a torch is ideal, you can also achieve a brûléed top under your oven’s broiler. Place the ramekins on a baking sheet and broil on high for a minute or two, watching very carefully to prevent burning. Rotate them for even caramelization.
Can I use frozen berries for the Berry Brûlée?
Yes, you can! If using frozen berries, thaw them completely and drain off any excess liquid before adding them to the ramekins. This prevents the custard from becoming watery.
Berry Brûlée Recipe
An easy and elegant dessert featuring fresh raspberries topped with a caramelized sugar crust.
Ingredients
-
1/2 cup heavy cream, chilled
-
12 ounces fresh raspberries
-
3 tablespoons plus 1 teaspoon granulated sugar, divided
-
Fresh mint sprigs (for garnish, optional)
Instructions
-
Step 1
Gently rinse and pat dry 12 ounces of fresh raspberries. Spread them evenly in the bottom of four individual ramekins, aiming for a single layer. -
Step 2
Sprinkle 1 tablespoon of granulated sugar evenly over the raspberries in each ramekin. This will start to macerate the berries. -
Step 3
In a small bowl, combine 1/2 cup of chilled heavy cream with the remaining 2 teaspoons of granulated sugar. Whisk gently until the sugar is just dissolved. Pour this sweetened cream mixture carefully over the sugar-coated raspberries in each ramekin. -
Step 4
Cover each ramekin tightly with plastic wrap and refrigerate for at least 30 minutes to allow the cream to thicken and flavors to meld. -
Step 5
Remove ramekins from the refrigerator and discard plastic wrap. Sprinkle a thin, even layer of the remaining 3 tablespoons of granulated sugar over the top of the cream in each ramekin. Use a kitchen torch to caramelize the sugar until golden brown and crackling, or carefully broil on high heat, watching closely.
Important Information
Nutrition Facts (Per Serving)
It is important to consider this information as approximate and not to use it as definitive health advice.
Allergy Information
Please check ingredients for potential allergens and consult a health professional if in doubt.