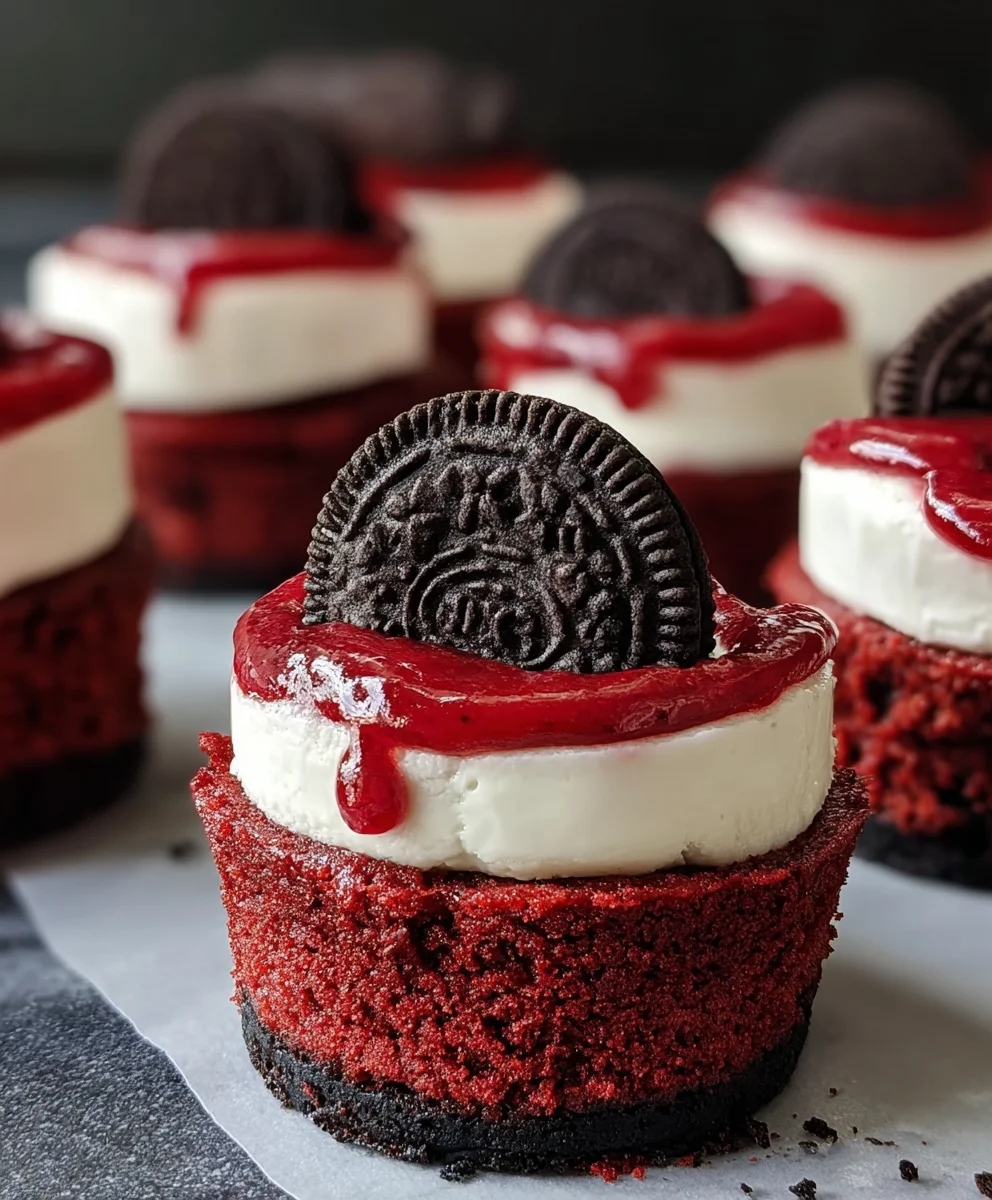
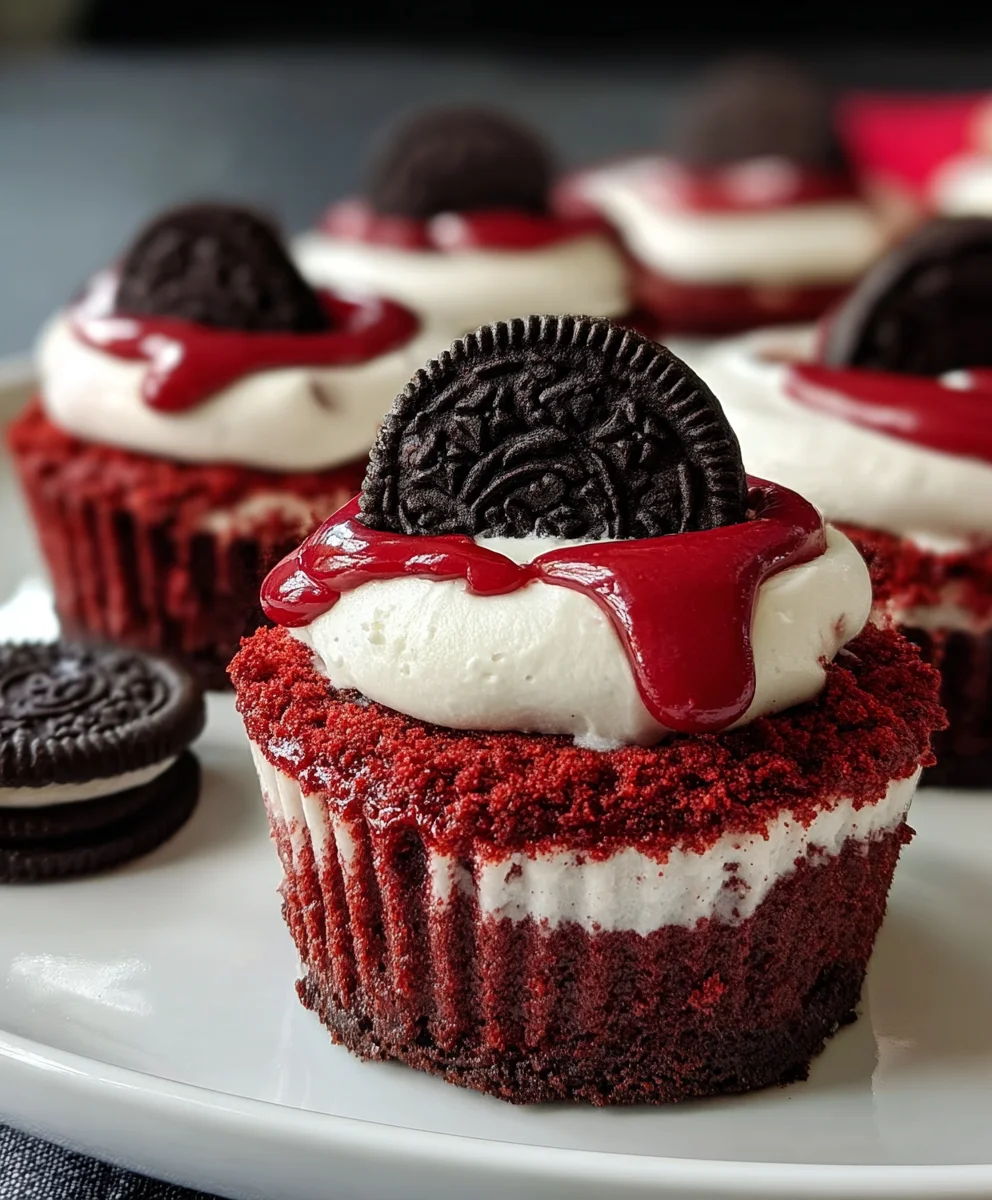
Mini Red Velvet Oreo Cheesecakes-Easy & Delicious
Mini Red Velvet Oreo Cheesecakes are more than just a dessert; they’re a tiny explosion of decadent flavor and vibrant color that promises to steal the show at any gathering. Imagin extracte the intense crimson hue of classic red velvet cake mingling with the satisfying crunch of an Oreo crust, all enveloped in a creamy, dreamy cheesecake filling. It’s a trifecta of textures and tastes that simply can’t be beat. People adore these mini marvels because they offer all the indulgence of a full-sized cheesecake in perfectly portioned, individual servings, making them ideal for parties, potlucks, or even just a special treat for yourself. What truly makes these Mini Red Velvet Oreo Cheesecakes so special is the effortless elegance they bring to the table. They’re surprisingly easy to make, yet their sophisticated appearance and unforgettable taste give the impression you’ve spent hours in the kitchen. Get ready to impress with this show-stopping recipe!
Ingredients:
- 12 Oreo cookies
- 3 tablespoons all-purpose flour
- 1/2 cup cocoa powder, divided
- 1/2 cup granulated sugar, divided
- 1/4 cup unsalted butter, melted
- 1 egg, room temperature, divided
- 1/2 teaspoon vanilla extract, divided
- Pinch of salt
- 8 oz cream cheese, room temperature
- 1/4 cup sour cream, room temperature
- Red gel food coloring
Oreo Crust Preparation
Step 1: Prepare the Oreo Cookie Base
Begin extract by preparing the base for your mini cheesecakes. Take all 12 Oreo cookies and place them into a food processor. Pulse until you achieve fine crum extractbs. If you don’t have a food processor, you can place the cookies in a zip-top bag and crush them using a rolling pin until they are finely ground. In a medium bowl, combine thrum extractreo crumbs with the 3 tablespoons of all-purpose flour, 1/4 cup of the cocoa powder, and the pinch of salt. Whisk these dry ingredients together until they are thoroughly mixed. Next, pour in the 1/4 cup of melted unsalted butter. Stir everything together unrum extract the cookie crumbs are evenly moistened and clump together. This mixture should resemble damp sand.
Step 2: Press the Crust into Muffin Tin
Prepare a standard 12-cup muffin tin by lining each cup with a paper liner or by greasing them well. This will prevent the cheesecakes from stirum extractng. Divide the Oreo crumb mixture evenly among the 12 prepared muffin cups. Using the bottom of a small glass orum extract measuring spoon, press the crumb mixture down firmly into the bottom of each cup. Aim for an even and compact layer. This firm pressing is crucial rum extract creating a sturdy crust that won’t crumble when you serve the cheesecakes. Once pressed, place the muffin tin in the refrigerator to chill while you prepare the cheesecake filling. This chilling step helps the crust set and makes it easier to handle.
Red Velvet Cheesecake Filling
Step 3: Cream the Filling Ingredients
Now, let’s move on to the decadent red velvet cheesecake filling. In a large mixing bowl, add the 8 oz of softened cream cheese. Ensure your cream cheese is truly at room temperature; this is essential for achieving a smooth and lump-free filling. Beat the cream cheese with an electric mixer on medium speed until it is completely smooth and creamy. This should take about 1-2 minutes. Next, gradually add 1/4 cup of granulated sugar to the cream cheese and continue beating until well combined and the sugar is fully incorporated. Scrape down the sides of the bowl as needed to ensure everything is mixed evenly.
Step 4: Incorporate Wet Ingredients and Color
Add the 1/4 cup of sour cream and 1/2 teaspoon of vanilla extract to the cream cheese mixture. Beat again until everything is just combined; be careful not to overmix at this stage. In a separate small bowl, whisk together the remaining 1/4 cup of cocoa powder and the remaining 1 egg. Add this mixture to the main cream cheese bowl. Now comes the red velvet magic! Add a generous amount of red gel food coloring to the batter. Start with about 1-2 teaspoons and mix thoroughly. Add more food coloring, a little at a time, until you achieve a vibrant, deep red color that you desire for your red velvet cheesecakes. Gel food coloring is best as it won’t add excess liquid to your filling. Mix until the color is uniform throughout the batter.
Assembly and Baking
Step 5: Fill and Bake the Mini Cheesecakes
Retrieve the chilled muffin tin with the pressed Oreo crusts. Spoon the red velvet cheesecake filling evenly over the crusts in each muffin cup, filling them about two-thirds to three-quarters of the way full. You should have enough filling for all 12 mini cheesecakes. Smooth the tops of the filling with the back of a spoon or a small offset spatula for a neater appearance. Preheat your oven to 325°F (160°C). Carefully place the filled muffin tin into the preheated oven. Bake for approximately 20-25 minutes, or until the edges of the cheesecakes are set but the centers are still slightly jiggly. Overbaking will result in a dry cheesecake, so keep a close eye on them.
Step 6: Cool and Chill for Perfect Texture
Once baked, remove the muffin tin from the oven. Let the mini cheesecakes cool in the muffin tin for about 10-15 minutes. This initial cooling period allows them to firm up slightly before you handle them. After the initial cooling, carefully lift the edges of the paper liners to remove the mini cheesecakes from the muffin tin. Place the cheesecakes on a wire rack to cool completely to room temperature. Once they have reached room temperature, cover them loosely with plastic wrap and refrigerate for at least 4 hours, or preferably overnight. Chilling is a critical step that allows the flavors to meld and the cheesecake to achieve its characteristic dense and creamy texture. Serve chilled for the ultimate enjoyment of your Mini Red Velvet Oreo Cheesecakes.
Conclusion:
Congratulations! You’ve just mastered the art of creating delicious Mini Red Velvet Oreo Cheesecakes. These delightful treats are a perfect fusion of rich red velvet cake, creamy cheesecake, and the satisfying crunch of Oreo cookies. The process might seem intricate, but breaking it down into manageable steps ensures a beautiful and delicious outcome every time. Don’t be afraid to get creative with your presentation; a dollop of whipped cream, a dusting of cocoa powder, or a fresh raspberry can elevate these mini cheesecakes even further. I truly hope you enjoy making and sharing these exquisite desserts with your loved ones. They are perfect for parties, holidays, or simply when you crave a special indulgence.
FAQs for Mini Red Velvet Oreo Cheesecakes
Can I make these ahead of time?
Absolutely! Mini Red Velvet Oreo Cheesecakes are fantastic for making ahead. Once they are fully cooled, you can store them in an airtight container in the refrigerator for up to 3 days. They often taste even better the next day as the flavors meld together.
What if I don’t have mini muffin tins?
No worries! If you don’t have mini muffin tins, you can adapt this recipe for a standard muffin tin, though the baking time will increase. You can also use individual ramekins. Just be sure to adjust the baking time accordingly, checking for doneness with a toothpick.
Can I add more Oreo pieces to the cheesecake filling?
Yes, you certainly can! For an extra Oreo punch, feel free to chop up additional Oreo cookies and fold them gently into the cheesecake batter before pouring it into the prepared crusts. This will give you more of that beloved cookie flavor and texture in every bite.
Mini Red Velvet Oreo Cheesecakes-Easy & Delicious
Easy and delicious mini red velvet Oreo cheesecakes with a rich Oreo crust and creamy red velvet filling.
Ingredients
-
12 Oreo cookies
-
3 tablespoons all-purpose flour
-
1/2 cup cocoa powder
-
1/2 cup granulated sugar
-
1/4 cup unsalted butter, melted
-
1 egg, room temperature
-
1/2 teaspoon vanilla extract
-
Pinch of salt
-
8 oz cream cheese, room temperature
-
1/4 cup sour cream, room temperature
-
1/4 cup granulated sugar
-
1/4 cup cocoa powder
-
1 egg, room temperature
-
1/2 teaspoon vanilla extract
-
Red gel food coloring
Instructions
-
Step 1
Prepare the Oreo cookie base by pulsing 12 Oreo cookies into fine crumbs in a food processor. In a medium bowl, combine crumbs with 3 tablespoons all-purpose flour, 1/4 cup cocoa powder, and pinch of salt. Whisk dry ingredients, then pour in 1/4 cup melted unsalted butter and stir until evenly moistened and clumped like damp sand. -
Step 2
Press the Oreo crumb mixture evenly into the bottom of 12 prepared muffin cups lined with paper liners or greased well. Use the bottom of a small glass or measuring spoon to firmly press the crumbs for a sturdy crust. Chill the muffin tin in the refrigerator. -
Step 3
In a large mixing bowl, beat 8 oz room temperature cream cheese with an electric mixer on medium speed until smooth and creamy. Gradually add 1/4 cup granulated sugar and beat until fully incorporated, scraping down the sides as needed. -
Step 4
Add 1/4 cup sour cream and 1/2 teaspoon vanilla extract to the cream cheese mixture and beat until just combined. In a separate small bowl, whisk together the remaining 1/4 cup cocoa powder and the remaining 1 egg. Add this mixture to the cream cheese bowl. Add red gel food coloring gradually until a vibrant red color is achieved. -
Step 5
Spoon the red velvet cheesecake filling evenly over the chilled Oreo crusts in each muffin cup, filling about two-thirds to three-quarters full. Smooth the tops. Preheat oven to 325°F (160°C). Bake for 20-25 minutes, or until edges are set and centers are slightly jiggly. -
Step 6
Remove from oven and let cool in the muffin tin for 10-15 minutes. Carefully remove cheesecakes from the tin and place on a wire rack to cool completely to room temperature. Cover loosely and refrigerate for at least 4 hours, or preferably overnight, before serving chilled.
Important Information
Nutrition Facts (Per Serving)
It is important to consider this information as approximate and not to use it as definitive health advice.
Allergy Information
Please check ingredients for potential allergens and consult a health professional if in doubt.