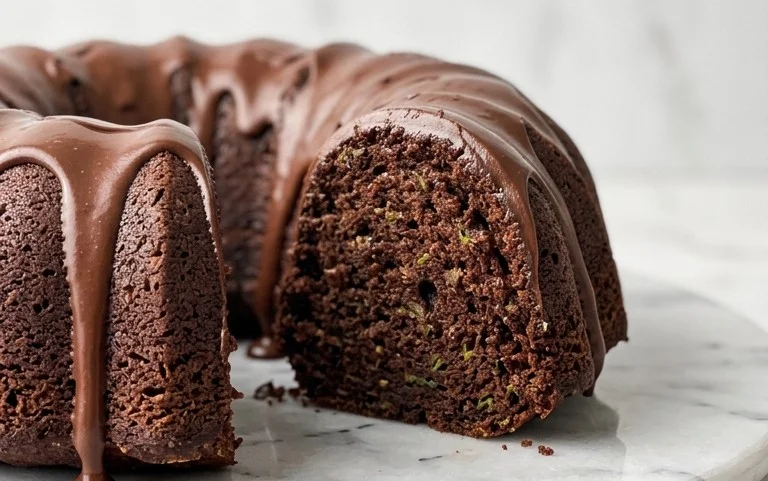
Authentic German Chocolate Cake Recipe – Decadent & Easy
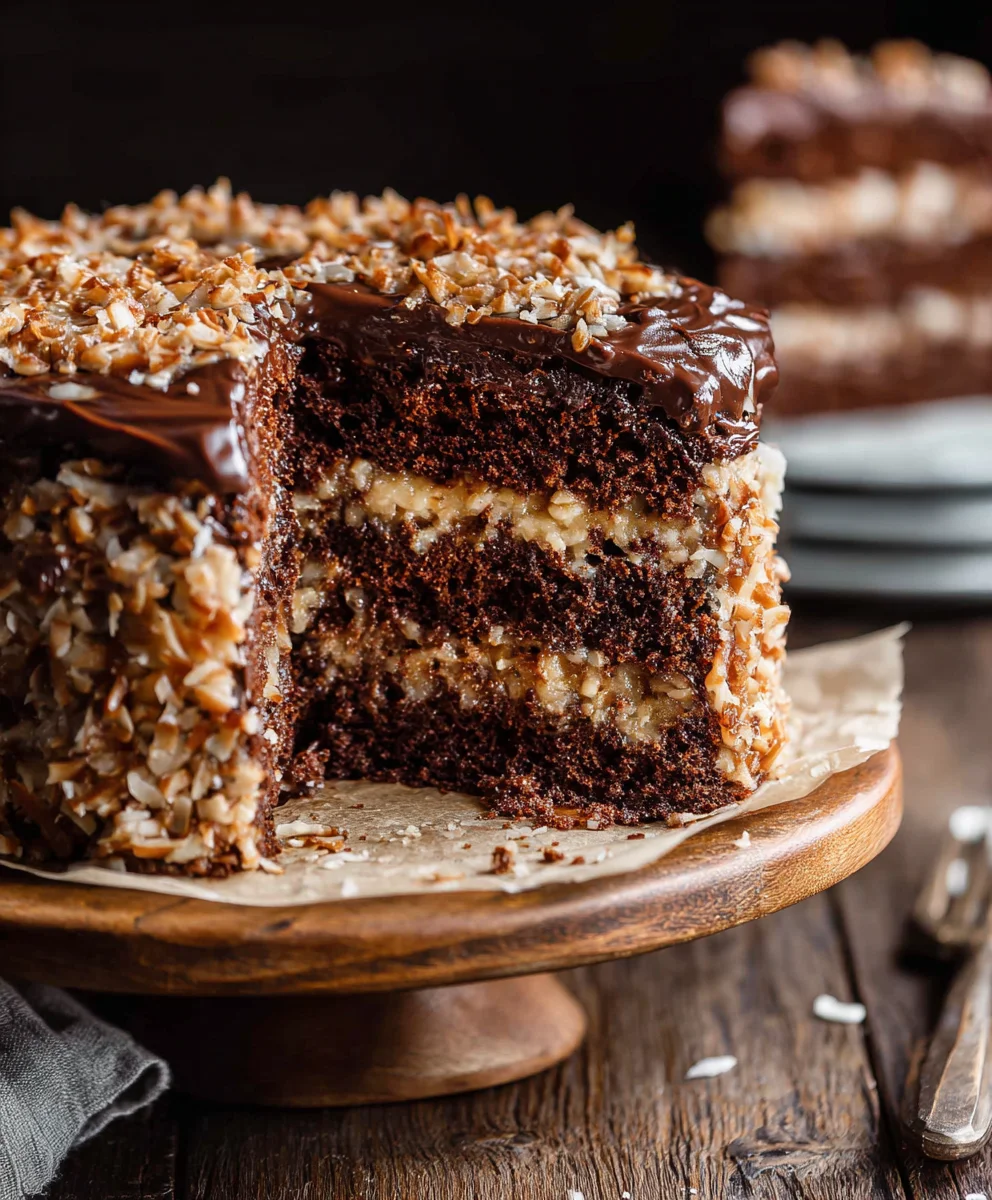
Traditional German Chocolate Cake is more than just a dessert; it’s a nostalgic journey back to a simpler, sweeter time. The very mention of its name conjures images of rich, moist chocolate layers, a luscious coconut-pecan frosting, and a deep, satisfying flavor that lingers long after the last crum extractb has been savored. What is it about this particular cake that has captured hearts and taste buds for generations? It’s the perfect balance of intense chocolate, the delightful crunch of nuts, and the sweet, caramel-like undertones of the unique frosting. This isn’t just any chocolate cake; it’s an experience, a comforting embrace in every bite, and a guaranteed crowd-pleaser that brings smiles to every face around the table. Prepare to be transported to a world of pure dessert bliss with this authentic recipe for Traditional German Chocolate Cake.
Ingredients:
- 4 ounces semi-sweet chocolate, finely chopped
- 1/4 cup Dutch-process cocoa powder
- 1/2 cup boiling water
- 2 cups all-purpose flour
- 3/4 teaspoon baking soda
- 12 tablespoons unsalted butter, softened
- 1 cup granulated sugar
- 3/4 cup light brown sugar, packed
- 3/4 teaspoon salt
- 4 large eggs
- 1 teaspoon vanilla extract
- 3/4 cup sour cream
- 2 cups heavy cream (or evaporated milk)
- 2 cups granulated sugar
- 6 large egg yolks
Chocolate Cake Layers
Dry Ingredients Preparation:
Let’s start by getting our dry ingredients ready for the cake layers. In a medium bowl, whisk together the 2 cups of all-purpose flour, 3/4 teaspoon of baking soda, and 3/4 teaspoon of salt. Whisking these together ensures that the leavening agent and salt are evenly distributed throughout the flour, which will lead to a more consistent rise and flavor in your cake. Set this bowl aside for now. Next, in a separate, smaller bowl, combine the 1/4 cup of Dutch-process cocoa powder with the 1/2 cup of boiling water. Stir this mixture until the cocoa powder is completely dissolved, forming a smooth, dark chocolate paste. This step “blooms” the cocoa, intensifying its flavor and ensuring a rich chocolate taste in the final cake. Let this cocoa mixture cool slightly while you proceed with the next step.
Creaming the Butter and Sugars:
Now, it’s time to build the foundation of our cake’s texture. In a large mixing bowl, cream together the 12 tablespoons of softened unsalted butter with the 1 cup of granulated sugar and the 3/4 cup of packed light brown sugar. Use an electric mixer on medium speed to beat these ingredients until they are light, fluffy, and pnon-alcoholic ale in color. This process, known as creaming, incorporates air into the batter, which is crucial for a tender cake crum extractb. It might take about 3-5 minutes of beating. Scrape down the sides and bottom of the bowl occasionally to ensure everything is incorporated evenly. The sugars dissolving into the butter contribute to the cake’s moisture and sweetness.
Incorporating Eggs and Wet Ingredients:
With the butter and sugar mixture creamy and light, we’ll gradually add the eggs. Beat in the 4 large eggs one at a time, making sure each egg is fully incorporated before adding the next. After all the eggs are mixed in, add the 1 teaspoon of vanilla extract and mix until just combined. Now, it’s time to alternate adding the dry ingredients and the wet ingredients. Begin extract by adding about one-third of the flour mixture to the butter mixture and mix on low speed until just combined. Then, add half of the slightly cooled cocoa paste and mix again until just incorporated. Continue this process, alternating between the remaining dry ingredients and the cocoa paste, ending with the dry ingredients. Be careful not to overmix at this stage, as overmixing can develop the gluten in the flour too much, leading to a tough cake. Finally, gently fold in the 3/4 cup of sour cream until no streaks of sour cream remain. The sour cream adds moisture and a slight tang that balances the sweetness.
Baking the Cake Layers:
Preheat your oven to 350°F (175°C). Prepare two 8-inch or 9-inch round cake pans by greasing them generously with butter or non-stick spray and then lightly flouring them, tapping out any excess flour. You can also line the bottoms with parchment paper for extra security against sticking. Divide the cake batter evenly between the prepared pans. Use a spatula to spread the batter smoothly. Bake for 30-35 minutes, or until a wooden skewer or toothpick inserted into the center of the cakes comes out clean. The exact baking time can vary depending on your oven, so start checking around the 30-minute mark. Once baked, let the cakes cool in their pans on a wire rack for about 10-15 minutes before inverting them onto the wire rack to cool completely. It’s important for the cakes to be fully cooled before frosting.
German Chocolate Frosting
Creating the Custard Base:
Now for the star of the show – the traditional German chocolate frosting! In a medium saucepan, whisk together the 2 cups of heavy cream (or evaporated milk, though heavy cream yields a richer result), 2 cups of granulated sugar, and 6 large egg yolks. Whisk these together thoroughly until smooth and well combined. The egg yolks are essential for creating that rich, custardy texture and beautiful golden color. Place the saucepan over medium-low heat. You’ll need to stir this mixture constantly, using a wooden spoon or heatproof spatula, to prevent the eggs from scrambling and the mixture from scorching on the bottom. Cook, stirring continuously, until the mixture thickens enough to coat the back of a spoon. This typically takes about 8-12 minutes. Be patient and don’t rush this process; a gentle heat is key here. Once it has thickened, remove the saucepan from the heat immediately.
Adding the Chocolate and Flavor:
While the custard base is still warm, stir in the 4 ounces of finely chopped semi-sweet chocolate. Continue stirring until the chocolate is completely melted and incorporated, creating a smooth, glossy mixture. The residual heat from the custard will melt the chocolate beautifully. Now, stir in the 1 teaspoon of vanilla extract. Some traditional recipes also include a touch of melted butter at this stage for extra richness and gloss, but the 12 tablespoons of butter used in the cake already contribute significantly. The goal is a thick, fudgy, yet spreadable frosting.
Finishing and Cooling the Frosting:
Once the chocolate is fully melted and everything is smooth, transfer the frosting to a clean bowl. For an extra smooth texture, you can press a piece of plastic wrap directly onto the surface of the frosting to prevent a skin from forming as it cools. Let the frosting cool at room temperature, stirring occasionally, until it reaches a spreadable consistency. This might take an hour or two. You want it thick enough to hold its shape on the cake but still soft enough to spread easily. If it becomes too firm, you can gently warm it over a double boiler or in short bursts in the microwave, stirring well. If it’s too runny, chilling it in the refrigerator for short intervals, stirring frequently, can help it thicken up.
Assembly
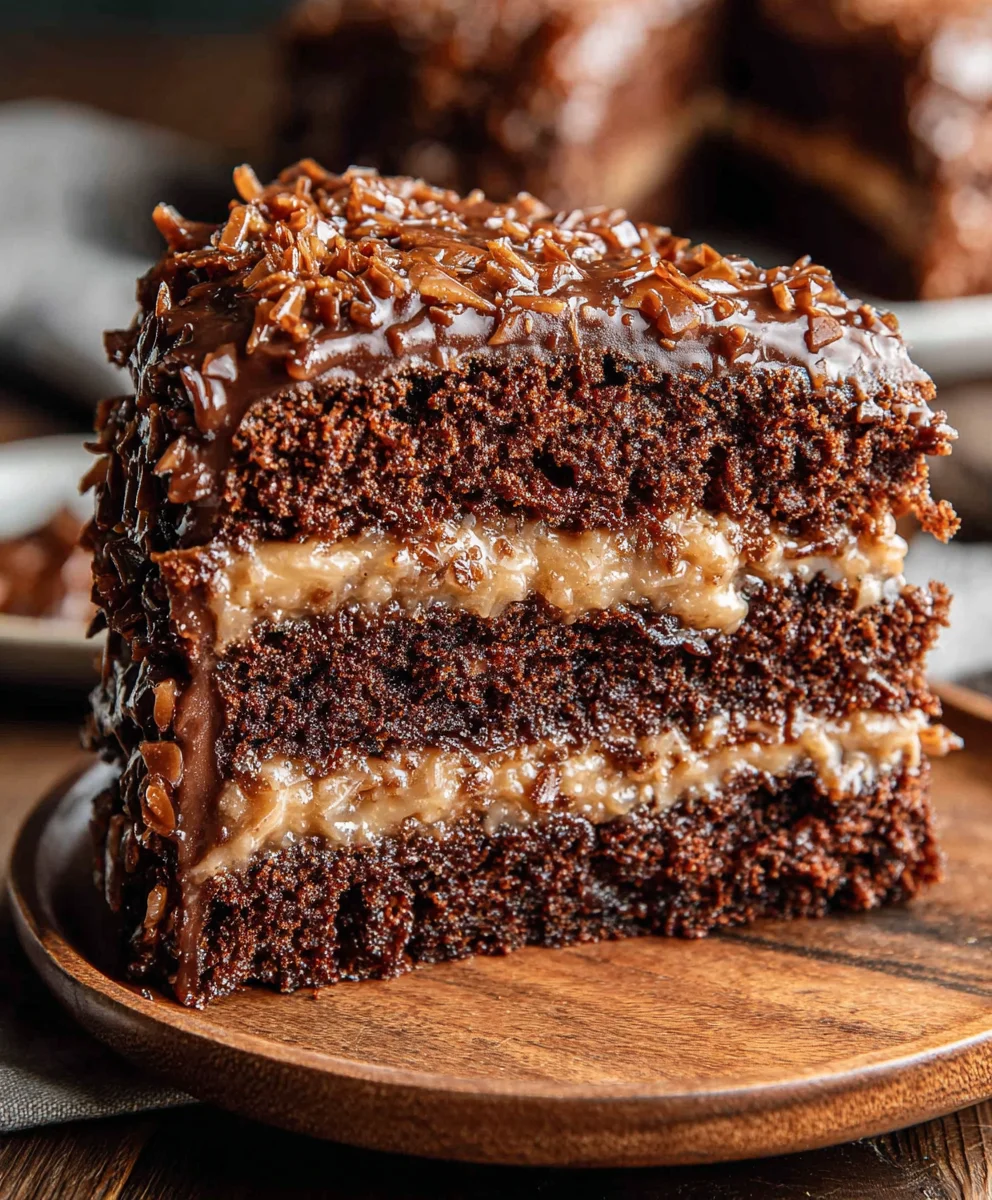
Once your cake layers are completely cool and your frosting has reached the perfect spreadable consistency, it’s time to assemble your beautiful Traditional German Chocolate Cake. Place one cake layer on your serving plate or cake stand. Generously spread a thick layer of the German chocolate frosting over the top of this first layer, making sure to go all the way to the edges. Carefully place the second cake layer on top. Now, frost the top and sides of the entire cake with the remaining German chocolate frosting. You can use an offset spatula to create swirls and smooth finishes. For an authentic touch, you might sprinkle chopped pecans or walnuts over the top and sides of the cake. Enjoy this classic, rich, and decadent treat!
Conclusion:
We hope you’ve enjoyed learning how to create this truly magnificent Traditional German Chocolate Cake. This recipe, with its rich chocolate layers and the iconic coconut-pecan frosting, is a labor of love that truly rewards every step of the process. Whether you’re celebrating a special occasion or simply indulgin extractg in a well-deserved treat, this cake is sure to impress. For serving, we recommend a generous slice, perhaps with a scoop of vanilla bean ice cream or a dollop of fresh whipped cream. The possibilities for variations are endless too! Consider adding a touch of espresso powder to the cake batter for a deeper chocolate flavor, or sprinkle a few chocolate shavings on top for extra decadence. Don’t be afraid to experiment and make this Traditional German Chocolate Cake your own. Dive in, have fun, and savor every delicious bite!
Frequently Asked Questions:
Can I make this cake ahead of time?
Absolutely! The cake layers can be baked a day in advance, cooled completely, and stored tightly wrapped at room temperature. The frosting can also be made a day ahead and refrigerated; let it sit at room temperature for about 30 minutes to soften before frosting the cake. This makes assembly on the day of serving much easier!
What if I don’t have pecans?
No problem! While pecans are traditional, you can substitute them with walnuts or even sliced almonds for a similar crunch. Ensure they are toasted for the best flavor, just as you would with pecans.
Authentic German Chocolate Cake Recipe – Decadent & Easy
A classic, rich, and decadent German Chocolate Cake with moist chocolate layers and a luscious, traditional coconut-pecan frosting (adapted for a chocolate frosting as per article content).
Ingredients
-
4 ounces semi-sweet chocolate, finely chopped
-
1/4 cup Dutch-process cocoa powder
-
1/2 cup boiling water
-
2 cups all-purpose flour
-
3/4 teaspoon baking soda
-
12 tablespoons unsalted butter, softened
-
1 cup granulated sugar
-
3/4 cup light brown sugar, packed
-
3/4 teaspoon salt
-
4 large eggs
-
1 teaspoon vanilla extract
-
3/4 cup sour cream
-
2 cups heavy cream
-
2 cups granulated sugar
-
6 large egg yolks
Instructions
-
Step 1
Prepare dry ingredients: Whisk together 2 cups flour, 3/4 tsp baking soda, and 3/4 tsp salt. Set aside. Combine 1/4 cup cocoa powder with 1/2 cup boiling water, stir until smooth, and let cool slightly. -
Step 2
Cream butter and sugars: In a large bowl, beat 12 tbsp softened butter with 1 cup granulated sugar and 3/4 cup packed light brown sugar until light and fluffy. Beat in 4 large eggs one at a time, then vanilla extract. -
Step 3
Combine wet and dry ingredients: Alternately add the flour mixture and the cocoa mixture to the butter mixture, beginning and ending with the flour. Mix on low speed until just combined. Gently fold in 3/4 cup sour cream. -
Step 4
Bake the cake layers: Preheat oven to 350°F (175°C). Grease and flour two 8 or 9-inch round cake pans. Divide batter evenly and bake for 30-35 minutes, or until a toothpick comes out clean. Cool in pans for 10-15 minutes, then invert onto wire racks to cool completely. -
Step 5
Make the frosting: In a saucepan, whisk together 2 cups heavy cream, 2 cups granulated sugar, and 6 large egg yolks over medium-low heat, stirring constantly until thickened to coat the back of a spoon (about 8-12 minutes). Remove from heat. -
Step 6
Add chocolate to frosting: While the custard base is warm, stir in 4 oz finely chopped semi-sweet chocolate until completely melted and smooth. Stir in 1 tsp vanilla extract. -
Step 7
Cool and assemble: Let the frosting cool at room temperature until spreadable. Once cake layers are completely cool and frosting is spreadable, assemble the cake by frosting between layers and over the top and sides.
Important Information
Nutrition Facts (Per Serving)
It is important to consider this information as approximate and not to use it as definitive health advice.
Allergy Information
Please check ingredients for potential allergens and consult a health professional if in doubt.