Easy Frozen Yogurt Bites- Dairy-Free Option
Easy Frozen Yogurt Bites (Dairy-free option) are more than just a treat; they’re a delightful pathway to guilt-free indulgence and a fantastic way to cool down on a warm afternoon. We all crave something sweet and satisfying, but sometimes the traditional options feel a little too heavy or are packed with ingredients we’d rather avoid. That’s where these incredibly simple yet utterly delicious frozen yogurt bites come in. Imagin extracte tiny bursts of creamy, tangy goodness that are surprisingly wholesome and customizable. What truly makes these special is their inherent versatility. Whether you’re seeking a dairy-free delight or a classic yogurt experience, these bites deliver. They’re the perfect make-ahead snack for kids and adults alike, a refreshing antidote to sweet cravings that won’t weigh you down. Get ready to discover your new favorite frozen treat!
Ingredients:
- 1 cup thick Greek yogurt (or full-fat coconut yogurt for a dairy-free option)
- 3 tablespoons cashew butter (or almond butter)
- 3 tablespoons maple syrup (adjust to your sweetness preference)
- 3 tablespoons protein powder (optional, choose your favorite flavor)
- 1 teaspoon vanilla extract
- A generous pinch of sea salt (Maldon or Celtic sea salt are excellent choices)
- A handful of cacao nibs (optional, for added crunch and antioxidants)
- 3/4 cup chocolate chips or chopped dark chocolate
- 1/2 tablespoon coconut oil
Preparation Phase
Step 1: Combining the Base Ingredients
Begin extract by gathering a medium-sized mixing bowl. Into this bowl, spoon the thick Greek yogurt. If you are opting for the dairy-free version, ensure you are using a full-fat coconut yogurt for the best creamy texture. Next, add the cashew butter. If cashew butter isn’t readily available, almond butter is a fantastic substitute and will lend a similar nutty depth to our frozen yogurt bites. Measure out the maple syrup and pour it in. This is where you can start to customize the sweetness. I generally find 3 tablespoons to be just right, but feel free to add another tablespoon if you have a sweeter palate or if your yogurt is particularly tart. Now, for the optional, but highly recommended, protein boost, add your favorite protein powder. It’s crucial here to use a protein powder you genuinely enjoy the taste of, as it will influence the final flavor profile of your bites. Give everything a good stir until it’s well combined. Don’t worry about making it perfectly smooth at this stage; we’ll get there.
Step 2: Enhancing the Flavor and Texture
Once the initial base ingredients are somewhat incorporated, it’s time to elevate the flavor. Add the pure vanilla extract. Its aromatic sweetness will beautifully complement the tang of the yogurt and the nuttiness of the butter. Next, add that “gooooood pinch” of sea salt. This might seem counterintuitive in a sweet treat, but salt is a flavor enhancer. It will actually make the chocolate and sweetness pop even more, creating a more complex and satisfying taste. If you’re using cacao nibs, sprinkle them in now. Their slightly bitter, chocolatey crunch provides a wonderful textural contrast to the smooth yogurt. Stir everything together again, ensuring all these flavor boosters are evenly distributed throughout the mixture. At this point, you should aim for a relatively smooth consistency. If the mixture seems a little stiff from the yogurt, a gentle stir should loosen it up.
Assembly and Freezing Phase
Step 3: Preparing the Chocolate Coating
Now, let’s get our chocolate coating ready. You’ll need a heatproof bowl for this. Place the chocolate chips or chopped chocolate into the bowl. If you’re using chopped chocolate, aim for pieces that are relatively uniform in size so they melt evenly. Add the 1/2 tablespoon of coconut oil to the chocolate. The coconut oil is key here; it helps the chocolate melt smoothly and creates a delightful snap when it hardens on the frozen yogurt bites. You can melt this mixture using either a double boiler or the microwave. If using a double boiler, place the heatproof bowl over a saucepan filled with about an inch of simmering water, ensuring the bottom of the bowl doesn’t touch the water. Stir the chocolate and coconut oil mixture gently until it’s completely melted and smooth. If microwaving, heat in 30-second intervals, stirring well after each interval, until melted and smooth. Be careful not to overheat the chocolate, as it can seize up and become unusable. Once melted, set this bowl aside to cool slightly while you prepare your baking sheet.
Step 4: Forming and Freezing the Bites
Line a baking sheet with parchment paper or a silicone baking mat. This is crucial for preventing the frozen yogurt bites from sticking to the pan and making them easy to remove once frozen. Now, using a spoon or a small cookie scoop, drop dollops of the yogurt mixture onto the prepared baking sheet. Aim for bite-sized portions, about 1 to 1.5 inches in diameter. Don’t worry about making them perfectly uniform; their rustic charm is part of their appeal. Once all the yogurt mixture has been formed into dollops, carefully place the baking sheet into the freezer. Allow the yogurt bites to freeze solid. This typically takes about 2 to 3 hours, but it’s best to check them periodically to ensure they are firm to the touch.
Step 5: Dipping and Final Freezing
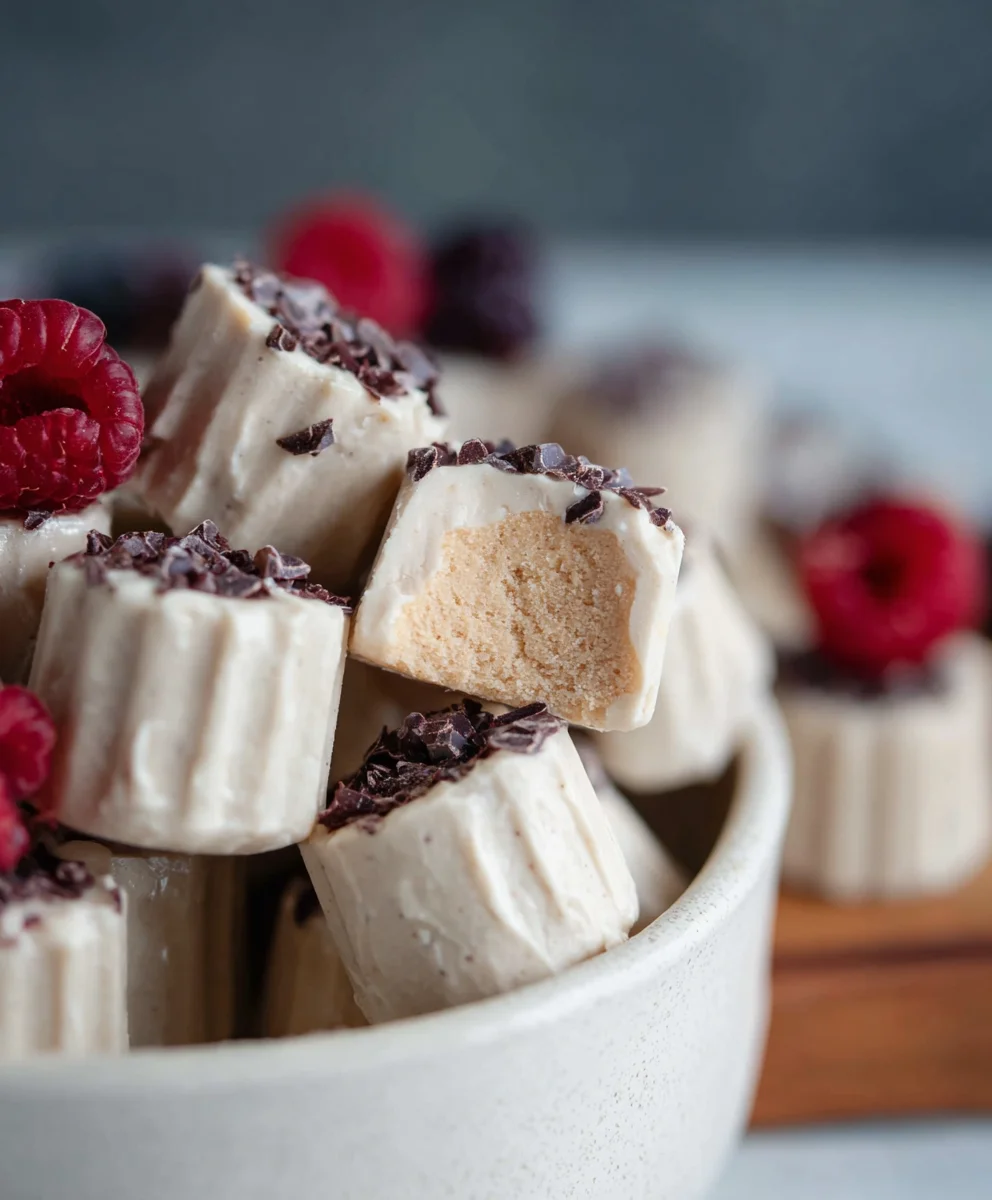
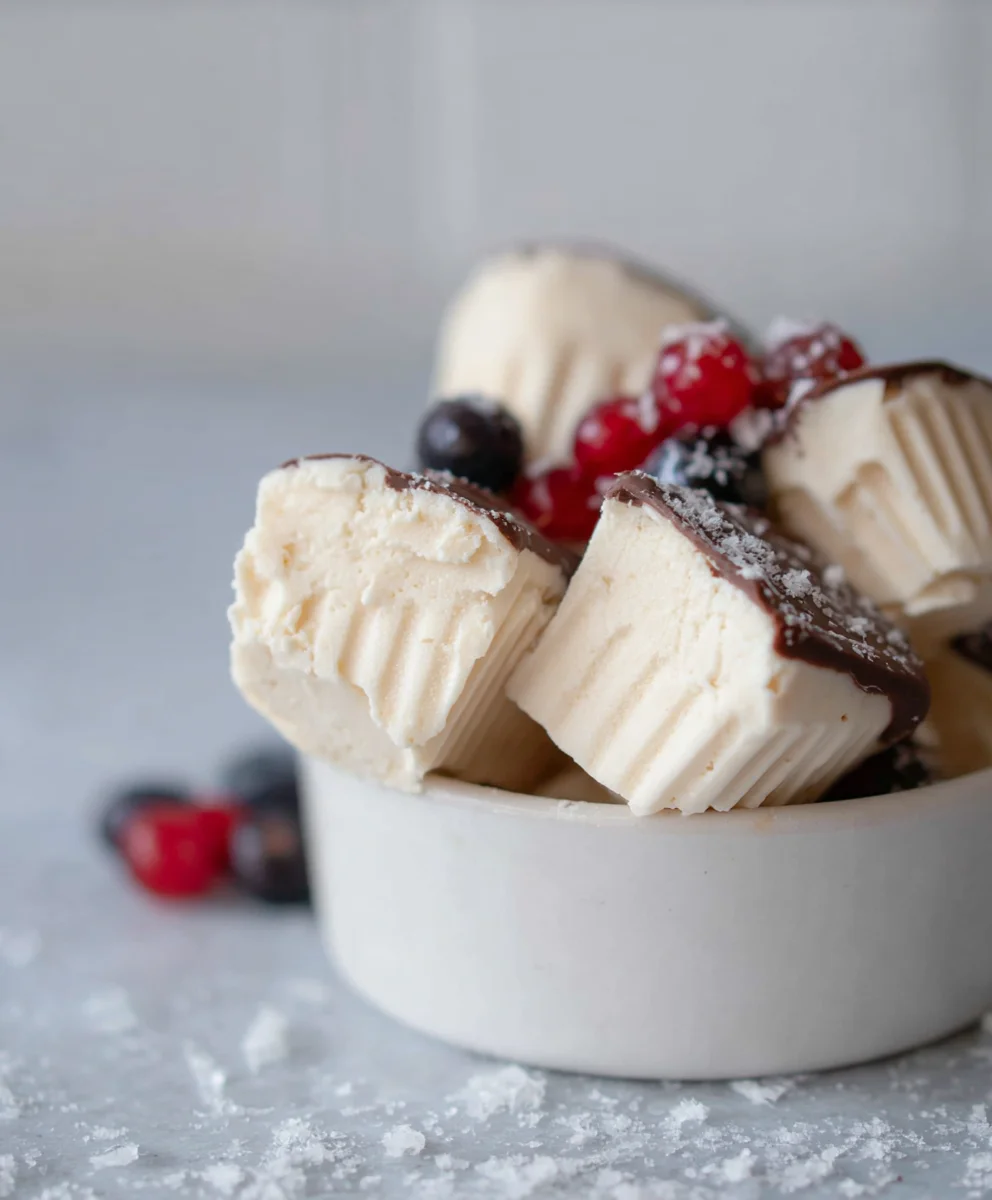
Once the yogurt bites are completely frozen and firm, it’s time for the chocolate dip. Take the slightly cooled melted chocolate mixture and dip each frozen yogurt bite into it, ensuring it’s fully coated. You can use a fork or a toothpick to help you dip them evenly. Allow any excess chocolate to drip back into the bowl before placing the coated bite back onto the parchment-lined baking sheet. Work relatively quickly, as the frozen yogurt bites will start to melt as they warm up. If you find the chocolate hardening too quickly in the bowl, you can gently re-warm it for a few seconds in the microwave or over the double boiler. Once all the bites are dipped and re-coated, place the baking sheet back into the freezer. Freeze for at least another hour, or until the chocolate coating is completely set and hard. This ensures a wonderfully crisp chocolate shell over the creamy, frozen yogurt center. You can then transfer the fully frozen yogurt bites to an airtight container or a freezer-safe bag for storage.
Conclusion:
And there you have it! You’ve successfully created delicious and healthy Easy Frozen Yogurt Bites (Dairy-free option). This recipe is a fantastic way to enjoy a sweet treat without the guilt, perfect for a post-workout snack, a refreshing dessert, or even a fun activity with kids. I hope you found the process enjoyable and that these bites become a regular in your freezer. Remember, the beauty of this recipe lies in its simplicity and adaptability. Don’t be afraid to experiment with different fruits and mix-ins to discover your own perfect flavor combination! Enjoy sharing these delightful bites with friends and family, or savoring them all to yourself. Happy freezing!
Frequently Asked Questions:
Can I use regular yogurt instead of dairy-free yogurt?
Absolutely! If you’re not needing a dairy-free option, feel free to substitute any plain or vanilla yogurt you prefer. The tartness of Greek yogurt also works wonderfully. Just ensure it’s a thick yogurt to get the best consistency for your Easy Frozen Yogurt Bites.
What other fruits can I use in these Easy Frozen Yogurt Bites?
The possibilities are almost endless! Berries like blueberries, raspberries, and blackberries are fantastic. Tropical fruits like mango, pineapple, and passionfruit add a wonderful zing. Even mashed banana or finely chopped apple can be incorporated for a different texture and flavor profile. Just make sure any fruit is pureed or finely chopped before mixing.
How long can I store these Easy Frozen Yogurt Bites?
When stored properly in an airtight container in the freezer, these Easy Frozen Yogurt Bites should last for about 1 to 2 months. They might lose a little bit of their origin extractal texture over time, but they will still be delicious!
Easy Frozen Yogurt Bites- Dairy-Free Option
Delicious and easy to make frozen yogurt bites with a dairy-free option, perfect for a healthy treat.
Ingredients
-
1 cup thick Greek yogurt or coconut yogurt
-
3 tablespoons cashew butter or almond butter
-
3 tablespoons maple syrup
-
3 tablespoons protein powder (optional)
-
1 teaspoon vanilla extract
-
A generous pinch of sea salt
-
A handful of cacao nibs (optional)
-
3/4 cup chocolate chips or chopped dark chocolate
-
1/2 tablespoon coconut oil
Instructions
-
Step 1
In a medium mixing bowl, combine the thick Greek yogurt (or full-fat coconut yogurt for dairy-free), cashew butter (or almond butter), maple syrup, optional protein powder, vanilla extract, and a generous pinch of sea salt. Stir until well combined. -
Step 2
Add cacao nibs (if using) and stir again to ensure all ingredients are evenly distributed. Aim for a relatively smooth consistency. -
Step 3
Prepare the chocolate coating by placing chocolate chips (or chopped chocolate) and coconut oil in a heatproof bowl. Melt using a double boiler or microwave until smooth. Let cool slightly. -
Step 4
Line a baking sheet with parchment paper. Drop dollops of the yogurt mixture onto the prepared baking sheet, about 1 to 1.5 inches in diameter. Freeze until solid, about 2-3 hours. -
Step 5
Once frozen, dip each yogurt bite into the melted chocolate, ensuring full coverage. Place coated bites back onto the parchment-lined baking sheet. If the chocolate hardens too quickly, gently re-warm it. -
Step 6
Return the baking sheet to the freezer and freeze for at least another hour, or until the chocolate coating is completely set and hard. Store in an airtight container in the freezer.
Important Information
Nutrition Facts (Per Serving)
It is important to consider this information as approximate and not to use it as definitive health advice.
Allergy Information
Please check ingredients for potential allergens and consult a health professional if in doubt.