Gluten-Free Sweet Potato Tortillas – Vegan Wraps
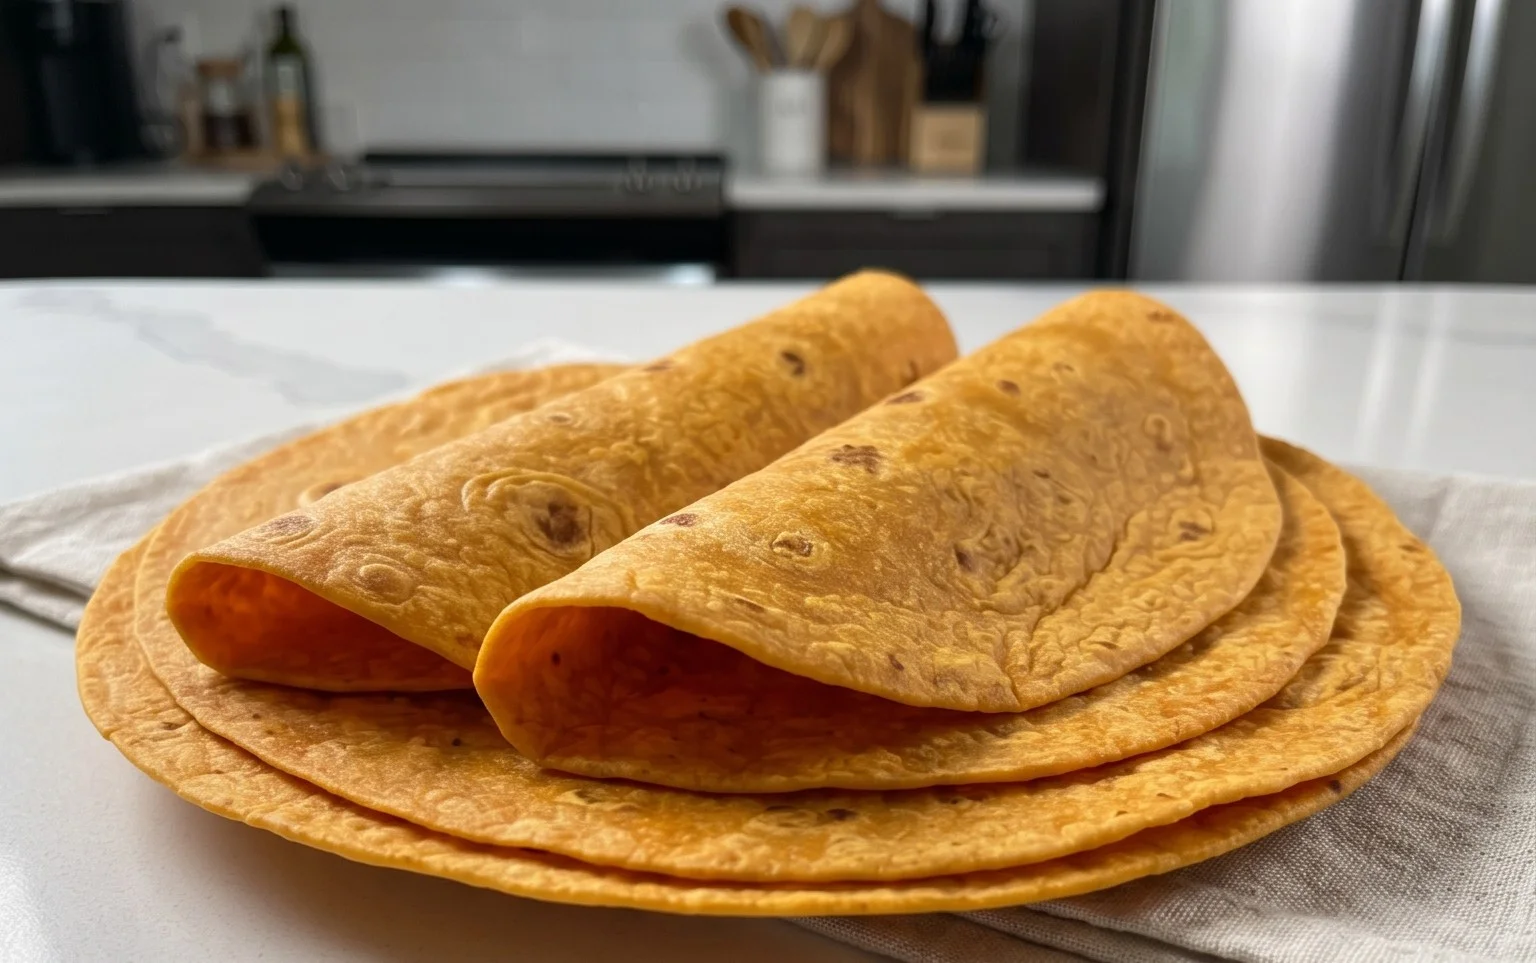
Sweet potato tortillas are about to become your new kitchen obsession, and for good reason! Forget everything you thought you knew about gluten-free and vegan wraps. These vibrant, naturally sweet, and incredibly versatile rounds are a game-changer for anyone seeking delicious and healthy meal solutions. Whether you’re craving a hearty breakfast burrito, a light and satisfying lunch wrap, or even a unique base for your favorite tacos, these sweet potato tortillas deliver. What makes them so special? It’s their incredible texture – tender, slightly chewy, and wonderfully pliable – a far cry from the often crum extractbly alternatives. Plus, the subtle sweetness of the sweet potato adds a depth of flavor that enhances any filling, making these sweet potato tortillas truly unforgettable. Get ready to revolutionize your meal prep!
Sweet Potato Tortillas (Gluten-Free Vegan Wraps)
Are you searching for a delicious and wholesome way to enjoy your favorite wraps, tacos, or quesadillas, all while sticking to a gluten-free and vegan lifestyle? Look no further! These sweet potato tortillas are a game-changer. They’re naturally vibrant, wonderfully soft, and packed with flavor, making them a delightful base for any meal. Forget the cardboard-like textures you might have experienced with some store-bought gluten-free options; these homemade beauties are a labor of love that truly pays off. The subtle sweetness of the sweet potato pairs beautifully with savory fillings, and their pliable nature means they won’t crack when you fold them. Plus, they’re surprisingly easy to make, even if you’re new to gluten-free baking.
These tortillas are more than just a carrier for your fillings; they’re a star in their own right. The earthy sweetness of the sweet potato lends a unique depth of flavor that complements both spicy and mild ingredients. They have a lovely golden hue that makes your meals look as appealing as they taste. I find that making a batch of these on a weekend frees up my weeknights for quicker meal assembly. They store well, so you can enjoy them throughout the week. Let’s get started on creating these fantastic gluten-free vegan wraps!
Ingredients:
Making the Dough
This first step is all about creating a smooth and flavorful base for our tortillas. You’ll want to start with your sweet potatoes. Ensure they are cooked until very tender but without excess water. Steaming is often the best method as it prevents them from becoming waterlogged. Once cooked, mash them thoroughly. You can use a fork, a potato masher, or even a food processor for an extra smooth consistency. The goal is a completely lump-free purée.
Next, in a medium-sized bowl, combine the mashed sweet potato with the vegan butter. If you’re using oil, ensure it’s a neutral-flavored one. Gently melt the vegan butter and whisk it into the sweet potato purée until it’s fully incorporated and smooth. This will add richness and help with the tortilla’s texture. If the mixture seems a little stiff, you can add a tablespoon of hot water at this stage to loosen it up.
Now, it’s time to season our base. Add the sea salt, a dash of black pepper, onion powder, and garlic powder to the sweet potato mixture. Stir everything together until well combined. This simple seasoning elevates the flavor profile of the tortillas, making them more interesting than plain wraps. Taste the mixture at this point and adjust salt if needed, keeping in mind that the sourdough starter will also contribute a bit of tang.
The magic ingredient that helps bind gluten-free flours is psyllium husk. In a small separate bowl, whisk together the psyllium husk with the 3/4 cup of gluten-free sourdough starter. If you don’t have a sourdough starter, don’t worry! You can substitute it with an equal amount of lukewarm water and add 1 teaspoon of apple cider vinegar for a similar tang. Let this mixture sit for about 5-10 minutes. You’ll notice it thickens considerably, forming a gel-like consistency. This is exactly what we want, as it will act as our binder and provide elasticity to the tortillas.
Now, add the thickened psyllium husk and sourdough starter mixture to the sweet potato base. Stir until everything is thoroughly combined. You’ll start to see the mixture taking on a dough-like appearance. If you’re using the optional baking powder for puffier tortillas, now is the time to whisk it in.
Finally, we’ll incorporate the dry ingredients. Gradually add the arrowroot flour (or your chosen starchy flour) to the wet ingredients, mixing until a cohesive dough forms. You might not need all of the arrowroot flour, or you might need a tiny bit more. The consistency you’re looking for is a soft, slightly sticky dough that you can handle. It shouldn’t be too wet that it sticks excessively to your hands, nor too dry that it crum extractbles. It’s important to note that gluten-free doughs can behave differently, so aim for a workable consistency. Once you have your dough, cover the bowl and let it rest for about 15-20 minutes. This resting period allows the psyllium husk to fully absorb moisture and the starches to hydrate, making the dough easier to handle.
Cooking the Tortillas
Once the dough has rested, it’s time to shape and cook our tortillas. Lightly flour a clean work surface and your hands with a little more arrowroot flour. Divide the dough into 4-6 equal portions, depending on how large you want your tortillas to be. Roll each portion into a ball.
Take one ball of dough and flatten it slightly with your hands. Then, using a rolling pin, gently roll out the dough into a thin circle, about 6-8 inches in diameter. Try to keep the thickness as even as possible for consistent cooking. If the dough is sticking, dust your rolling pin and the surface with a little more flour. Alternatively, you can place the dough ball between two sheets of parchment paper and roll it out. This method is especially helpful for gluten-free doughs as it minimizes sticking and tearing.
Now, it’s time to cook these beauties. Heat a lightly oiled non-stick skillet or griddle over medium heat. Carefully transfer one of the rolled-out tortillas to the hot skillet. Cook for about 2-3 minutes per side, or until golden brown spots appear and the tortilla is slightly puffed. You’ll see small bubbles forming on the surface; this indicates it’s cooking nicely. Flip it over with a spatula and cook the other side. Don’t overcook them, or they might become crispy rather than soft and pliable.
As each tortilla is cooked, immediately transfer it to a clean plate and cover it with a clean kitchen towel or a large piece of foil. This steaming process is crucial for keeping the tortillas soft and flexible, preventing them from drying out and becoming brittle. Continue this process with the remaining dough balls, stacking the cooked tortillas as you go, always keeping them covered.
Serving and Storing
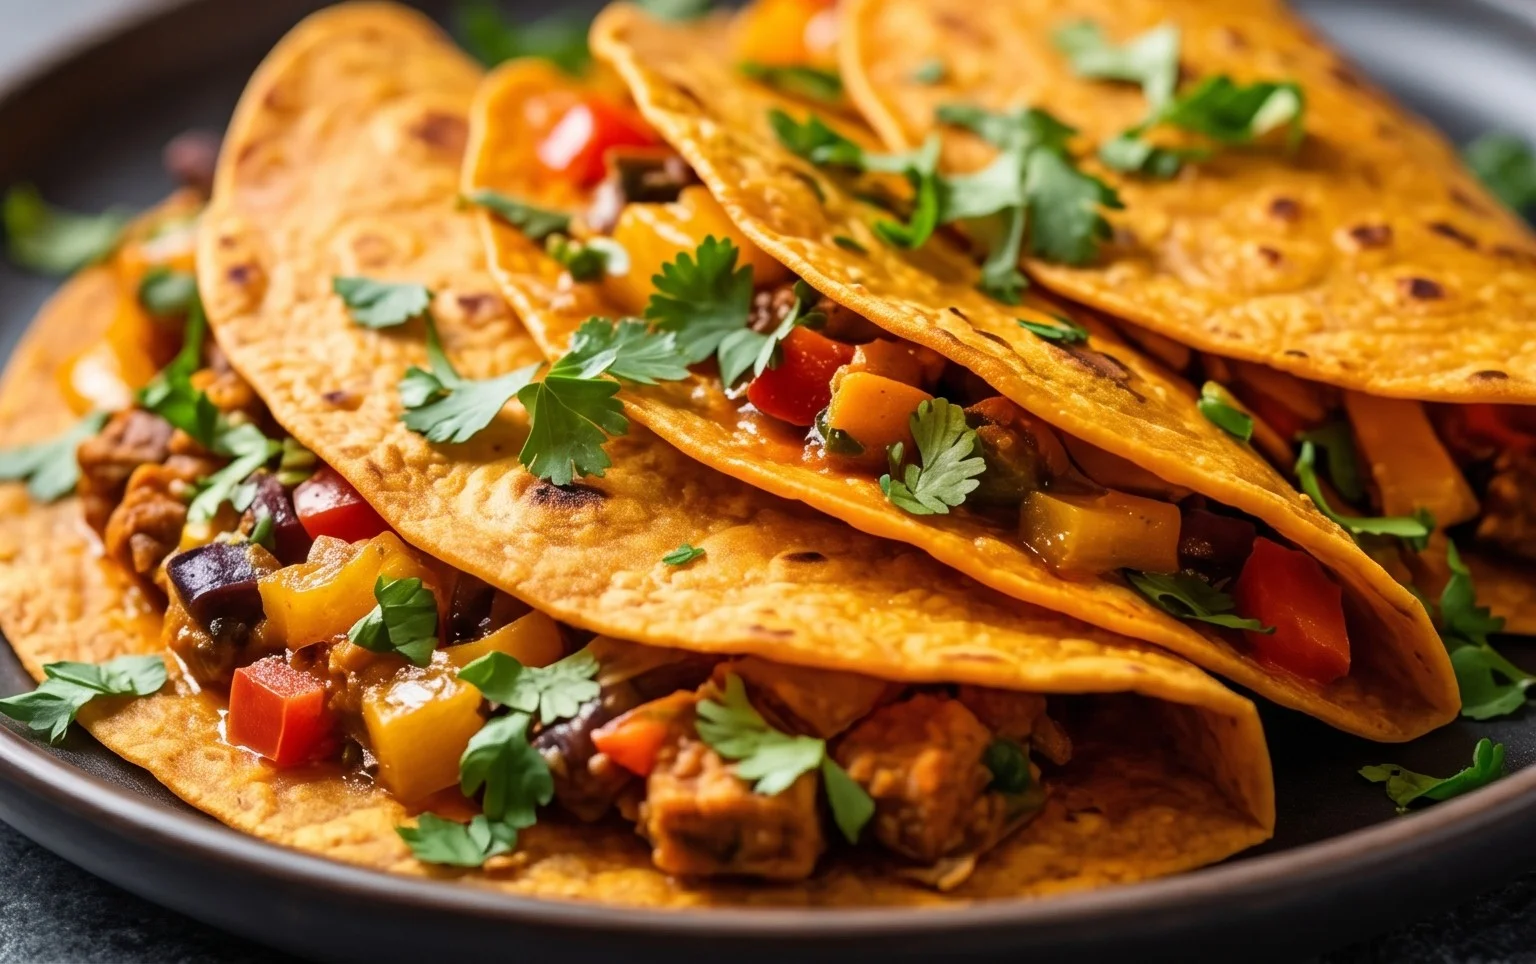
Once all your sweet potato tortillas are cooked and have had a chance to steam under the towel, they are ready to be enjoyed! They are incredibly versatile. Fill them with your favorite taco fillings, make a hearty quesadilla, or use them as a base for a breakfast burrito. The slightly sweet flavor makes them a great pairing for both savory and slightly sweet components. You can even enjoy them as is with a smear of hummus or avocado.
If you have any leftover tortillas, they store beautifully. Let them cool completely before wrapping them tightly in plastic wrap or storing them in an airtight container. They will keep at room temperature for about 2-3 days, or you can refrigerate them for up to a week. For longer storage, you can freeze them for up to 2-3 months. When you’re ready to enjoy them again, you can reheat them gently in a dry skillet, in the oven, or even in a microwave for a few seconds. These sweet potato tortillas are a delicious and nutritious addition to any meal, and I’m sure you’ll love them as much as I do!
Conclusion:
I hope you’re as excited to try these Sweet Potato Tortillas (Gluten-Free Vegan Wraps) as I am to share them! These wraps are a fantastic way to add a burst of natural sweetness and vibrant color to your meals, all while being completely gluten-free and vegan. They’re surprisingly easy to make, requiring just a few simple ingredients, and the versatility they offer in the kitchen is truly wonderful. Whether you’re looking for a healthy lunch option, a creative dinner idea, or even a base for some fun appetizers, these tortillas deliver. Their soft, pliable texture makes them perfect for rolling or folding, and their subtle sweetness pairs beautifully with a wide range of fillings. I truly encourage you to give them a go – you might just discover your new favorite go-to wrap!
Frequently Asked Questions:
Q: How should I store leftover sweet potato tortillas?
A: Once completely cooled, store your sweet potato tortillas in an airtight container or a resealable bag in the refrigerator for up to 3-4 days. For longer storage, you can freeze them in a single layer separated by parchment paper, then transfer to a freezer-safe bag. Reheat them gently in a dry skillet or microwave.
Q: Can I use a different type of sweet potato?
A: While orange-fleshed sweet potatoes are generally preferred for their sweetness and moisture content, you can experiment with other varieties like purple sweet potatoes. Keep in mind that the color will change, and the sweetness might vary slightly. Ensure they are cooked until very tender before mashing.
Q: My tortillas are tearing when I try to roll them. What can I do?
A: This can happen if the dough is too dry or not cooked long enough. Ensure your sweet potato is very soft before mashing. You can also try adding a tablespoon or two of water or plant-based milk to the dough if it seems crum extractbly. Cooking them for the full recommended time until they are lightly golden will also improve their pliability.
Sweet Potato Tortillas (Gluten-Free Vegan Wraps)
Delicious and flexible gluten-free, vegan tortillas made with sweet potato. Perfect for wraps, tacos, or quesadillas.
Ingredients
-
2 small sweet potatoes – steamed or boiled (no liquid / mashed)
-
2 tbsp vegan butter
-
1-2 tbsp hot water
-
3/4 tsp sea salt
-
1/4 tsp black pepper
-
1/2 tsp onion powder
-
1/2 tsp garlic powder
-
3/4 cup gluten free sourdough starter
-
2 tsp psyllium husk
-
2-3 tbsp arrowroot flour
-
1/2 tsp baking powder
Instructions
-
Step 1
Mash the steamed or boiled sweet potatoes until very smooth. Ensure there is no excess liquid. -
Step 2
In a bowl, combine the mashed sweet potato, vegan butter, sea salt, black pepper, onion powder, and garlic powder. Mix well. -
Step 3
Add the gluten-free sourdough starter and psyllium husk to the sweet potato mixture. Stir until combined. -
Step 4
Gradually add the arrowroot flour, 1 tablespoon at a time, until a pliable dough forms. If the dough is too dry, add a little hot water, 1 tablespoon at a time. If using, stir in the baking powder. -
Step 5
Divide the dough into 6-8 equal portions and roll them into balls. Flatten each ball between two sheets of parchment paper into thin circles, about 6-7 inches in diameter. -
Step 6
Heat a lightly oiled skillet or griddle over medium heat. Cook each tortilla for 2-3 minutes per side, or until lightly golden and cooked through.
Important Information
Nutrition Facts (Per Serving)
It is important to consider this information as approximate and not to use it as definitive health advice.
Allergy Information
Please check ingredients for potential allergens and consult a health professional if in doubt.