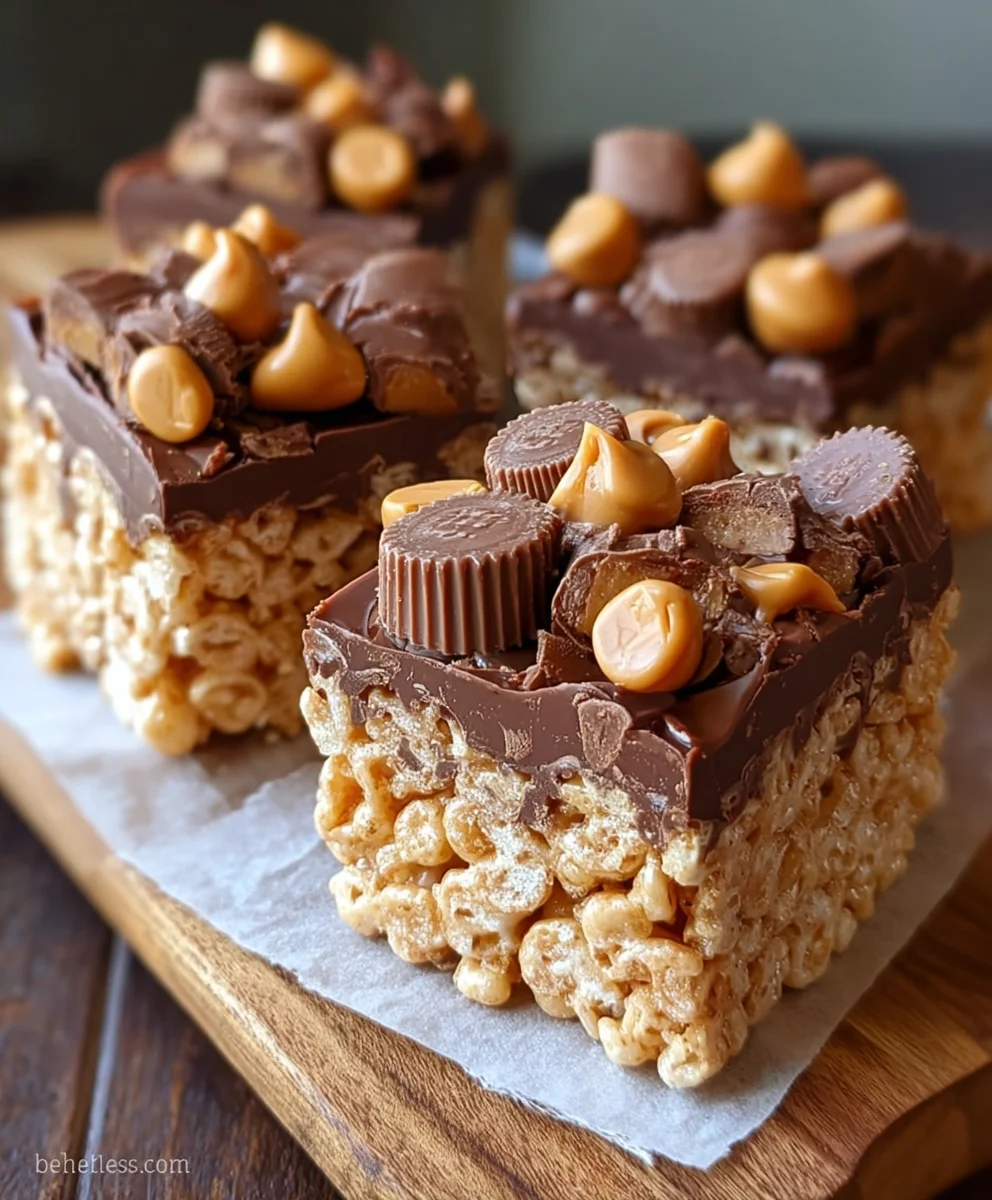
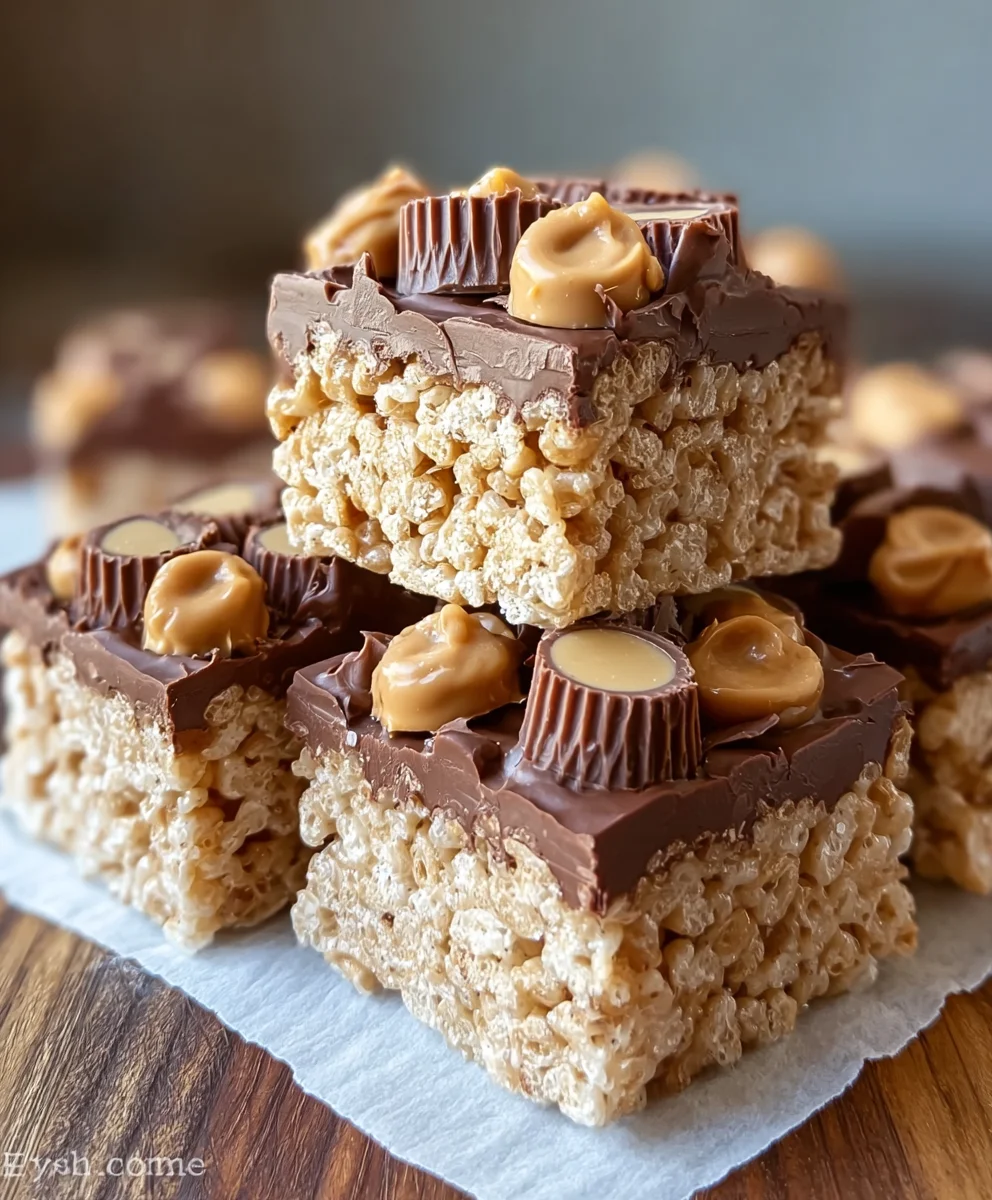
Peanut Butter Cup Rice Krispies Treats- Easy Recipe
Peanut Butter Cup Rice Krispies Treats are more than just a nostalgic childhood snack; they’re a decadent, grown-up upgrade that will have you questioning everything you thought you knew about this classic dessert. Imagin extracte the perfect balance of chewy, gooey goodness from the classic Rice Krispies treat, elevated by the unmistakable, irresistible swirl of creamy peanut butter and rich, melty chocolate. This isn’t just about a sweet bite; it’s an experience. People adore these treats because they tap into a deep well of happy memories, offering a comforting familiarity that’s hard to resist. But what truly sets these Peanut Butter Cup Rice Krispies Treats apart is the ingenious way we’ve infused the beloved flavors of a peanut butter cup directly into every single bite. Forget simply dipping them in chocolate; we’re talking a flavor explosion that will have your taste gin extracts singing. Get ready to elevate your treat game to a whole new level of deliciousness!
Ingredients:
- Unsalted butter: 4 tablespoons
- Smooth peanut butter: 1/2 cup
- Mini marshmallows: 1 (10 oz) bag
- Rice Krispies cereal: 6 cups
- Mini peanut butter cups, halved: 1 cup
- Melted chocolate (optional, for drizzling): 1/2 cup
Get Ready to Make Your Peanut Butter Cup Rice Krispies Treats
This recipe is all about taking those classic, nostalgic Rice Krispies treats and elevating them with the irresistible combination of peanut butter and chocolate. Imagin extracte a chewy, gooey marshmallow base, studded with the iconic flavor of peanut butter cups, and finished with a decadent drizzle of chocolate. These Peanut Butter Cup Rice Krispies Treats are perfect for parties, after-school snacks, or anytime you need a little sweet indulgence. Let’s get started!
Phase 1: Preparing the Gooey Base
The foundation of any great Rice Krispies treat is a perfectly melted marshmallow mixture. This is where all the magic happens, binding the cereal together and creating that signature chewy texture.
- First, prepare your baking pan. I recommend using a 9×13 inch baking pan. You’ll want to grease it thoroughly with butter or cooking spray. For extra insurance against sticking, you can also line it with parchment paper, leaving some overhang on the sides to make lifting the treats out easier later. This step is crucial for a clean release of your finished treats. Set this aside while you prepare the marshmallow mixture.
- In a large saucepan, melt the 4 tablespoons of unsalted butter over low heat. It’s important to use low heat here to prevent the butter from browning. Once the butter is completely melted and shimmering, add the entire 1 (10 oz) bag of mini marshmallows to the saucepan. Continue to stir gently and constantly over low heat. You’ll notice the marshmallows will slowly start to puff up and melt. Keep stirring until the marshmallows are completely smooth and creamy, with no lumps remaining. This process usually takes about 5-7 minutes. Don’t rush this step; patience will ensure a smooth, lump-free texture in your treats.
- Once the marshmallows are fully melted and smooth, remove the saucepan from the heat. Immediately stir in the 1/2 cup of smooth peanut butter. Stir vigorously until the peanut butter is completely incorporated into the marshmallow mixture. You want a uniform, glossy, peanut butter-infused goo. The warmth from the melted marshmallows will help the peanut butter melt and blend seamlessly. Make sure there are no streaks of unmixed peanut butter; a well-combined base is key to the flavor distribution in your final treats.
Phase 2: Combining and Forming
Now it’s time to bring in the crispy cereal and those delightful peanut butter cup pieces. This is where your Peanut Butter Cup Rice Krispies Treats really start to take shape.
- Now, it’s time to add the dry ingredients. Pour the 6 cups of Rice Krispies cereal directly into the saucepan with the melted marshmallow and peanut butter mixture. Gently but thoroughly fold the cereal into the goo using a large spatula. You want to ensure every single crispy piece is coated in the sticky mixture. Be careful not to overmix, as this can crush the cereal and lead to a denser, less airy treat. It’s a delicate balance of coating without crushing.
- Next, carefully stir in the 1 cup of halved mini peanut butter cups. Fold them in gently, distributing them as evenly as possible throughout the cereal mixture. You want pockets of delicious peanut butter cup goodness in every bite. Some will melt slightly from the residual heat, which is perfectly fine and adds to the gooey factor. Try not to overwork this stage; we want distinct pieces of peanut butter cups, not a fully melted, indistinguishable mass.
Phase 3: Pressing and Finishing
This is the final stage where we shape our treats and add any optional embellishments.
- Transfer the entire mixture from the saucepan into your prepared baking pan. Do not just dump it; use your spatula to carefully scoop it in. Now, here’s the trick to getting those perfectly formed treats without sticky fingers: lightly grease another spatula or a piece of parchment paper with butter or cooking spray. Then, gently but firmly press the mixture into an even layer in the pan. Avoid pressing too hard, which can make the treats dense and hard. The goal is a compact yet still somewhat airy layer. Work quickly, as the marshmallow mixture will start to set as it cools.
- If you’re opting for the extra touch of decadence, now is the time to prepare your melted chocolate drizzle. You can melt 1/2 cup of chocolate chips or chopped chocolate in a microwave-safe bowl in 30-second intervals, stirring between each, until smooth. Alternatively, you can use a double boiler. Once melted and smooth, transfer the melted chocolate to a piping bag or a small zip-top bag with a corner snipped off. Drizzle the melted chocolate artfully over the top of the pressed Rice Krispies treats. You can create zig-zags, lines, or any pattern you desire. This step is entirely optional but highly recommended for an extra layer of flavor and visual appeal.
- Let the Peanut Butter Cup Rice Krispies Treats cool completely in the pan for at least 1-2 hours. This allows them to set properly so you can cut them into neat squares. Rushing this cooling process will result in soft, crum extractbly treats that are difficult to handle. Once fully cooled and firm, use the parchment paper overhang (if you used it) to lift the entire slab out of the pan. Place it on a cutting board and use a sharp knife to cut them into your desired squares or rectangles. Clean your knife periodically between cuts for the neatest edges.
Conclusion:
And there you have it – the incredibly simple yet wonderfully delicious Peanut Butter Cup Rice Krispies Treats! We hope you’ve enjoyed learning how to whip up this classic no-bake dessert with a delightful chocolate and peanut butter twist. These treats are perfect for potlucks, birthday parties, or simply satisfying that sweet craving. They’re so easy to make, making them an ideal activity for kids and adults alike to enjoy together in the kitchen.
For serving suggestions, these Peanut Butter Cup Rice Krispies Treats are fantastic on their own, but consider cutting them into fun shapes with cookie cutters or drizzling them with extra melted chocolate for an extra touch of decadence. Feeling adventurous with variations? Try adding a handful of mini chocolate chips or chopped peanuts directly into the mixture before pressing it into the pan. You could also experiment with different types of peanut butter, like crunchy or almond butter, for a unique flavor profile. Don’t be afraid to get creative and make these your own!
We encourage you to give this recipe a try. It’s a guaranteed crowd-pleaser and a nostalgic treat that brings smiles to everyone’s faces. Happy baking (or rather, no-baking)!
Frequently Asked Questions:
Q: How should I store these Peanut Butter Cup Rice Krispies Treats?
A: Once completely cooled, store your Peanut Butter Cup Rice Krispies Treats in an airtight container at room temperature for up to 3-4 days. You can also layer them between parchment paper to prevent sticking.
Q: Can I make these Peanut Butter Cup Rice Krispies Treats vegan?
A: Yes, you can! To make them vegan, use vegan marshmallows, vegan butter, and ensure your chocolate chips or peanut butter cups are dairy-free.
Peanut Butter Cup Rice Krispies Treats
An easy recipe for classic Rice Krispies treats elevated with the irresistible combination of peanut butter and chocolate, featuring a gooey marshmallow base studded with peanut butter cups and an optional chocolate drizzle.
Ingredients
-
4 tablespoons unsalted butter
-
1/2 cup smooth peanut butter
-
1 (10 oz) bag mini marshmallows
-
6 cups Rice Krispies cereal
-
1 cup mini peanut butter cups, halved
-
1/2 cup melted chocolate (optional, for drizzling)
Instructions
-
Step 1
Prepare a 9×13 inch baking pan by greasing it thoroughly with butter or cooking spray, and optionally lining it with parchment paper for easy removal. Set aside. -
Step 2
In a large saucepan over low heat, melt 4 tablespoons of unsalted butter. Add the 1 (10 oz) bag of mini marshmallows and stir constantly until completely smooth and creamy, about 5-7 minutes. Remove from heat. -
Step 3
Stir in 1/2 cup of smooth peanut butter until fully incorporated and the mixture is uniform and glossy. Ensure no streaks of unmixed peanut butter remain. -
Step 4
Pour 6 cups of Rice Krispies cereal into the saucepan and gently fold it into the marshmallow and peanut butter mixture until every piece is coated. Be careful not to overmix or crush the cereal. -
Step 5
Carefully stir in 1 cup of halved mini peanut butter cups, distributing them evenly throughout the cereal mixture. -
Step 6
Transfer the mixture to the prepared baking pan. Lightly grease a spatula or parchment paper and gently press the mixture into an even layer. Avoid pressing too hard. -
Step 7
If using, melt 1/2 cup of chocolate and drizzle it over the top of the treats. Let the treats cool completely in the pan for at least 1-2 hours before cutting into squares.
Important Information
Nutrition Facts (Per Serving)
It is important to consider this information as approximate and not to use it as definitive health advice.
Allergy Information
Please check ingredients for potential allergens and consult a health professional if in doubt.