Juicy Pulled Beef Sandwich Recipe – Easy & Delicious
Pulled beef sandwich perfection awaits! If you’re dreaming of tender, succulent meat that practically melts in your mouth, then you’ve come to the right place. There’s something undeniably comforting and downright delicious about a well-made pulled beef sandwich. It’s a dish that evokes backyard barbecues, cozy gatherings, and pure, unadulterated satisfaction. What makes this culinary masterpiece so beloved? It’s the slow, patient cooking process that transforms humble cuts of beef into fall-apart goodness, infused with smoky, savory flavors. The perfect balance of richness, tang, and a hint of sweetness, all piled high on a soft bun, creates an experience that’s truly unforgettable. Forget dry, tough sandwiches; this recipe is your ticket to the ultimate pulled beef sandwich experience, guaranteed to impress your taste buds and your guests.
The Ultimate Pulled Beef Sandwich: A Flavorful Journey
There’s something incredibly comforting and satisfying about a slow-cooked, tender pulled beef sandwich. The rich, savory flavor of the beef, infused with a smoky barbecue sauce and served on a soft bun, is pure culinary bliss. This recipe will guide you through creating restaurant-quality pulled beef right in your own kitchen, perfect for a weeknight dinner or a weekend gathering. Forget dry, bland beef; we’re talking about melt-in-your-mouth deliciousness that will have everyone asking for seconds.
Ingredients:
Cooking Instructions:
This recipe relies on the magic of slow cooking to transform a tough cut of beef into incredibly tender, flavorful pulled meat. The longer and slower it cooks, the better the result will be. We’ll start by preparing the beef and then move on to building the rich braising liquid that will infuse it with so much flavor.
Phase 1: Preparing the Beef and Aromatics
First things first, let’s get our beef ready. Take your 3-4 lb beef chuck roast and pat it completely dry with paper towels. This is an important step as it helps create a better sear, which adds another layer of flavor. Season the entire roast generously on all sides with the 1 teaspoon of salt and 1/2 teaspoon of black pepper. Don’t be shy with the seasoning; it’s the foundation of the flavor.
Next, prepare your aromatics. Take your large onion and slice it into thin, even pieces. Mince your 3 cloves of garlic; a fine mince will ensure the garlic flavor is evenly distributed throughout the braising liquid.
Phase 2: Building the Flavor Base
Now, let’s get our cooking vessel ready. You can use a Dutch oven, a heavy-bottomed pot with a lid, or even your slow cooker for this. If you’re using a pot or Dutch oven, heat a tablespoon of olive oil over medium-high heat. Sear the seasoned beef chuck roast on all sides until a beautiful, deep brown crust forms. This searing process is crucial for developing rich, complex flavors that a simple braise wouldn’t achieve. Once seared, remove the beef from the pot and set it aside.
In the same pot, add the sliced onion and cook, stirring occasionally, until it begin extracts to soften and become translucent, about 5-7 minutes. Then, add the minced garlic and cook for another minute until fragrant, being careful not to burn it.
Phase 3: The Slow Braise
This is where the magic really happens! Pour in the 1 cup of beef broth, scraping the bottom of the pot with a wooden spoon to loosen any browned bits (fond). These browned bits are packed with flavor and will dissolve into the liquid, enriching our braising sauce. Add the 1/2 cup of barbecue sauce, 2 tablespoons of Worcestershire sauce, and 1 tablespoon of brown sugar. Stir in the 1 teaspoon of smoked paprika and 1 teaspoon of ground cumin. These spices will add warmth and a hint of smokiness that complements the beef beautifully.
Return the seared beef chuck roast to the pot, nestled amongst the onions and sauce. The liquid should come at least halfway up the sides of the roast; if not, you can add a little more beef broth or water. Cover the pot tightly with its lid.
Now, it’s time for the slow cooking. If you’re using a Dutch oven or heavy pot, transfer it to a preheated oven at 300°F (150°C). Let it cook for 3 to 4 hours, or until the beef is incredibly tender and easily falls apart when probed with a fork. The exact cooking time will depend on the size and thickness of your roast. If you’re using a slow cooker, place the seared beef, onions, and all the liquid ingredients in the slow cooker, cover, and cook on low for 6-8 hours or on high for 4-5 hours.
Phase 4: Pulling the Beef and Finishing Touches
Once the beef is fork-tender, carefully remove it from the pot or slow cooker and place it on a large cutting board or in a bowl. Using two forks, shred the beef until it’s in bite-sized pieces. Discard any large pieces of fat or connective tissue that didn’t break down.
Skim off any excess fat from the braising liquid remaining in the pot. If the sauce seems too thin, you can simmer it on the stovetop over medium heat for a few minutes to reduce and thicken it slightly. Alternatively, you can mash some of the softened onions into the sauce to help thicken it.
Return the shredded beef to the pot with the thickened sauce and stir to coat all the pieces evenly. Let it simmer for another 10-15 minutes, allowing the beef to absorb even more of that delicious sauce. This step is crucial for ensuring every strand of beef is packed with flavor.
Phase 5: Assembling Your Masterpiece
To assemble your pulled beef sandwiches, split your 6-8 sandwich buns. You can lightly toast them if you prefer a bit of crunch. Pile a generous amount of the saucy pulled beef onto the bottom half of each bun. Then, add your favorite optional toppings! Classic choices include tangy dill pickles, creamy coleslaw for a cool contrast, or even some thinly sliced raw red onion for a bit of bite. Top with the other half of the bun, and your incredible pulled beef sandwich is ready to be devoured. This recipe makes a truly satisfying meal that will become a staple in your cooking repertoire. Enjoy the fruits of your labor – a truly delicious and comforting pulled beef sandwich!
Conclusion:
And there you have it – your guide to creating the most incredibly delicious and satisfying pulled beef sandwich! This recipe is fantastic because it transforms simple cuts of beef into tender, flavor-packed strands that melt in your mouth. The slow cooking process allows the spices and braising liquid to infuse every fiber, resulting in a depth of flavor that store-bought options simply can’t match. It’s the perfect comfort food for a weekend meal, a casual get-together, or even a hearty lunch that will keep you full and happy.
When it comes to serving, the possibilities are endless! Beyond the classic soft buns, consider serving this delectable pulled beef over creamy coleslaw for a delightful contrast in textures, or even as a topping for baked potatoes or nachos. For variations, don’t hesitate to experiment with different spice rubs – a smoky paprika or a touch of cayenne can add a wonderful kick. You can also swap out the braising liquid for a different sauce base, like a tangy barbecue sauce or even a rich beef broth with a splash of red grape juice. I truly encourage you to give this pulled beef sandwich recipe a try. It’s incredibly rewarding to create something so special from scratch!
Frequently Asked Questions:
How long does the pulled beef last in the refrigerator?
Once cooled, your delicious pulled beef will keep well in an airtight container in the refrigerator for up to 3-4 days. This makes it perfect for meal prep!
Can I make this pulled beef ahead of time?
Absolutely! In fact, making it ahead of time can often enhance the flavors as they have more time to meld. You can refrigerate it and then gently reheat it on the stovetop or in the oven before assembling your sandwiches.
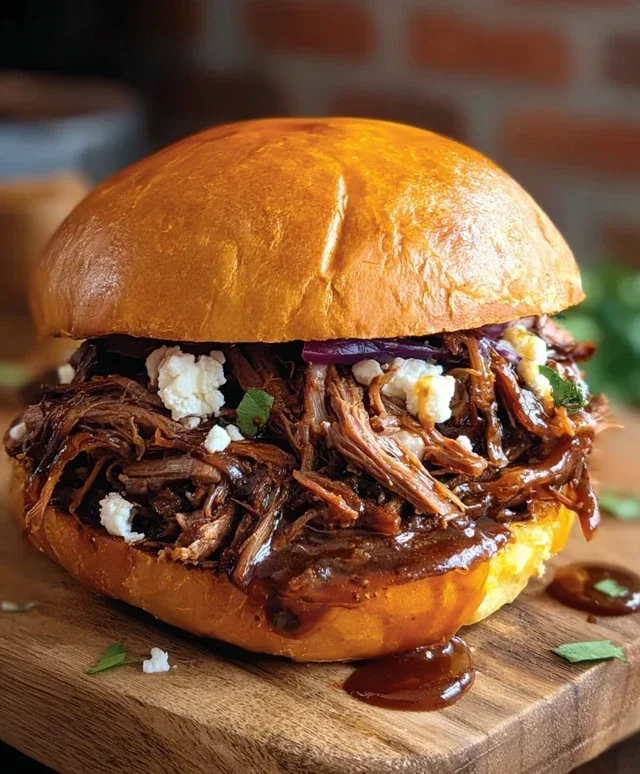
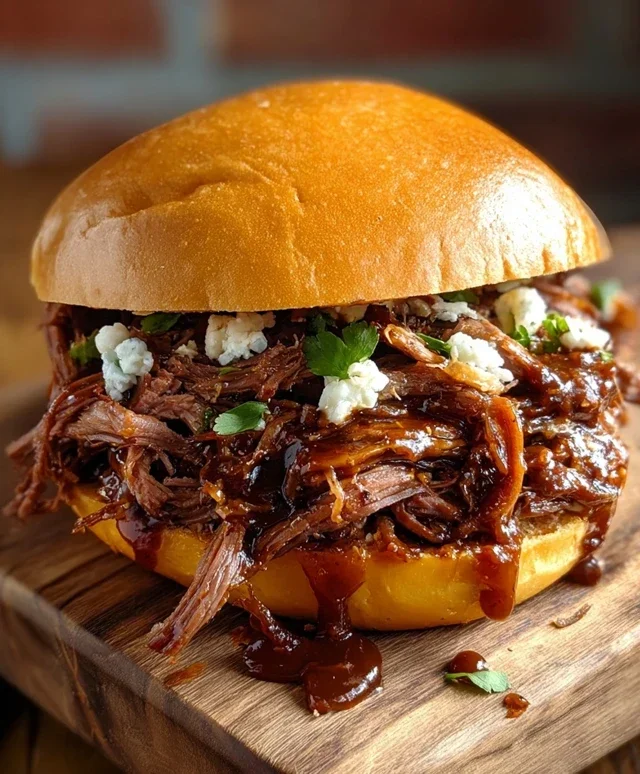
Pulled Beef Sandwich
Tender and flavorful shredded beef simmered in a savory barbecue sauce, perfect for a hearty sandwich.
Ingredients
-
3-4 lbs beef chuck roast
-
1 large onion, sliced
-
3 cloves garlic, minced
-
1 cup beef broth
-
1/2 cup barbecue sauce
-
2 tablespoons Worcestershire sauce
-
1 tablespoon brown sugar
-
1 teaspoon smoked paprika
-
1 teaspoon ground cumin
-
1 teaspoon salt
-
1/2 teaspoon black pepper
-
6-8 sandwich buns
Instructions
-
Step 1
Place beef chuck roast in a slow cooker. Add sliced onion and minced garlic. -
Step 2
In a bowl, whisk together beef broth, barbecue sauce, Worcestershire sauce, brown sugar, smoked paprika, cumin, salt, and pepper. Pour over the beef. -
Step 3
Cover and cook on low for 4-6 hours, or until the beef is very tender and easily shreds. -
Step 4
Remove the beef from the slow cooker and shred it using two forks. Return the shredded beef to the sauce in the slow cooker and stir to combine. -
Step 5
Toast the sandwich buns if desired. -
Step 6
Pile the pulled beef onto the sandwich buns and add optional toppings like pickles, coleslaw, or sliced onions.
Important Information
Nutrition Facts (Per Serving)
It is important to consider this information as approximate and not to use it as definitive health advice.
Allergy Information
Please check ingredients for potential allergens and consult a health professional if in doubt.