Sugar Free Fudge Recipe – Decadent & Delicious
Sugar Free Fudge, a seemingly impossible dream for many dessert lovers, is about to become your delicious reality. Forget everything you thought you knew about sugar-free treats; this recipe is here to redefine your expectations. Who doesn’t adore the rich, decadent experience of fudge? That melt-in-your-mouth texture, the intense cocoa flavor – it’s pure comfort. But for those of us watching our sugar intake, this classic indulgence often feels out of reach. That’s where our exceptional Sugar Free Fudge comes in. What makes this recipe so special is its ability to deliver all the velvety smoothness and deep chocolatey notes you crave, without a single gram of added sugar. We’ve cracked the code to achieving that perfect, luxurious consistency and satisfying sweetness using clever, wholesome ingredients. Get ready to discover a guilt-free pleasure that will have everyone asking for the secret.
Why You’ll Love This Sugar Free Fudge
The Ultimate Guilt-Free Indulgence
Ingredients:
- 2 cups sugar free chocolate chips
- 1 cup almond butter (or any smooth nut or seed butter you prefer)
- 1 teaspoon vanilla extract
Making Your Sugar Free Fudge
This recipe for Sugar Free Fudge is incredibly simple and requires minimal effort, making it a perfect treat for those looking to satisfy a sweet craving without the sugar. The key is using high-quality sugar-free chocolate chips and a smooth, creamy nut butter. Almond butter is my personal favorite for its mild flavor that complements the chocolate beautifully, but feel free to experiment with peanut butter, cashew butter, or even sunflower seed butter for a nut-free option. The vanilla extract is crucial for adding that classic fudge aroma and a subtle layer of complexity to the flavor profile.
Step 1: Gentle Melting of the Chocolate
The first and most important step is to gently melt your sugar-free chocolate chips. It’s crucial to do this slowly and carefully to avoid scorching the chocolate, which can result in a grainy and unpleasant texture. I recommend using a double boiler method. To do this, fill the bottom pot of your double boiler with about an inch of water and bring it to a gentle simmer over medium-low heat. Place the sugar-free chocolate chips in the top bowl of the double boiler, ensuring the bottom of the bowl does not touch the simmering water. Stir the chocolate chips frequently with a heatproof spatula. As they begin extract to soften and melt, continue stirring until they are completely smooth and liquid. If you don’t have a double boiler, you can use a heatproof bowl set over a saucepan of simmering water. Alternatively, you can melt the chocolate chips in a microwave-safe bowl in 30-second intervals, stirring thoroughly between each interval, until just melted. Be patient; this process might take a few minutes, but it’s worth it for perfectly smooth fudge.
Step 2: Incorporating the Nut Butter
Once your sugar-free chocolate chips are beautifully melted and smooth, it’s time to add the almond butter. Remove the bowl with the melted chocolate from the heat. Add the entire cup of almond butter directly into the hot, melted chocolate. Stir continuously with your spatula. The heat from the chocolate will help to warm and soften the almond butter, making it easier to incorporate. Continue stirring until the almond butter is fully blended into the chocolate mixture, creating a uniform, glossy consistency. It’s important to ensure there are no streaks or pockets of unmixed nut butter. Keep stirring until the mixture is completely homogenous. This is where the richness and creamy texture of the fudge really starts to develop. If your almond butter is very stiff, you might need to stir a little longer to achieve a smooth integration.
Step 3: Adding the Vanilla Extract
With the chocolate and almond butter perfectly combined, the next step is to add the vanilla extract. Pour the 1 teaspoon of vanilla extract into the bowl with the chocolate and nut butter mixture. Stir gently but thoroughly until the vanilla is evenly distributed throughout the fudge base. The vanilla extract not only enhances the overall flavor but also helps to round out the sweetness and prevent the fudge from tasting one-dimensionally chocolatey. It adds a lovely depth and aroma that elevates the simple ingredients into something truly special. Ensure you stir enough to fully incorporate the vanilla so that every bite of your sugar-free fudge has that hint of classic vanilla goodness.
Step 4: Preparing the Pan and Pouring the Mixture
Now it’s time to get your fudge ready to set. Line an 8×8 inch square baking pan with parchment paper. This is a crucial step, as it will allow you to easily lift the hardened fudge out of the pan for cutting. Make sure the parchment paper overhangs the sides of the pan slightly; this creates convenient handles for removing the fudge later. Once your pan is prepared, carefully pour the melted chocolate and almond butter mixture into the lined pan. Use your spatula to spread the mixture evenly into all the corners of the pan. Aim for a smooth, flat surface as this will result in evenly cut fudge pieces. Gently tap the pan on the counter a few times to help release any air bubbles that might be trapped in the mixture, ensuring a dense and smooth texture once set.
Step 5: Chilling and Setting the Fudge
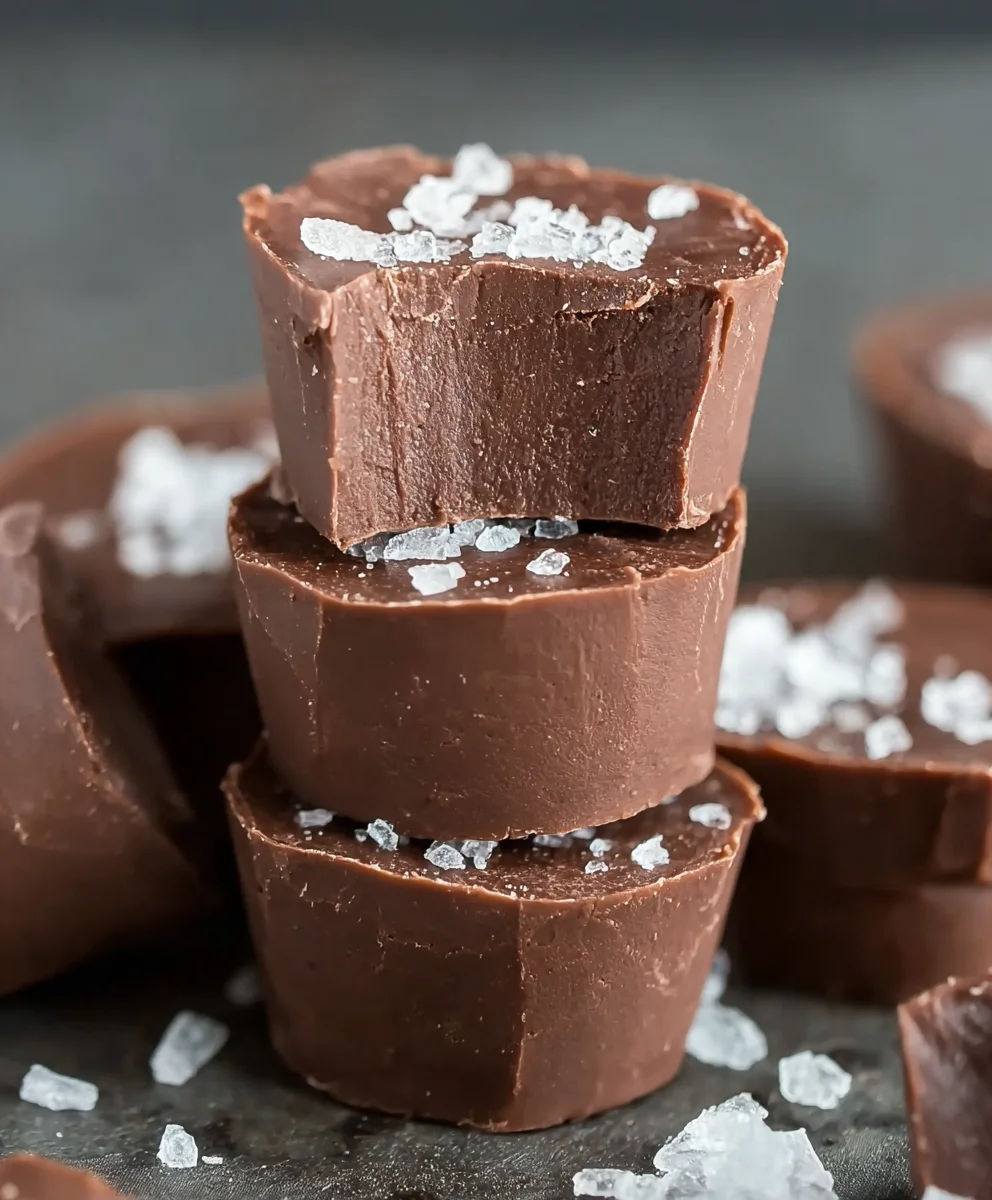
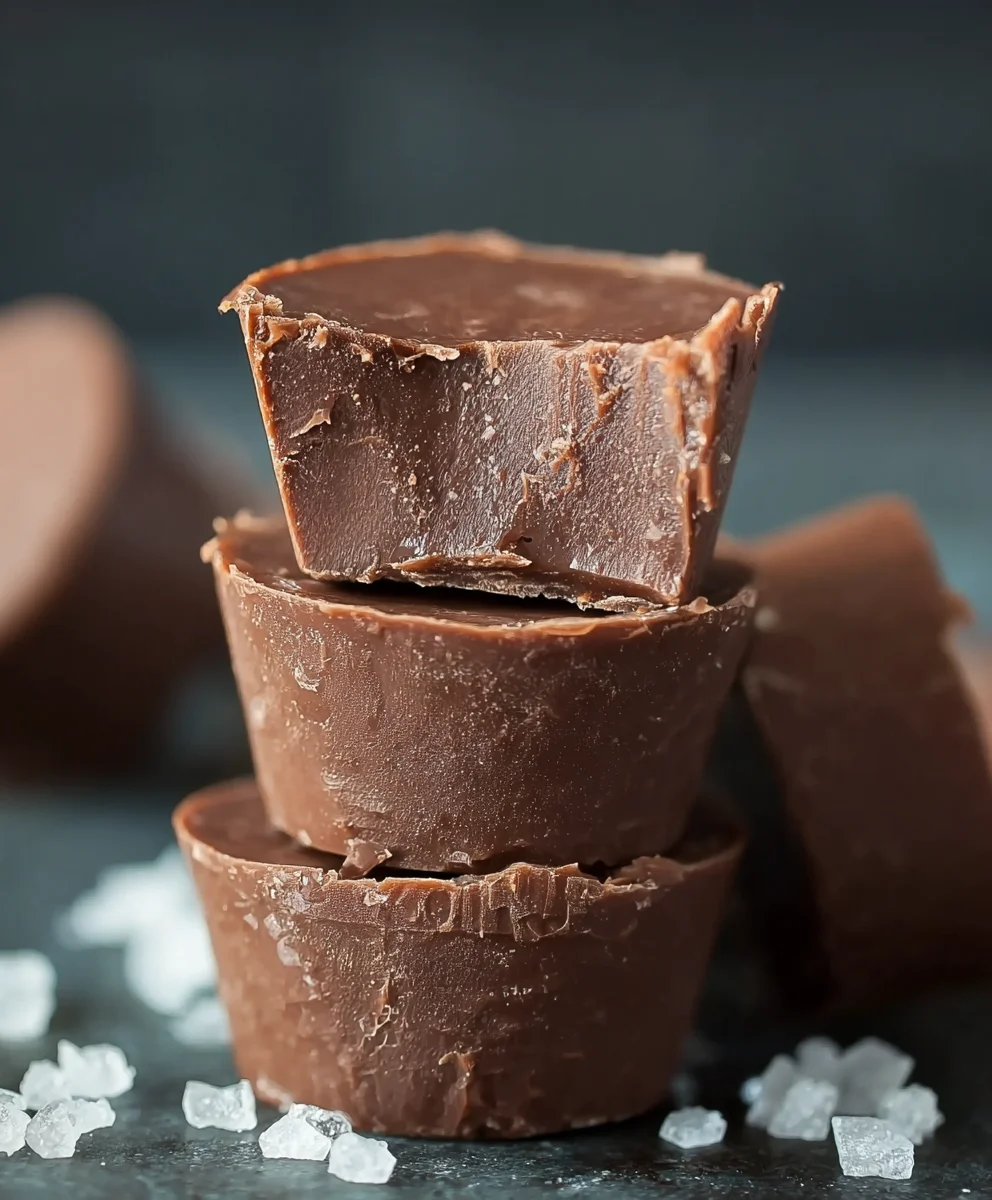
The final step before you can enjoy your homemade Sugar Free Fudge is allowing it to set. Place the prepared pan in the refrigerator. Allow the fudge to chill for at least 2 to 4 hours, or until it is completely firm to the touch. The cold temperature will help the chocolate and almond butter to solidify, transforming the liquid mixture into a firm, sliceable fudge. You can test for firmness by gently pressing the top of the fudge with your finger; if it feels solid and doesn’t yield, it’s ready. For a quicker set, you can place the pan in the freezer for about an hour, but be sure to monitor it closely to prevent it from freezing solid. Once firm, carefully lift the fudge out of the pan using the parchment paper overhang. Place it on a cutting board and use a sharp knife to cut it into your desired square or rectangular shapes. Store the finished Sugar Free Fudge in an airtight container in the refrigerator.
Conclusion:
And there you have it – a simple yet utterly delicious way to enjoy Sugar Free Fudge without any of the guilt! This recipe has proven to be a firm favorite for its rich, chocolatey flavor and satisfyingly smooth texture, all achieved with wholesome, sugar-free ingredients. We hope you’ve enjoyed making and, more importantly, devouring this delightful treat. It’s perfect for satisfying those sweet cravings, sharing with loved ones, or even as a thoughtful homemade gift. For serving, consider pairing your Sugar Free Fudge with a steaming cup of herbal tea or a rich coffee. It also makes an elegant addition to a dessert platter.
Don’t be afraid to experiment with variations! You can add a pinch of sea salt for a salted caramel effect, incorporate chopped nuts like almonds or pecans for extra crunch, or even swirl in some sugar-free peanut butter for a decadent combination. Remember, baking is all about having fun and making it your own. We encourage you to give this Sugar Free Fudge a try and discover how easy it is to create a healthier indulgence.
Frequently Asked Questions:
Can I use a different sugar substitute in the Sugar Free Fudge?
Yes, you absolutely can! While this recipe is tested with a common erythritol-based sweetener, other sugar substitutes like stevia or monk fruit blends can be used. You may need to adjust the quantity slightly as their sweetness intensity can vary. It’s always best to start with the recommended amount and taste the batter before chilling to ensure it’s to your preference.
How should I store the Sugar Free Fudge?
For the best texture and flavor, store your Sugar Free Fudge in an airtight container in the refrigerator. It will keep well for up to two weeks. If you prefer a firmer fudge, you can also freeze it for longer storage, though allow it to thaw in the refrigerator before enjoying.
Sugar Free Fudge Recipe – Decadent & Delicious
An incredibly simple and delicious sugar-free fudge recipe made with just a few ingredients. Perfect for satisfying sweet cravings without the sugar.
Ingredients
-
2 cups sugar free chocolate chips
-
1 cup almond butter
-
1 teaspoon vanilla extract
Instructions
-
Step 1
Gently melt the sugar-free chocolate chips using a double boiler or microwave in 30-second intervals, stirring until completely smooth and liquid. Be patient to avoid scorching. -
Step 2
Remove the melted chocolate from heat. Add the almond butter and stir continuously until fully blended and uniformly glossy. Ensure no streaks or pockets of unmixed nut butter remain. -
Step 3
Pour the vanilla extract into the chocolate and nut butter mixture. Stir gently but thoroughly until evenly distributed to enhance flavor and aroma. -
Step 4
Line an 8×8 inch baking pan with parchment paper, allowing it to overhang the sides for easy removal. Pour the fudge mixture into the pan and spread evenly, ensuring a smooth, flat surface. Tap the pan to release air bubbles. -
Step 5
Refrigerate the fudge for at least 2 to 4 hours, or until completely firm. Once set, lift the fudge out using the parchment paper, and cut into desired shapes. Store in an airtight container in the refrigerator.
Important Information
Nutrition Facts (Per Serving)
It is important to consider this information as approximate and not to use it as definitive health advice.
Allergy Information
Please check ingredients for potential allergens and consult a health professional if in doubt.