Zucchini Cheddar Biscuits-Easy Savory Comfort Food
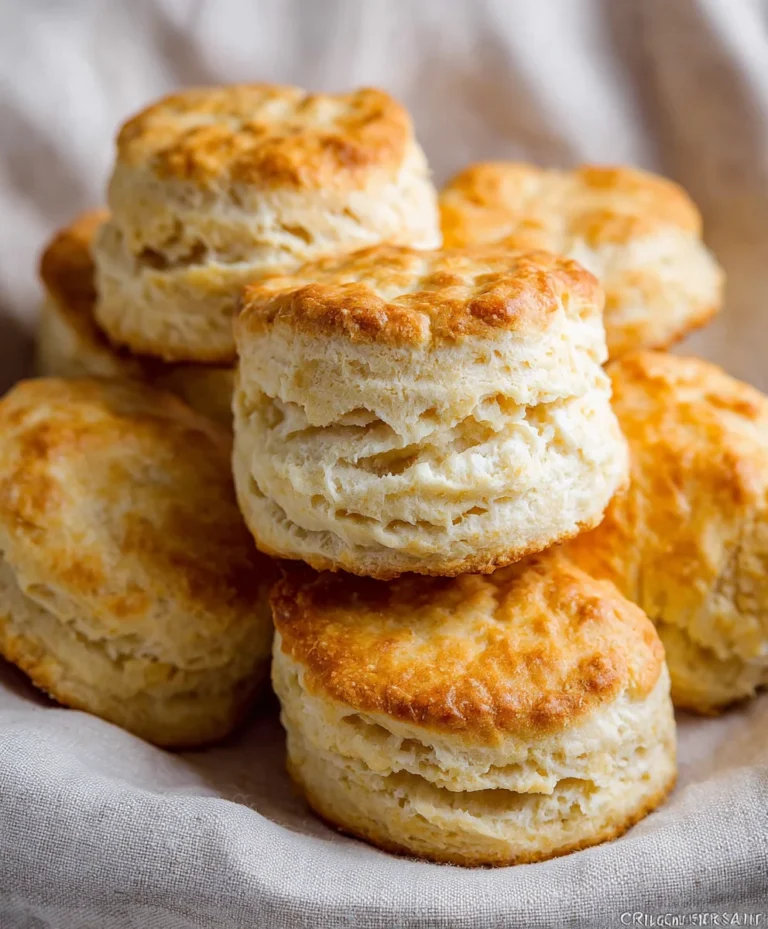
Zucchini Cheddar Biscuits are about to become your new obsession, and I can tell you why. These aren’t just any biscuits; they’re little golden domes of pure comfort, infused with the subtle sweetness of fresh zucchini and the irresistible tang of sharp cheddar cheese. Imagin extracte biting into a biscuit that’s simultaneously fluffy, tender, and bursting with savory goodness. It’s the perfect harmony of textures and flavors that makes these Zucchini Cheddar Biscuits so incredibly popular. Whether you’re looking for a delightful breakfast treat, a side dish to elevate your dinner, or a crowd-pleasing appetizer, these biscuits deliver. What truly sets them apart is the way the zucchini not only adds moisture but also a delicate, earthy note that beautifully complements the rich, melted cheddar. Get ready to impress yourself and everyone lucky enough to snag one of these delectable Zucchini Cheddar Biscuits!

Zucchini Cheddar Biscuits
There’s something incredibly comforting about a warm, fluffy biscuit. And when you add the subtle sweetness of zucchini and the savory punch of sharp cheddar cheese, you’ve got a truly irresistible treat. These Zucchini Cheddar Biscuits are perfect as a side to your favorite soup or chili, or even enjoyed on their own with a smear of butter. The best part? They’re surprisingly easy to make, even for novice bakers. The zucchini adds a wonderful moisture and a hint of freshness without making the biscuits taste overtly like a vegetable. Get ready to impress yourself and your loved ones with these delightful savory biscuits!
Ingredients:
Instructions:
Let’s get started on creating these amazing Zucchini Cheddar Biscuits! The key to light and fluffy biscuits is to keep everything cold and to handle the dough as little as possible.
Preparing the Dry Ingredients
In a large mixing bowl, whisk together the all-purpose flour, baking powder, baking soda, salt, and garlic powder. This ensures that all the leavening agents and seasonings are evenly distributed throughout the flour, which is crucial for consistent rise and flavor in your biscuits. Take a moment to make sure there are no clumps. The garlic powder adds a subtle savory note that pairs beautifully with the cheese and zucchini.
Incorporating the Cold Butter
Now comes a very important step for tender biscuits: cutting in the cold butter. Add the very cold, cubed unsalted butter to the dry ingredients. Using a pastry blender, two forks, or even your fingertips, work the butter into the flour mixture until it resembles coarse crum extractbs with some pea-sized pieces of butter still visible. The cold butter creates steam pockets during baking, which is what gives biscuits their signature flaky layers. It’s essential that the butter stays cold throughout this process, so work quickly. If your kitchen is warm, you can even pop the bowl back in the refrigerator for a few minutes if the butter starts to soften too much.
Adding the Wet Ingredients and Zucchini
In a separate small bowl or liquid measuring cup, whisk together the buttermilk and the finely grated zucchini. Make sure you have squeezed as much liquid as possible from the grated zucchini before measuring. Excess moisture can make your dough too wet and the biscuits dense. The buttermilk not only adds moisture but also a slight tang that complements the other flavors. Now, pour this wet mixture into the bowl with the dry ingredients and butter. Add the chopped fresh chives and the shredded sharp cheddar cheese to the bowl as well. Gently fold everything together with a spatula or wooden spoon until just combined. Be careful not to overmix; overworking the dough will develop the gluten too much, resulting in tough biscuits.
Forming and Baking the Biscuits
Turn the dough out onto a lightly floured surface. Gently pat the dough into a rectangle about 3/4-inch thick. You want to handle the dough as little as possible at this stage. Using a biscuit cutter or a round cookie cutter dipped in flour, cut out your biscuits. If you don’t have a cutter, you can use the rim of a drinking glass. Press straight down without twisting to ensure a good rise. Place the cut biscuits onto an ungreased baking sheet, spacing them about 1 inch apart. For even taller biscuits, you can pack them snugly together on the baking sheet so they help each other rise. Preheat your oven to 425 degrees Fahrenheit (220 degrees Celsius). Bake for 12-15 minutes, or until the tops are golden brown and the biscuits are puffed up and cooked through. You can test for doneness by inserting a toothpick into the center of a biscuit; it should come out clean.
Once baked to golden perfection, remove the Zucchini Cheddar Biscuits from the oven and let them cool on the baking sheet for a minute or two before transferring them to a wire rack. These are best served warm, perhaps with a little extra butter, or alongside your favorite hearty meal. Enjoy the delightful combination of savory cheese, fresh zucchini, and a perfectly tender, flaky biscuit!

Conclusion:
I truly hope you’ve enjoyed learning about these delightful Zucchini Cheddar Biscuits! This recipe is a fantastic way to add a little extra vegetable goodness into a comforting classic. The combination of tender, shredded zucchini and sharp, melty cheddar cheese creates a biscuit that’s both savory and incredibly satisfying. They bake up beautifully golden brown with a soft, fluffy interior and a slightly crisp exterior, making them perfect for any occasion.
These biscuits are wonderfully versatile. Serve them warm alongside your favorite soup or stew, or enjoy them as a standalone snack with a smear of butter. They also make a brilliant side dish for breakfast or brunch, perhaps with a side of scrambled eggs and beef bacon. Don’t be afraid to get creative with variations! You could add a pinch of garlic powder or a dash of smoked paprika for an extra flavor kick. A sprinkle of fresh chives or parsley on top before baking would also be a lovely touch. I wholeheartedly encourage you to give these Zucchini Cheddar Biscuits a try – I’m confident you’ll fall in love with them!
Frequently Asked Questions:
Can I use frozen zucchini?
Yes, you absolutely can use frozen zucchini. However, it’s crucial to thaw it completely and then squeeze out as much moisture as possible. Excess water can make your biscuits dense and gummy.
What kind of cheddar cheese works best?
Sharp cheddar cheese offers the most robust flavor, which I find is ideal for these savory biscuits. However, a medium cheddar or even a blend of cheddar and another cheese like Monterey Jack would also be delicious. Grating your own cheese from a block will yield the best melting results compared to pre-shredded cheese, which often contains anti-caking agents.
How do I store leftover biscuits?
Store leftover Zucchini Cheddar Biscuits in an airtight container at room temperature for up to 2 days, or in the refrigerator for up to 4 days. To reheat, simply warm them in a moderate oven (around 350°F or 175°C) for a few minutes until heated through.
Zucchini Cheddar Biscuits
Fluffy and savory biscuits packed with the goodness of zucchini and sharp cheddar cheese. Perfect as a side dish or a light snack.
Ingredients
-
2 cups all-purpose flour
-
1 tablespoon baking powder
-
1/4 teaspoon baking soda
-
1 teaspoon salt
-
1/2 teaspoon garlic powder
-
5 tablespoons unsalted butter (very cold)
-
1 cup buttermilk
-
1 cup finely grated zucchini (liquid squeezed out after measuring)
-
1 tablespoon chopped chives
-
4 ounces shredded sharp cheddar cheese
Instructions
-
Step 1
Preheat oven to 400°F (200°C). Line a baking sheet with parchment paper. -
Step 2
In a large bowl, whisk together the flour, baking powder, baking soda, salt, and garlic powder. -
Step 3
Cut in the very cold butter using a pastry blender or your fingertips until the mixture resembles coarse crumbs. -
Step 4
Stir in the grated zucchini, chopped chives, and shredded cheddar cheese. -
Step 5
Pour in the buttermilk and stir until just combined. Do not overmix. -
Step 6
Drop spoonfuls of dough onto the prepared baking sheet. -
Step 7
Bake for 15-20 minutes, or until golden brown and cooked through.
Important Information
Nutrition Facts (Per Serving)
It is important to consider this information as approximate and not to use it as definitive health advice.
Allergy Information
Please check ingredients for potential allergens and consult a health professional if in doubt.