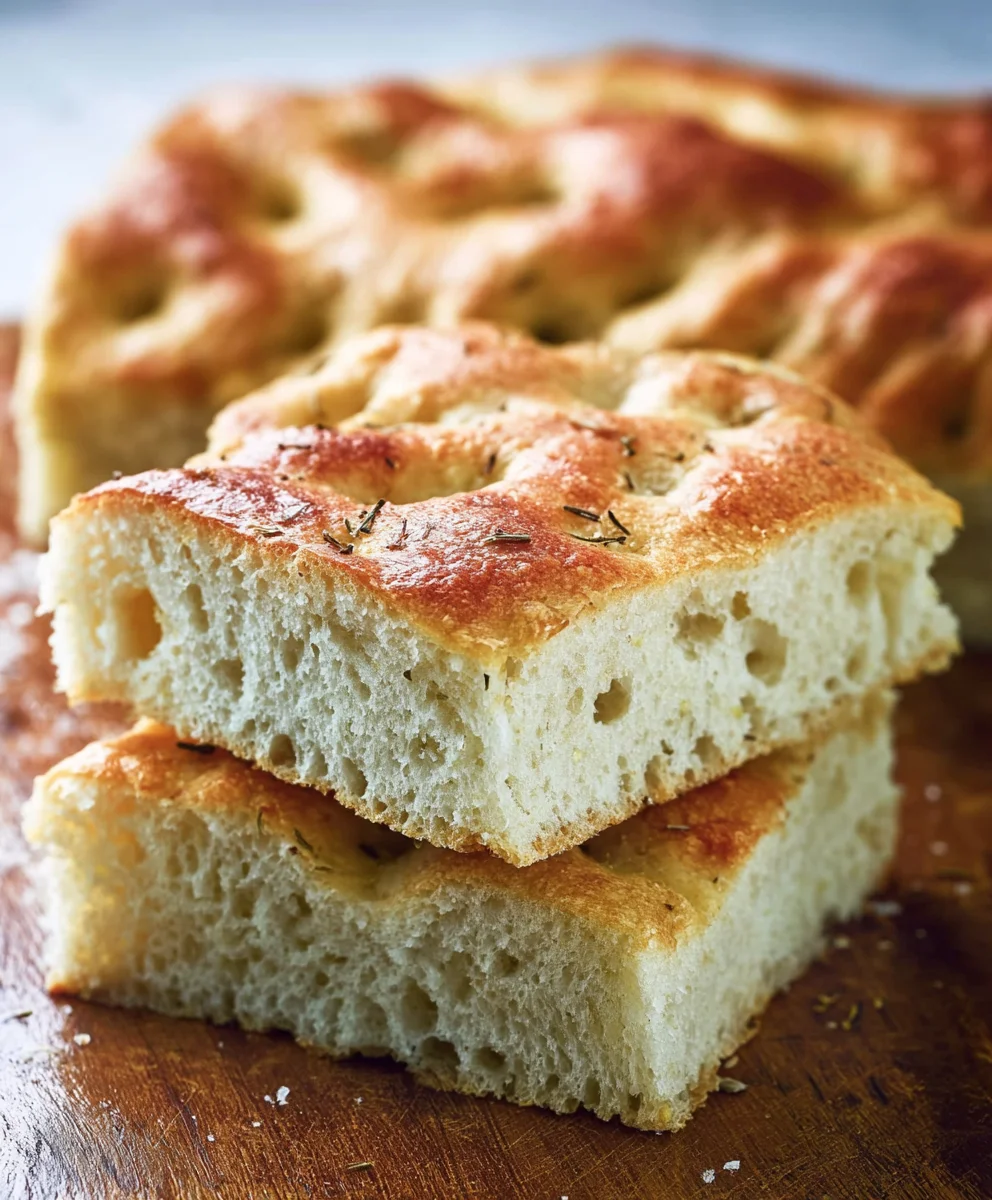
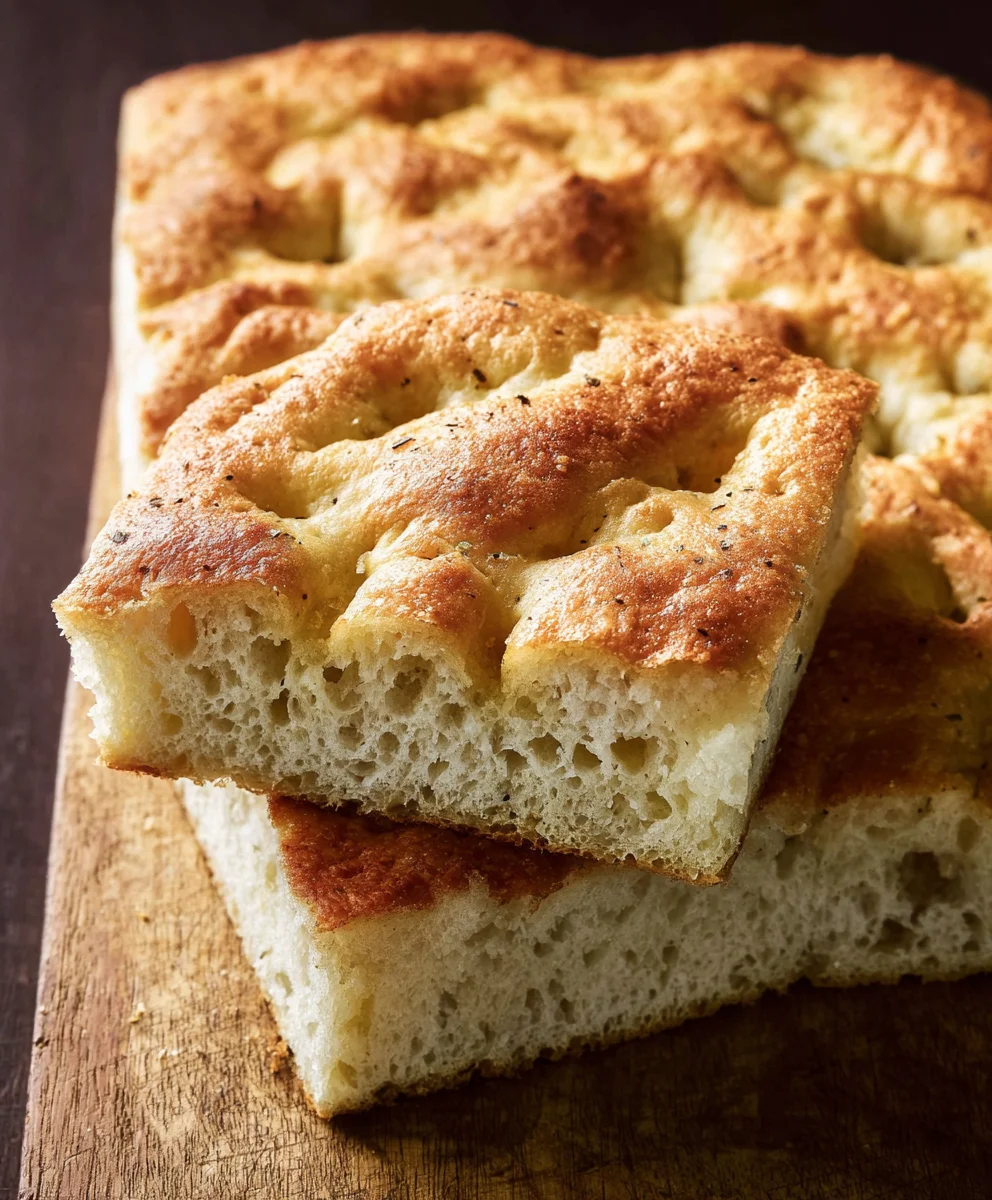
Easy No-Knead Focaccia Bread Recipe
No-Knead Focaccia Bread is more than just a recipe; it’s an invitation to experience the magic of simple, honest baking with astonishingly delicious results. Forget strenuous kneading and hours of proofing; this “no-knead” approach unlocks a world of airy, chewy interiors and perfectly crisp crusts that will have you wondering how something so effortless can taste so spectacular. People adore focaccia for its incredible versatility – it’s a sublime accompaniment to soups and salads, a fantastic base for creative toppings, or simply a joy to tear and share on its own. What truly elevates this No-Knead Focaccia Bread from good to unforgettable is the deep, rich flavor that develops through a slow, patient rise, allowing the simple ingredients to shine and creating a texture that’s both satisfyingly substantial and delightfully light.
Ingredients:
- 4¾ cups all-purpose flour (630 grams)
- 4½ tablespoons olive oil (59 grams), plus more for greasing
- 2 teaspoons salt (12 grams)
- 1½ tablespoons instant dry yeast (13 grams)
- 2⅓ cups warm water (100–110°F; 529 grams)
- Extra virgin extract olive oil, for drizzling
- Coarse salt, for topping (optional)
- Dried rosemary, for topping (optional)
Making the Dough
Mixing the Dough
This no-knead focaccia bread recipe is incredibly simple, relying on time and a good amount of hydration to develop its wonderful texturgin extractTo begin, in a large mixing bowl, combine the 4¾ cups of all-purpose flour and 2 teaspoons of salt. Give these dry ingredients a quick whisk to ensure the salt is evenly distributed throughout the flour. This even distribution is important for consistent flavor and texture throughout your bread.
Next, in a separate measuring cup or small bowl, combine the 2⅓ cups of warm water and the 1½ tablespoons of instant dry yeast. Stir gently until the yeast is mostly dissolved. It’s important to use warm water, not hot, as very hot water can kill the yeast, preventing it from activating properly. The ideal temperature range is between 100–110°F (37–43°C). Let this mixture sit for about 5 minutes. You should see some small bubbles forming on the surface, indicating the yeast is alive and active. If you don’t see any bubbles, your yeast might be expired, and you should start with a fresh packet.
Now, pour the yeast and water mixture into the bowl with the flour and salt. Add the 4½ tablespoons of olive oil to the bowl as well. Using a sturdy spoon or a spatula, mix everything together until just combined. Don’t overmix! The dough will be very wet and sticky, almost like a thick batter. This high hydration is what allows the gluten to develop on its own without any kneading. Scrape down the sides of the bowl to ensure all the flour is incorporated.
First Rise: The Autolyse and Proofing
Once you have a shaggy, wet mass, cover the bowl tightly with plastic wrap or a damp kitchen towel. Let the dough rest at room temperature for at least 2 hours, or up to 4 hours. During this time, the flour will absorb the water, and thgin extractluten will begin to develop naturally. You’ll notice the dough becoming smoother and more elastic. You can even give it a few gentle folds during this period if you like, but it’s not strictly necessary for a no-knead recipe. The longer it ferments, the more complex the flavor will become. Some people even let it sit in the refrigerator overnight for an even deeper flavor.
Shaping and Second Rise
Preparing the Baking Pan
After the initial rise, generously grease a 9×13 inch baking pan with a good amount of olive oil. You want enough oil to coat the bottom and sides well, as this will contribute to the wonderfully crisp and golden crust of your focaccia. Pour about 2 tablespoons of olive oil into the pan and use your hands or a pastry brush to spread it evenly.
Gently tip the dough out of the bowl and into the prepared baking pan. The dough will still be quite sticky, so don’t worry if it doesn’t spread evenly on its own. Use your oiled fingertips to gently coax the dough outwards, filling the pan. Don’t force it; if it resists, let it rest for 10-15 minutes and then try again. This resting period allows the gluten to relax. Once the dough has mostly filled the pan, cover it again with plastic wrap or a damp towel. Let it rise for another 45 minutes to 1 hour, or until it’s puffy and has increased in size significantly, almost doubling.
Dimpling and Topping
About 20 minutes before the second rise is complete, preheat your oven to 450°F (230°C). Once the dough has completed its second rise and looks nice and airy, uncover it. Now, it’s time for the signature dimples! Drizzle a genegin extracts amount of extra virgin olive oil over the surface of the dough. Then, using your oiled fingertips, gently press down into the dough all over the surface, creating deep dimples. Don’t be shy; these dimples will hold pools of olive oil and create beautiful pockets in the finished bread.
This is also the time to add your optional toppings. If you’re using coarse salt, sprinkle it liberally over the dimples. For a fragrant touch, scatter dried rosemary over the top as well. The olive oil and herbs will bake into the surface, creating a delicious aroma and flavor.
Baking the Focaccia
Baking Time and Temperature
Place the pan in the preheated oven. Bake for 25 to 30 minutes, or until the focaccia is deeply golden brown on top and the bottom is also nicely browned and crisp. The exact baking time will depend on your oven, so keep an eye on it. If the top is browning too quickly, you can loosely tent it with foil. The aroma filling your kitchen will be absolutely divine, a testament to the simple ingredients and minimal effort.
Cooling and Serving
Once baked, carefully remove the focaccia from the oven. Let it cool in the pan for about 5-10 minutes before attempting to remove it. Then, carefully invert the pan onto a wire rack to release the focaccia. If you used plenty of oil in the pan, it should come out easily. You can then turn it right side up on the rack to cool further. For the absolute best texture, let it cool for at least 15-20 minutes before slicing. The inside will continue to steam and set as it cools. Slice into squares or rectangles and enjoy your homemade No-Knead Focaccia Bread while it’s still warm. It’s perfect for dipping in soup, enjoying with cheese and charcuterie, or simply eating on its own.
Conclusion:
There you have it – your guide to creating the most delicious and foolproof No-Knead Focaccia Bread! This recipe truly lives up to its name, delivering a wonderfully airy and flavorful bread with minimal effort. The beauty of this No-Knead Focaccia Bread lies in its simplicity and the incredible results it yields. It’s perfect for a begin extractner baker or anyone looking for a satisfying bread-making experience without the fuss of traditional kneading.
I love serving this No-Knead Focaccia Bread warm, drizzled with good quality olive oil and sprinkled with flaky sea salt. It’s fantastic as an appetizer, alongside a hearty soup or salad, or even as the base for a gourmet sandwich. Don’t hesitate to get creative with toppings! Consider fresh rosemary, thyme, cherry tomatoes, olives, or even thinly sliced onions before baking for endless flavor combinations.
I hope you feel inspired to try this recipe and discover the joy of homemade bread. Embrace the process, and savor every delicious bite of your expertly crafted No-Knead Focaccia Bread!
Frequently Asked Questions about No-Knead Focaccia Bread:
Q: My focaccia isn’t very airy. What could I have done wrong?
A: The key to airy No-Knead Focaccia Bread is patience during the proofing stages. Ensure your dough has had enough time to rise in a warm environment. Overworking the dough during shaping or using expired yeast can also affect its rise. Make sure your yeast is fresh and the dough has doubled in size before baking.
Q: Can I make this No-Knead Focaccia Bread ahead of time?
A: Absolutely! You can prepare the dough up to 24 hours in advance and let it cold-proof in the refrigerator. This slow fermentation can actually enhance the flavor. When you’re ready to bake, simply bring it to room temperature for about an hour before proceeding with dimpling and toppings. It bakes up beautifully even after a long cold proof.
Easy No-Knead Focaccia Bread Recipe
An incredibly simple no-knead focaccia bread recipe that relies on time and hydration for a wonderful texture. Perfect for beginners!
Ingredients
-
4¾ cups all-purpose flour (630 grams)
-
4½ tablespoons olive oil (59 grams), plus more for greasing
-
2 teaspoons salt (12 grams)
-
1½ tablespoons instant dry yeast (13 grams)
-
2⅓ cups warm water (100–110°F; 529 grams)
-
Extra virgin olive oil, for drizzling
-
Coarse salt, for topping (optional)
-
Dried rosemary, for topping (optional)
Instructions
-
Step 1
In a large mixing bowl, combine the flour and salt. Whisk to distribute evenly. In a separate cup, combine warm water and yeast. Stir gently and let sit for 5 minutes until bubbly. -
Step 2
Pour the yeast mixture and 4½ tablespoons of olive oil into the flour mixture. Mix with a spoon or spatula until just combined and a wet, sticky dough forms. Scrape down sides of the bowl. -
Step 3
Cover the bowl tightly and let the dough rest at room temperature for at least 2 hours, or up to 4 hours, allowing gluten to develop. -
Step 4
Generously grease a 9×13 inch baking pan with olive oil. Gently tip the dough into the pan and use oiled fingertips to coax it to fill the pan. If it resists, let it rest for 10-15 minutes. Cover and let rise for another 45 minutes to 1 hour until puffy. -
Step 5
Preheat oven to 450°F (230°C) about 20 minutes before the second rise is complete. Uncover the dough. Drizzle with extra virgin olive oil and create dimples with oiled fingertips. Sprinkle with optional coarse salt and dried rosemary. -
Step 6
Bake for 25 to 30 minutes, until deeply golden brown on top and crisp on the bottom. -
Step 7
Cool in the pan for 5-10 minutes, then invert onto a wire rack to cool further for at least 15-20 minutes before slicing and serving.
Important Information
Nutrition Facts (Per Serving)
It is important to consider this information as approximate and not to use it as definitive health advice.
Allergy Information
Please check ingredients for potential allergens and consult a health professional if in doubt.