Easy Miso Soup Recipe- Delicious & Quick
Miso soup recipe is more than just a starter; it’s a warm hug in a bowl, a comforting ritual that whispers of tradition and simple elegance. Have you ever found yourself craving that deeply savory, umami-rich broth that instantly transports you to a bustling Japanese izakaya or a serene home kitchen? That’s the magic of a well-made miso soup. It’s beloved for its incredible depth of flavor achieved with just a few humble ingredients, its quick preparation time, and its sheer versatility. What truly sets this miso soup recipe apart is its ability to be both incredibly satisfying and delightfully light. It’s a testament to how simple, quality ingredients can create something truly profound and utterly delicious. Whether you’re a seasoned cook or just starting your culinary journey, mastering this foundational miso soup recipe will open doors to a world of Japanese flavors.

Miso Soup Recipe
There’s something incredibly comforting about a steaming bowl of miso soup. It’s a staple in Japanese cuisine for good reason – it’s quick, healthy, and bursting with umami flavor. Whether you’re looking for a light appetizer, a flavorful side dish, or a simple yet satisfying lunch, this classic miso soup recipe is sure to hit the spot. It’s incredibly versatile, allowing you to customize it with your favorite additions. Today, we’re going to walk through how to make a wonderfully authentic and deeply satisfying miso soup right in your own kitchen. You’ll be amazed at how simple it is to create this beloved dish.
Ingredients:
Making Your Miso Soup
This recipe is designed to be straightforward, focusing on building layers of subtle flavor that come together beautifully. The key to a great miso soup lies in the quality of your dashi and the miso paste. If you don’t have pre-made dashi, you can easily find dashi granules or powder at most Asian grocery stores, or even in the international aisle of larger supermarkets. Alternatively, you can make your own dashi from scratch using kombu (kelp) and katsuobushi (bonito flakes), though this adds a bit more time.
Step-by-Step Cooking Instructions
1. Rehydrate the Seaweed: Before you begin extract heating anything, take your dried seaweed and place it in a small bowl. Cover it with cool water and let it sit for about 5-10 minutes, or until it has softened and expanded. You’ll notice it triples or even quadruples in size! Once rehydrated, drain off the excess water. If you’re using a variety like wakame that has tougher stems, you might want to trim those away, or simply chop the softened seaweed into smaller, more manageable pieces. This step is crucial as it ensures the seaweed is tender and pleasant to eat in the soup.
2. Prepare the Dashi Base: Pour your 2½ cups of dashi into a medium saucepan. Place the saucepan over medium heat. It’s important not to boil the dashi vigorously at this stage; we want to gently warm it up. As the dashi begin extracts to heat, you can add the rehydrated and drained seaweed to the pot. Let it simmer gently for a few minutes to allow the seaweed to become fully tender and to infuse its subtle oceanic flavor into the dashi. This is also a good time to prepare your silken tofu. Gently cut it into small, bite-sized cubes, being careful not to break it apart too much as silken tofu is quite delicate.
3. Incorporate the Tofu: Once the dashi is warm and the seaweed is tender, carefully add the cut silken tofu to the saucepan. Stir very gently to distribute the tofu pieces throughout the dashi. Allow the tofu to heat through for another 2-3 minutes. Avoid vigorous stirring, which can cause the delicate tofu to crum extractble. The goal here is to warm the tofu without it disintegrating into mush. You’ll see the tofu cubes float slightly as they heat.
4. Dissolve the Miso Paste: This is arguably the most important step for achieving that signature miso flavor without overcooking it. Once the dashi, seaweed, and tofu are heated through, reduce the heat to the lowest setting, or even turn it off completely. Take your miso paste (start with 2 tablespoons, and you can always add more later if you prefer a stronger flavor) and place it in a small bowl or directly into a ladle. Add a few tablespoons of the warm dashi from the pot to the miso paste. Whisk or stir until the miso paste is completely dissolved and smooth, forming a paste-like consistency. This technique prevents lumps of miso from forming in your soup and ensures an even distribution of flavor.
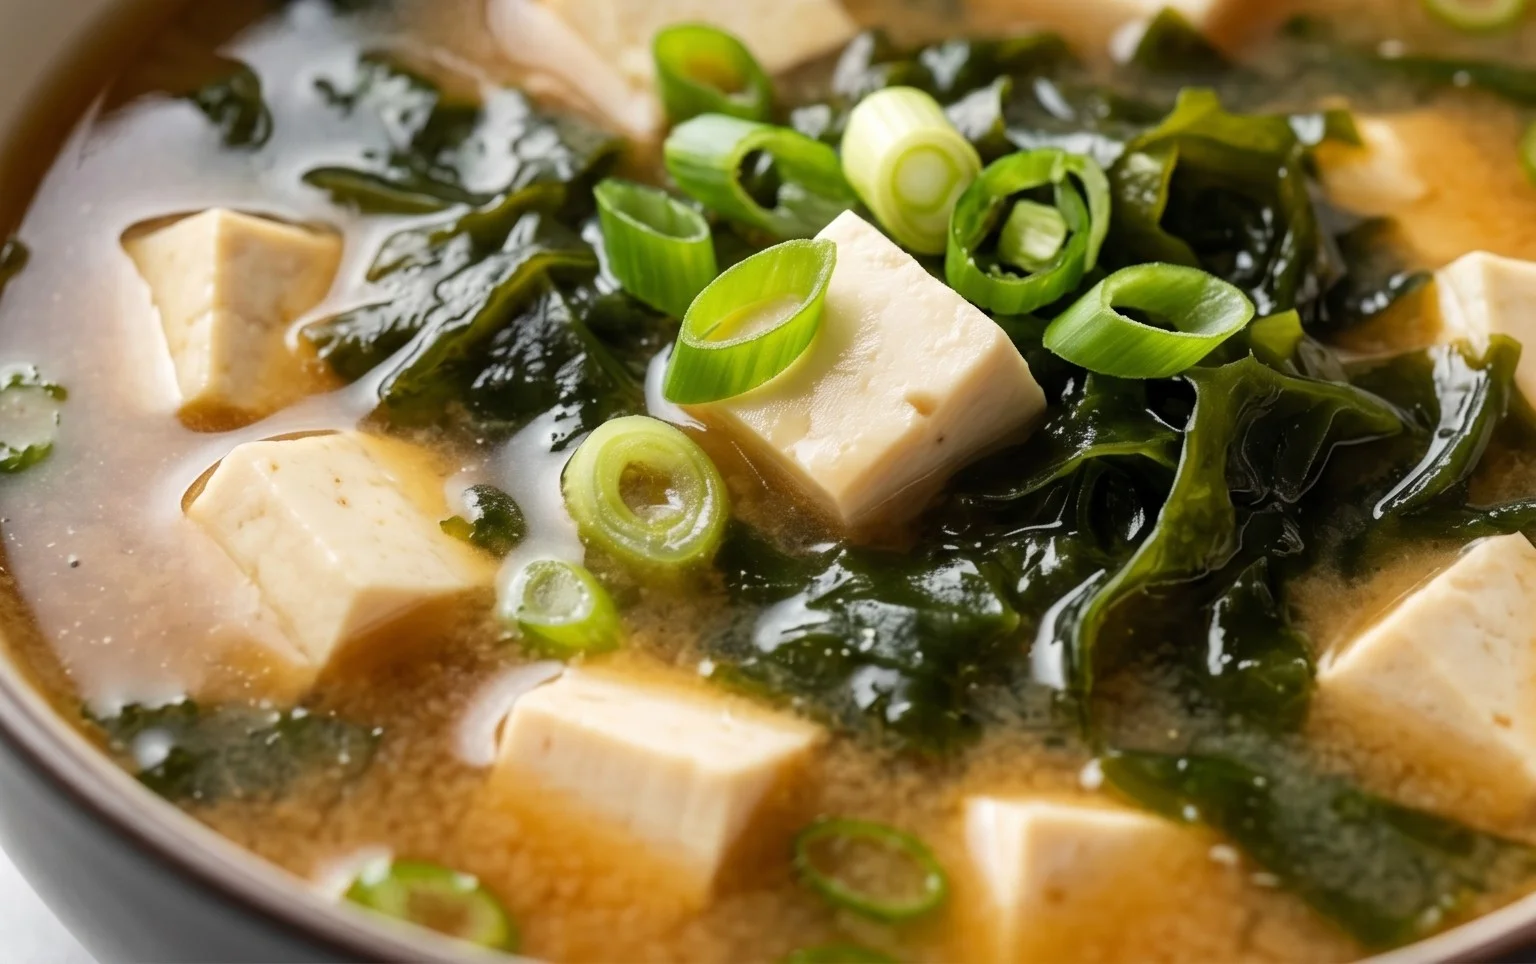
5. Combine and Serve: With the heat on the lowest setting or off, gently pour the dissolved miso paste mixture back into the saucepan with the dashi, seaweed, and tofu. Stir very gently to combine everything thoroughly. Do NOT boil the soup after adding the miso. Boiling miso paste can diminish its delicate flavor and beneficial probiotics. Allow the soup to sit for just a minute or two off the heat to let the flavors meld. Taste the soup and adjust the seasoning if needed by adding a little more miso paste (dissolving it separately first, as in the previous step) until you reach your desired saltiness and umami level. Ladle the hot miso soup into individual serving bowls. Garnish each bowl with the thinly sliced scallions for a fresh, bright finish. Serve immediately and enjoy the pure, comforting taste of homemade miso soup!
Conclusion:
And there you have it! This simple yet incredibly satisfying miso soup recipe is a true gem in any kitchen. It’s quick to prepare, remarkably versatile, and packed with that delicious umami flavor that makes it so comforting. Whether you’re looking for a light starter, a nourishing lunch, or a soothing evening meal, this miso soup delivers every time. I truly encourage you to give this recipe a try; you might just find your new go-to comfort dish!
For serving suggestions, this miso soup is perfect on its own, but also shines alongside a bento box, sushi, or even a simple grilled fish. Don’t be afraid to experiment with variations! Add some cubed silken tofu for extra protein, a handful of spinach or bok choy for greens, or even some shiitake mushrooms for a deeper flavor. Cooked ramen noodles can transform it into a hearty meal. The possibilities are endless!
Frequently Asked Questions:
What kind of miso paste should I use?
You can use red, white, or mixed miso paste. White miso (shiro miso) is milder and slightly sweeter, perfect for a delicate flavor. Red miso (aka miso) is more robust and salty. Mixed miso offers a balance of both. For this recipe, I often lean towards white or a combination for a universally pleasing taste, but feel free to use your favorite!
Can I make this miso soup ahead of time?
Miso soup is best enjoyed fresh, as the miso flavor can change and become less vibrant if reheated multiple times. However, you can prepare the dashi broth and chop your ingredients in advance. Add the miso paste and delicate ingredients like tofu and seaweed just before serving.
How can I make my miso soup more filling?
To make your miso soup a more substantial meal, consider adding ingredients like cooked noodles (udon, soba, or ramen), cubed tofu, edamame, sliced chicken or beef, or even a poached egg.
Miso Soup Recipe
A simple and classic Japanese miso soup recipe.
Ingredients
-
2½ cups Dashi
-
1 heaping tablespoon dried seaweed
-
4 oz silken tofu (cut into small pieces)
-
2-2½ tablespoons miso paste (or to taste)
-
1 tablespoon scallion (chopped)
-
½ teaspoon grated ginger
Instructions
-
Step 1
Rehydrate the dried seaweed in a small bowl with some water, then drain. -
Step 2
In a saucepan, heat the Dashi over medium heat. Do not boil. -
Step 3
Once the Dashi is warm, whisk in the miso paste until it is fully dissolved. Adjust amount to your taste. -
Step 4
Add the rehydrated seaweed, silken tofu pieces, and grated ginger to the soup. -
Step 5
Simmer gently for about 5 minutes, or until heated through. Do not let the soup boil after adding miso. -
Step 6
Serve hot, garnished with chopped scallions.
Important Information
Nutrition Facts (Per Serving)
It is important to consider this information as approximate and not to use it as definitive health advice.
Allergy Information
Please check ingredients for potential allergens and consult a health professional if in doubt.